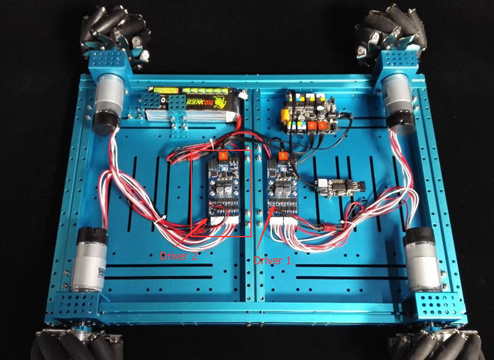
The default I2C address of the two high power encoder motor drivers for Mecanum is 0x09, Mainboard will find the I2C address 0x09 when it send commands, now the two encoder motor drivers respond at the same time. In that way, how can we control the two drivers separately.
Solution: change the I2C address for one of the high power encoder motor drivers.
The steps are shown below (in order to match the default firmware program for Mecanum, it is suggested to change the I2C address for the high power encoder motor driver which supposed to connect to Port 2 on the mainboard):
-
Unplug the driver (here we call it driver 1) which connected to Port 1 on mainboard. Only leave the other driver (here we call it driver 2) connected to Port 2 on mainboard.
Make sure the mainboard and driver 2 are both connected to the power source, with the power switches pulled to on.
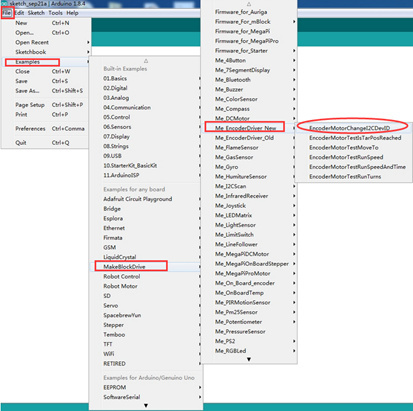
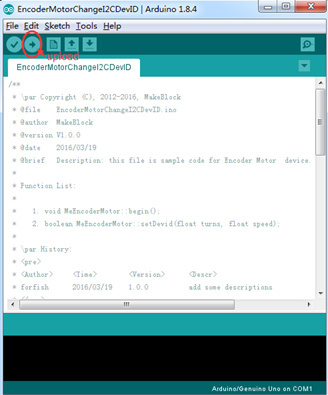
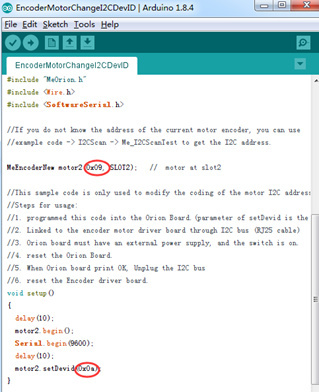
Now open library change I2C DevID in Arduino software and upload the program to the mainboard. Press the reset button on mainboard and replug the RJ25 cable between driver 2 and mainboard when it shows upload done on the bottom line.
-
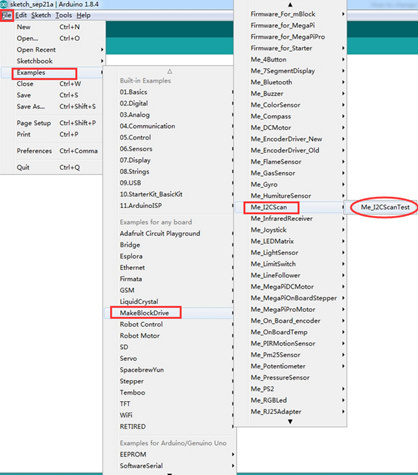
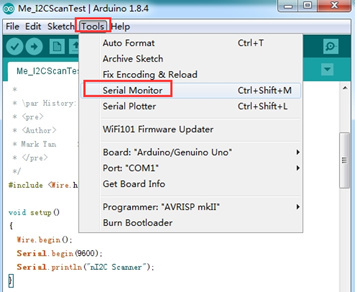
Open library I2C Scan and upload it, then click on the serial monitor on the upper right corner when upload done. Now, you can see whether the I2C address has been modified successfully. Show 0x0a, on behalf of the change success
(note: If you need to change its I2C address back to original address 0x09, open the library changeI2CDevID, exchange the 0x09 and the 0x0a, then upload the program and refer to Step 2 checking the current I2C address with serial monitor.)
-
Now you can upload the new firmware for the Mecanum robot.The two drivers will be controlled separately.


