Need help controlling mBot2 remotely like mBot


#1

ok, thank you all.

im the past i had the mbots connected usb to windows systems, coded the remote control, and used the infrared remote control that came with the mbot… all great.

this new mbot2, i have no idea, do we code the mbot2 then upload to the mbot2 then remove the cyberpi to control it wit hthe cyberpi joystick? i also have a makeblock remote controoller device too, but i dont know how to use it,=.
when i looked at the tutorials it showed how to code it, BUT i dont know where to code it all, do i do it under the cyber pi device, the mbots2 the remote controller, every time i click on 1 it clears the code i already put in place, as well some of the sample blocks arent even there unless im clicked on the remote controller device…

i see the sample programs in mblock5, but im still unclear how to start a simple remote control from nothing (not using the example programs)

are there any good tutorial videos, does the mbot2 need a wifi network to work, as im in a classroom and we cannot just ‘connect’ to the school wifi (im thinkinig of getting a little travel router and connecting that for the mbots to use and communicate?)

can y’all point me in the right direction, i was so good with the older mbots
mm


#2

With only the parts that come with cyberpi (mBot2), you cannot really remote control it. Sorry. :frowning: You can control cyberpi from a tablet, using the makeblock app, but without buying more electronics, that is pretty much it. (You can sort of use Upload Mode Broadcast) from your computer too…)

#3

thank you! what about this makeblock bluetooth controller i have, that was bought wit hthe new mbot2?
how would we connect it to the mbot2, or multimple mbot2’s? im a teacher… we have 6 mbots2’s and 1 makeblock bluetooth controller.


#4

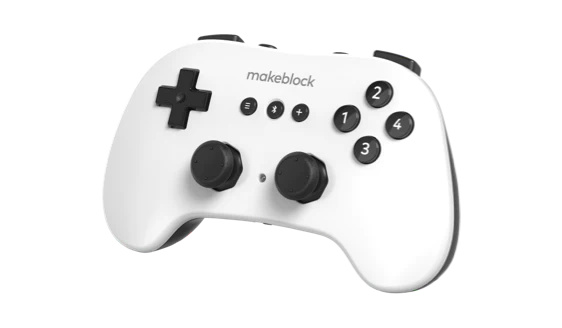
@magicmarc Is this the Bluetooth controller?

image

If so, I don’t have one, so I can’t help you much there, but @CommandeR probably could. :slight_smile: I’ll do some research.


#5

yes, thats the one…!


#6

@magicmarc I’ll see what I can find out. In the meantime, you can contact mBlock or wait for CommandeR to respond.


#7

@magicmarc This may help you:

And:

Are you holding the Bluetooth button until the blue light on controller starts flashing fast? That starts the pairing procedure and within a few seconds both the controller and robot’s bluetooth module should have a steady blue light (if pairing succeeded).

Also, I need some additional info:


#8

I have no experience (thus-far) of mBot 2 but you may find my notes on the Bluetooth controller in the following post to be of some help in coding it.


#9

thank you,
yes, im using the latest mblock.
ill try connecting today.
and ill check the link
mm


#10

Would this be 5.4.0 or 5.4.3?


#11

5.4.3, and i trying thing out to use the makeblock bluetooth remote controller, but i dont see where to place this block (mblock%20mbot2%20remote%20control%20code%20block-where

also, when coding the blocks, which sprite should i be ‘on’, the cyberpi or the mbot2 sprite?
this is so different from the mbot 1 and the 3.4.x software!

are there other places with projects code other than the ‘example programs’ in the makeblock?
id love to see a youetube for the mbots …if anyof y’all know of a good resource for tutorial videos for mbot2
thanks as always y’all
marc


#12

CyberPi should be fine. Did you check out what I said for pairing?

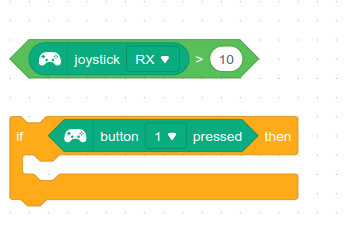
Example block usage below:

image


#13

Yes, check out

https://planet.mblock.cc

https://planet.mblock.cc/projects#type=projects&order=trending&tab=all

Although they are both having issues right now.


#14

gotya, you see i didnt know the joystick had a ‘greater than/less than’ type of sensor, i just thought 'joystick Right X-axis or not, ill try this out tomorrow.
and yes the bluetooth seemed to connect to the mbot 2.
ill give it a go!


#15

@magicmarc Great! I hope it works for you. :slight_smile:


#16

YES, this helps alot, specifically the explanation of the controller and the sample code, the values for each button, but moreso the joysticks, -255 to +255 range for each axis, each joystick (l & r)! now i understand how the joystick green oval matches with the greater than value, and moreso how i can try to use the extension for the bluetooth controll to have the left joystick got left right and the right joystick go forward back!
its lll still be alot to learn for the new mbot2 remote control… next is trying to understand the new infrared line follower, the new quad sensor? any links for that!
i still have handful of mbot v1 that can be used if needed for the students…!


#17

@magicmarc The quad RGB color sensor?

Check out this:

https://education.makeblock.com/help/mbuild-quad-rgb-sensor/

And for the

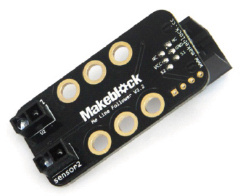
do you mean this?

image

Or this:

image

For #2, see here:

https://education.makeblock.com/help/me-line-follower/

But it cannot be interfaced with cyberpi. :confused:
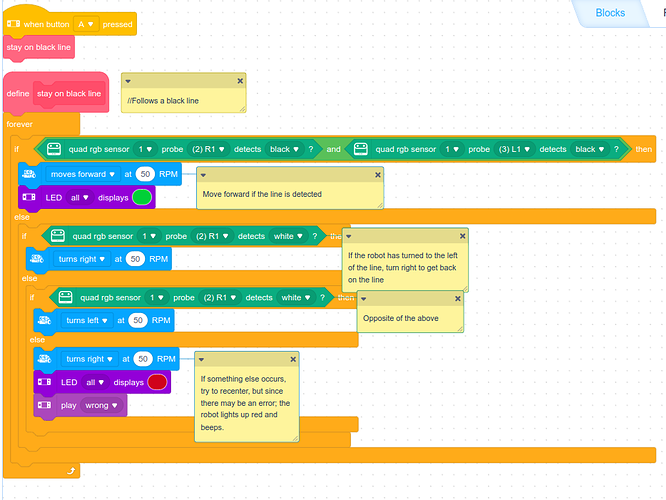
Instead, you use the quad RGB color sensor to follow a line (with cyberpi). See my code:

I hope this helps you!


#18

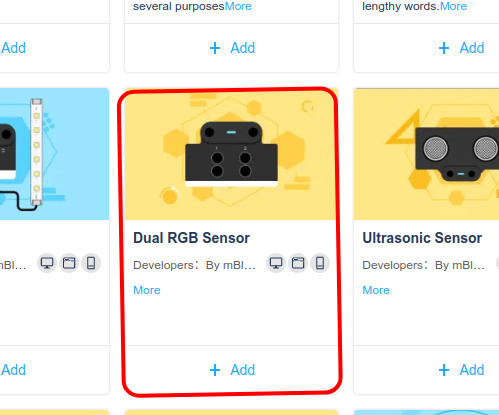
thanks, yes that #2 infra red sensor was the one that i always used with the mbot v1, had 3 or 4 codes it sent out when it detected white or black basically, but the line follower that comes with the new mbot2, is totally upgraded, detects different colors supposedly. i beleive it is the quad rgb, not the dual. im going to examine this sample code.
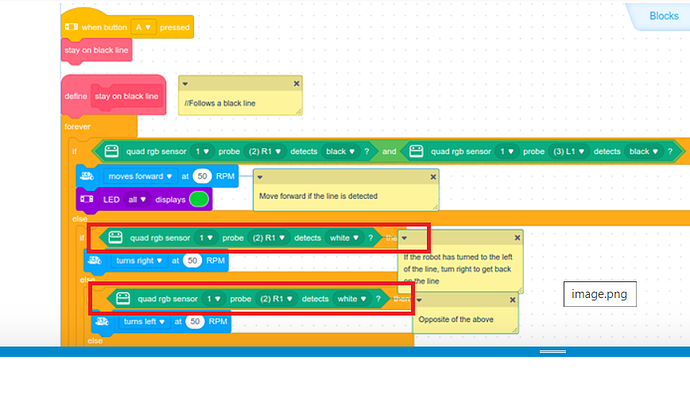
question, ive attached a screenshot, in your code the lines 'if quad rgb sensor (1), what is the 1, the port the quad rgb cable plugs into, or just the 1st quad rgb device?
as well the next part ‘probe (2) R1 detects white turn left at 50 rpm’ wouldnt the next one be L1 instead of r1 (or visa…)
thanks again for all this, its great.


#19

@magicmarc

It is the first device. (You can have up to 8 I think).

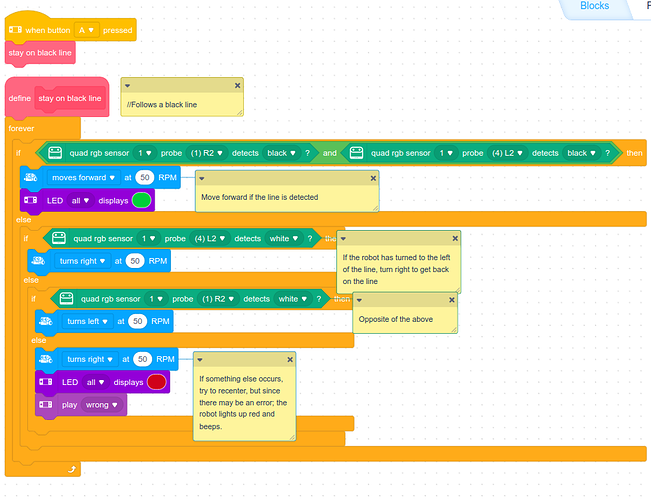
Yes, sorry. See the new code:

I updated it to be less sensitive, too.

image

You can download the code:
mBot 2 Line following.zip (40.5 KB)
You will need to download the ZIP and extract the files, then use the .mblock file and open that in mBlock.


Need Help with Line Sensor Blocks for mBot 2 in Sumo Program
#20

ahhh, so i am learnigng a little bit, thanks for the sample code… i noticed that when i opened the ‘example program’ in mblock5.4.3, and select the EN line follower, and upload it to mbot2, and put it on the floor when i have a black duck tape ‘track’ , it tends to stay on the left side of the black track ,as if the outer right hand sensor is doing all the detecting, wherease the old mbot, the line follower program we did kept the robot in the middle of the black track, and adjusted when it deteced no black either right or left…
this one tends to stay on the left side of the trasck, and often just goes off the track and spins ! ha.
but i did calibrate the quad rgb just now… but the directions say to update the firmware in the quad rgb, how/where do i do that. in the old version there was a dropdown to update the firmware forthe mbot…?
but i dont see it here in mblock 5 w/mbots connected with quad sensor on it.
thanks again
marc

the code you uploaded in the zip i tried as well, but had to change the sensor to the inners L1 & R1, so that it stays in the middle of the track, as well i had to change the turn speed rpm from 50 to 20 as it was missing the change in color. but im slowly geting it, and will be able to do things wit hthe students, , sensor tests for the light, sound, ultrasonic distance, and then create a few simple rpograms like the remote control w/the bluetooth controller, a line follow project and an obstacle avoidance, just teaching them the intros to loops, if/ten/esle, sensors, code decision trees, stacked controls, etc… thank you.

also, i dont see alot of activity here in this forum, are you and commander the main admins assisting all of us here.?