Hello all -
In a previous post, I showed how to make a Reporter block in the Extension Builder. I thought it might be worthwhile to make a similar tutorial for making Command blocks as well. In general, Command blocks are much more straightforward to make. I won’t assume you’ve read the Reporter block tutorial, so some of the steps here are simply duplicates. Finally, there’s no reason why this wouldn’t work in Live Mode, but realistically, since you can’t get any data out of Live Mode (due to restrictions Makeblock has placed on us), there’s not really much point in Live Mode for the teaching that I do. Your milage maty vary.
Here are the steps to make a Command block:
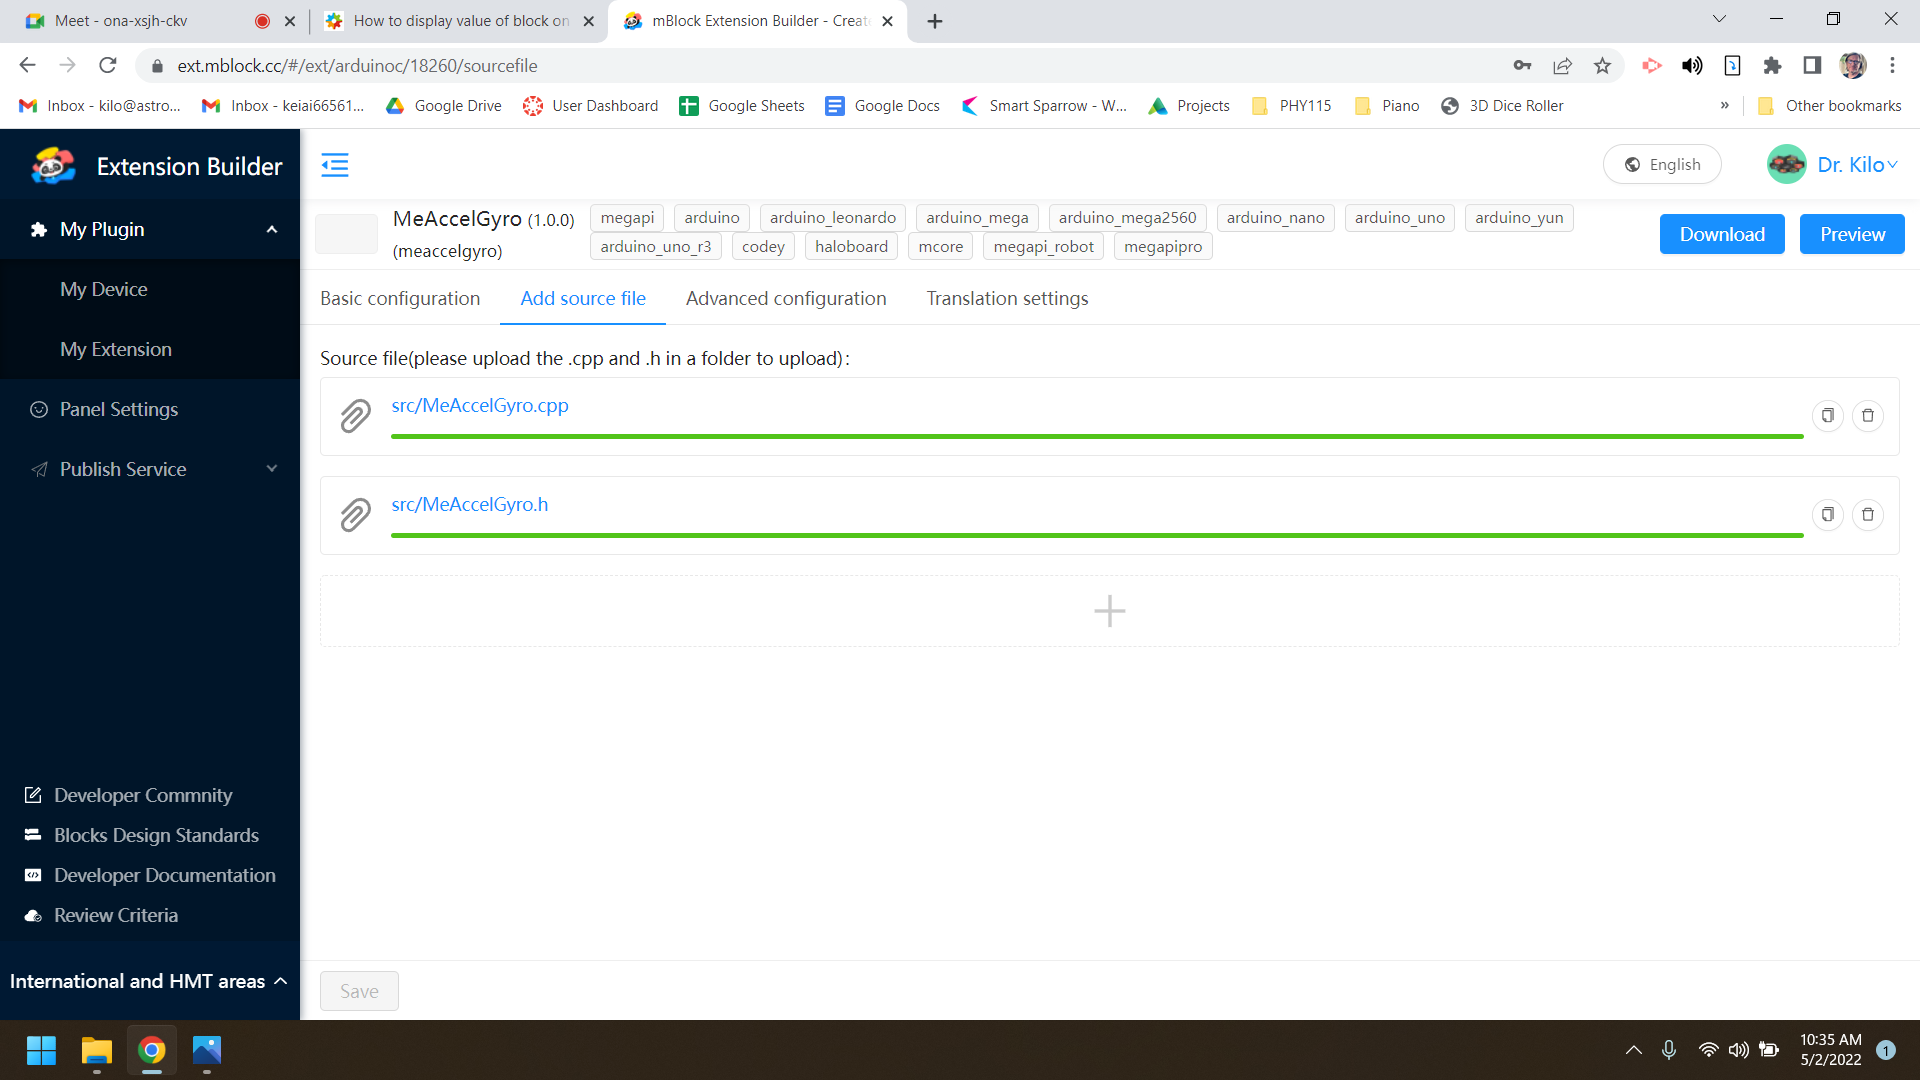
- In Extension Builder, create your extension then add your source files for any libraries that you need. All files need to be in the same folder, because you can only upload entire folders not individual files In this case, I’ve added the accelerometer library that I wrote in ArduinoC (see my other topic for the code if you want it).
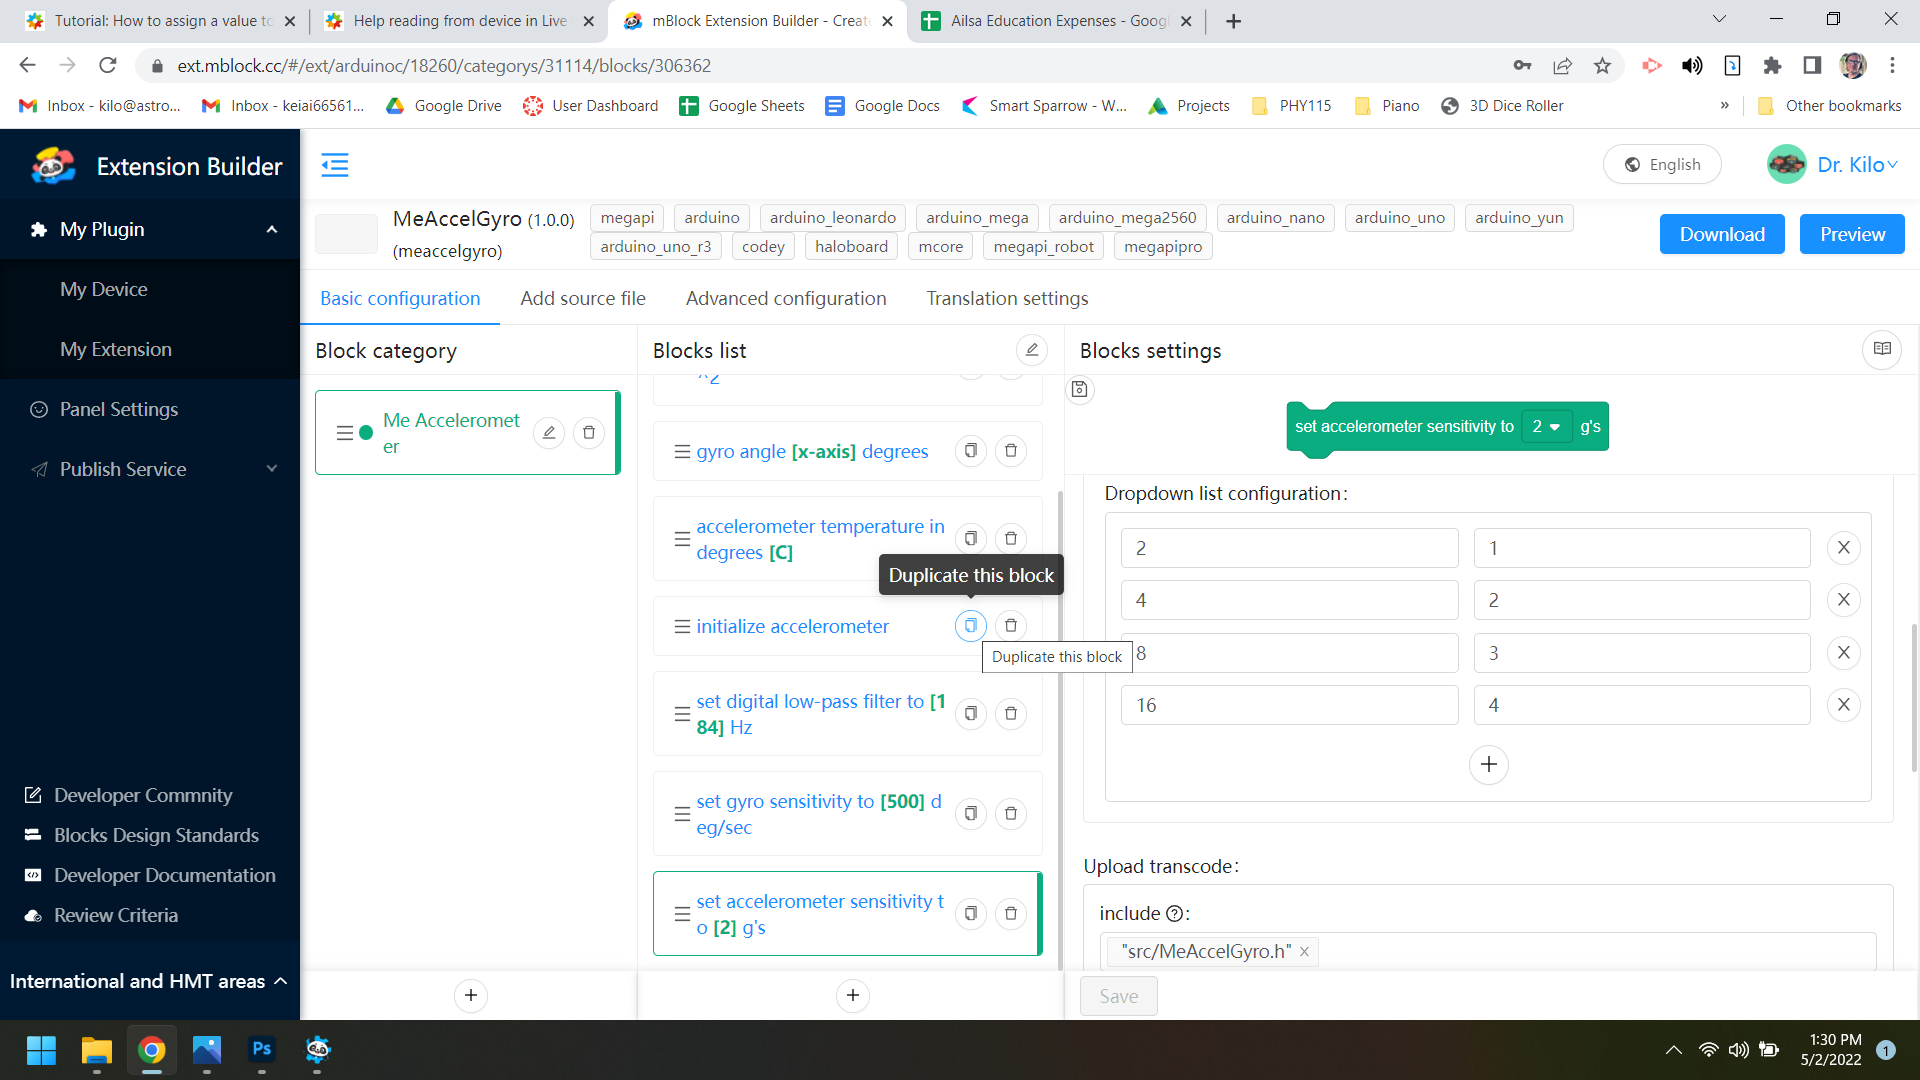
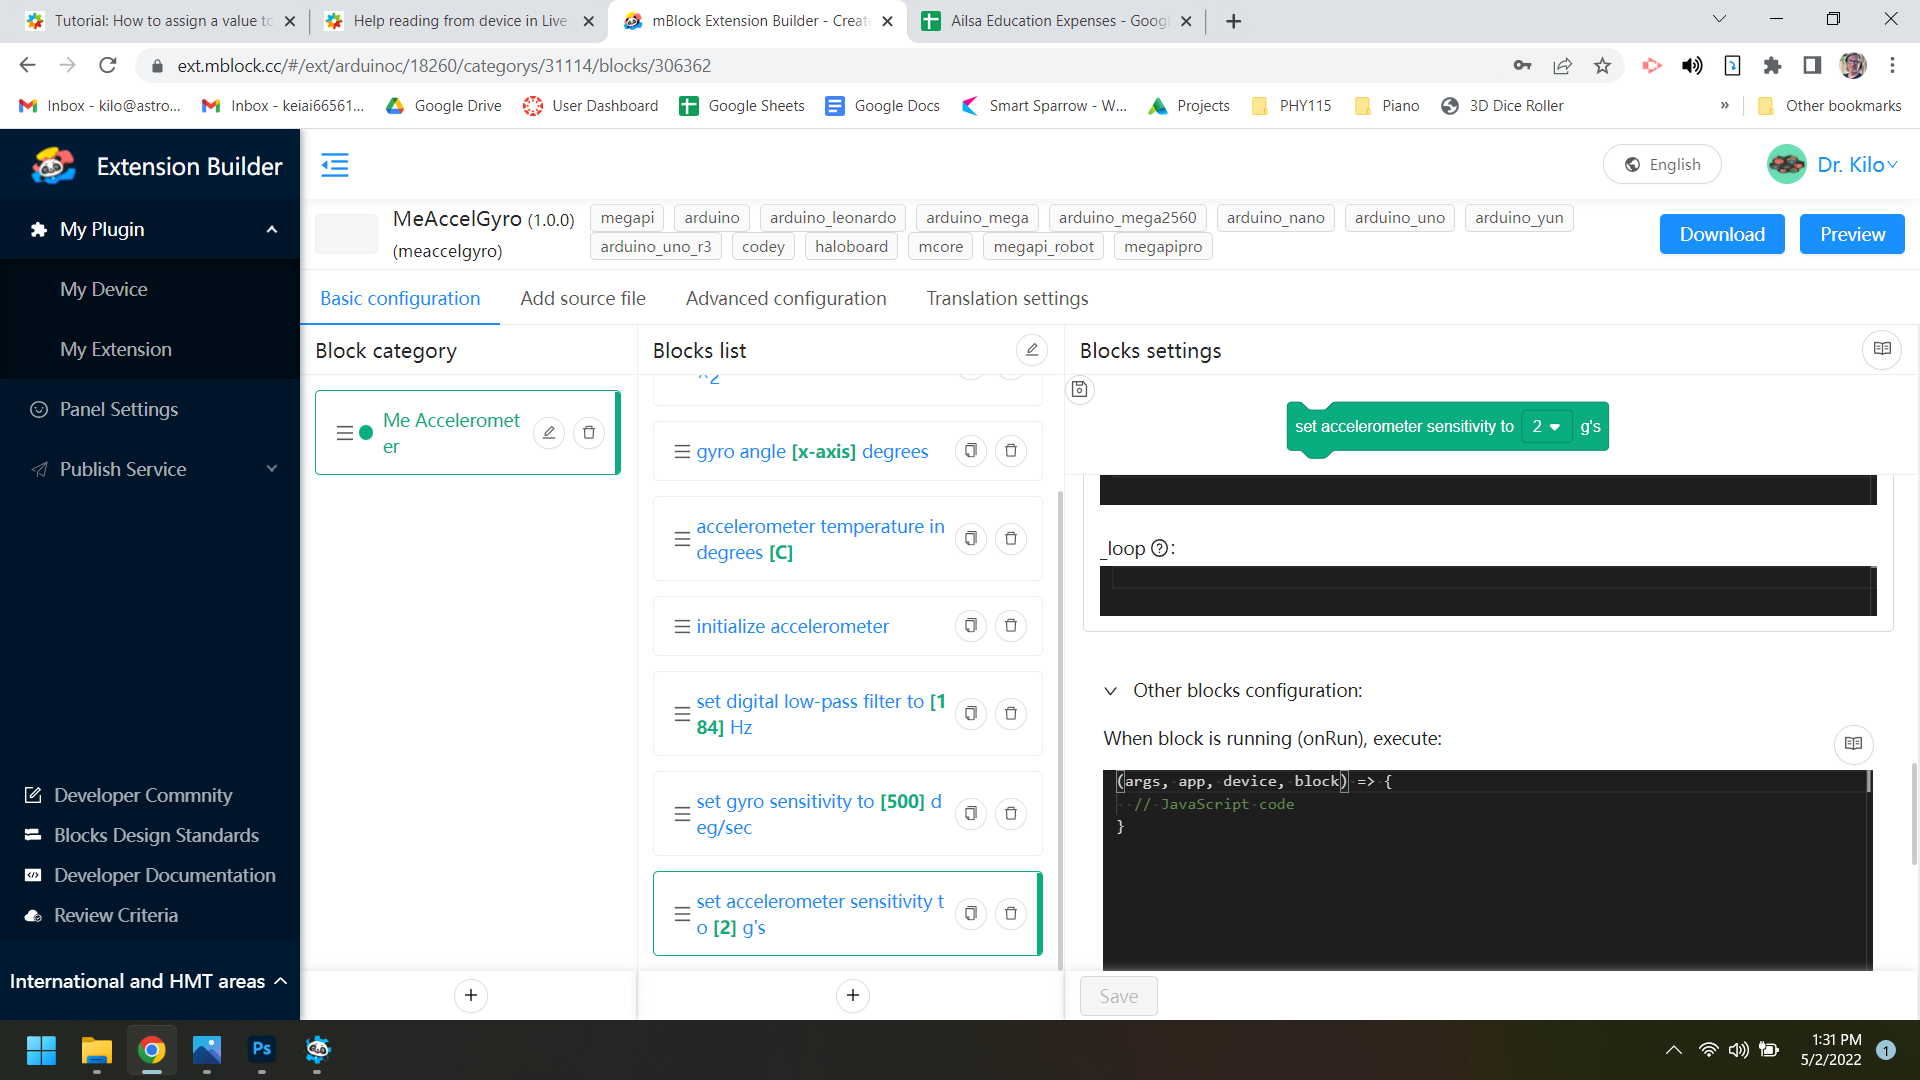
- Add a block as shown. You need to make it a Command block. Notice that I have added a dropdown box to select the full scale accelerometer sensitivity (one of the parameters of the Me 3-Axis Accelerometer)… To add parameters, just type “@” in the Content box and you will get a list of parameter types you can add.
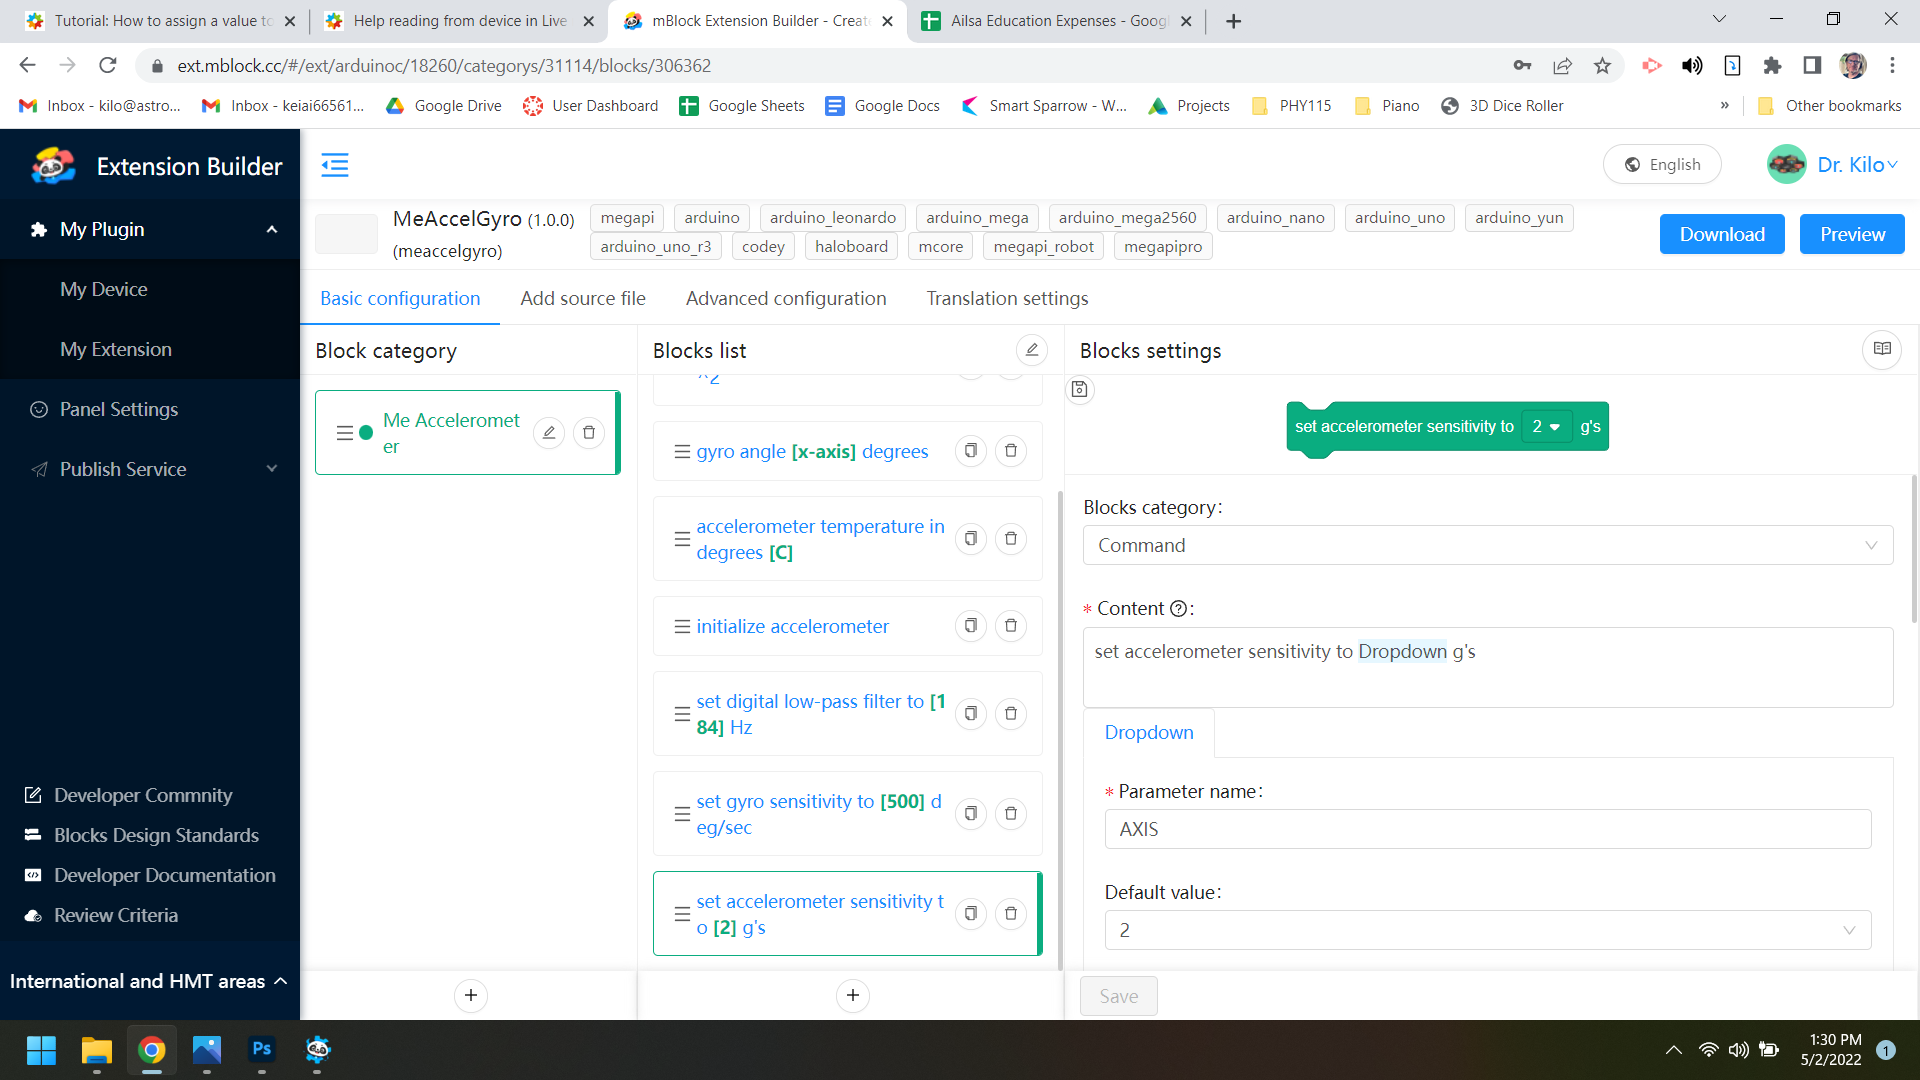
- If you added a dropdown box (as in this case), set the items you want in the list. The first column is what is displayed to the user, the second column is what is sent to the code when the user makes a choice. Note that you can enter in all the items at once by clicking the “+” button and entering your list in the form of:
item1name,item1value
item2name,item2value
etc.
When you do this, you’ll need to delete the first entry, which will be blank.
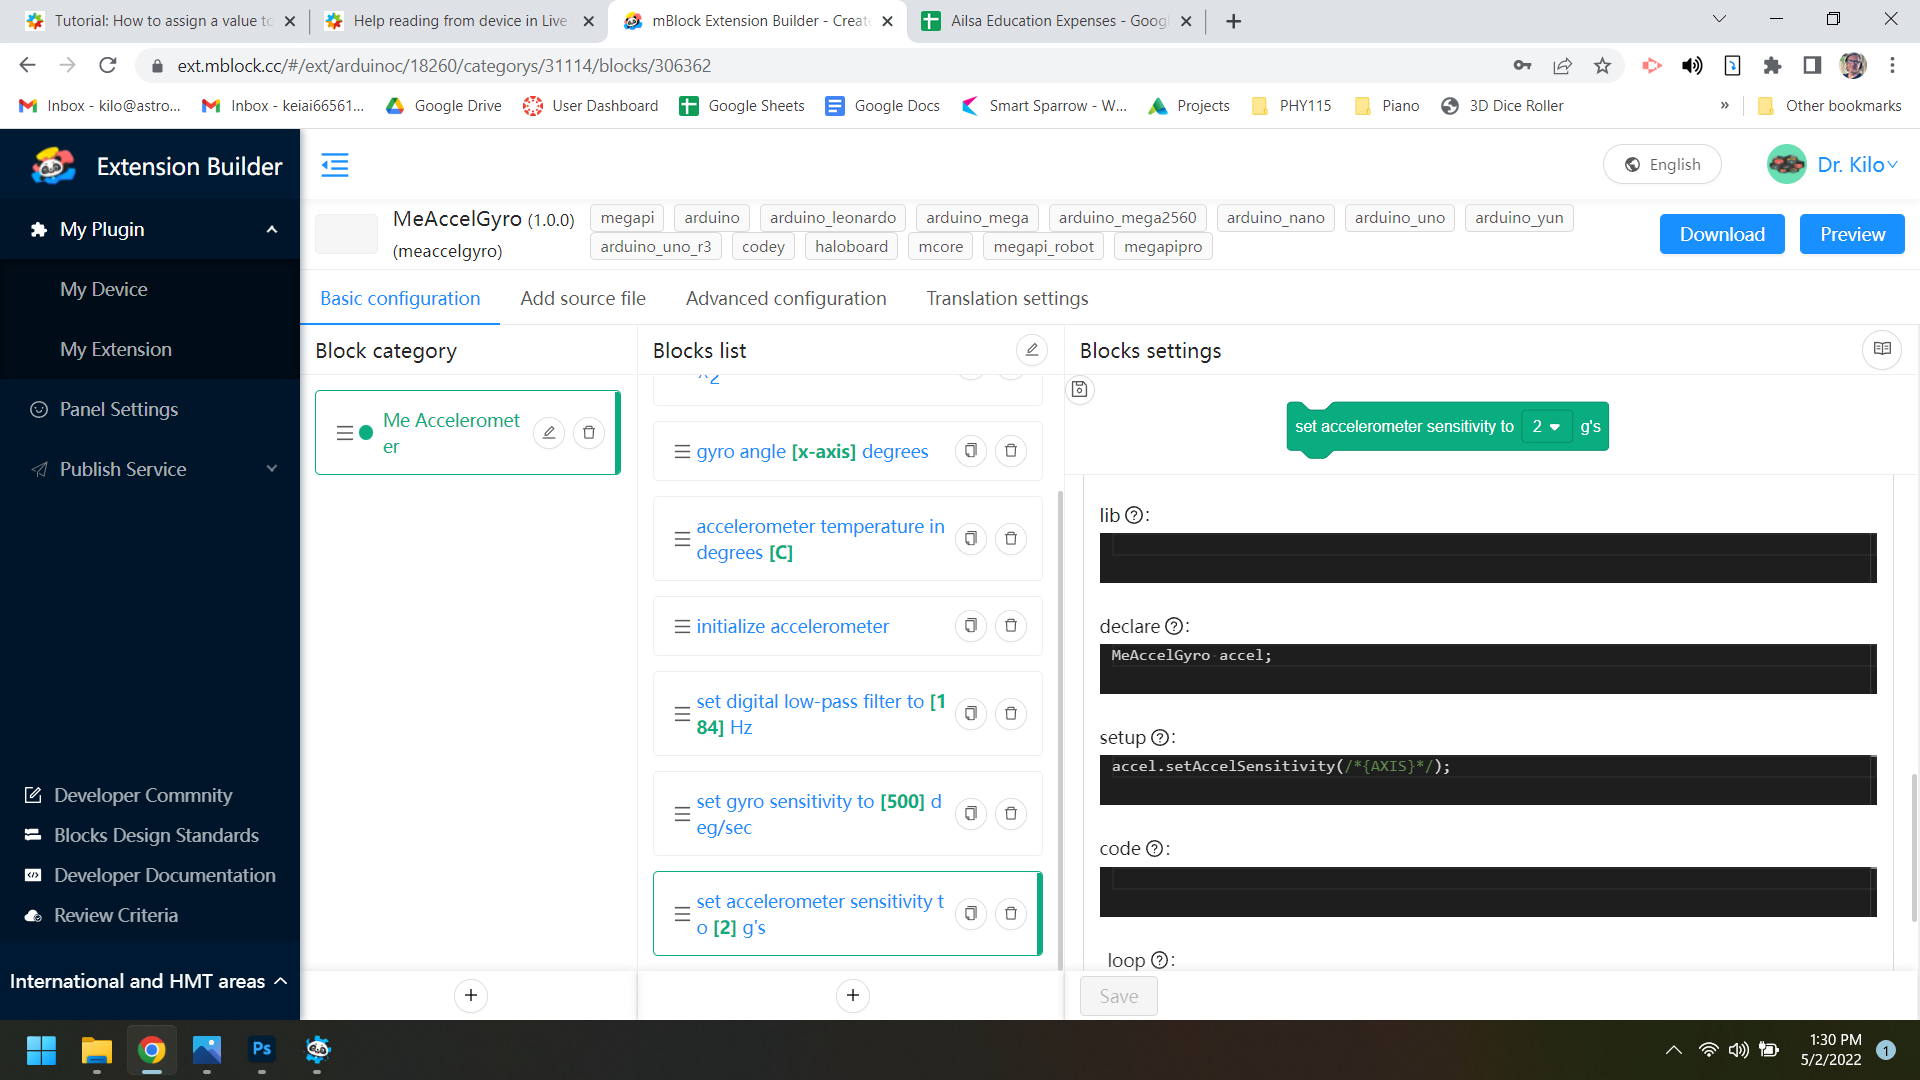
In the Include section, you should be able to click on the blank and choose your .h file (MeAccelGyro.h in this case) from your library. I have often found that this doesn’t work. If it doesn’t, it’s not a big deal, just type it manually in the Lib section (see next image).
- In the Declare section, you need to declare any variables or objects you will be using. If you have any initialization, that goes in the Setup section. Because I wanted the user to be able to use multiple blocks from the extension, I created an initialization Command block that is -required- to be called at the beginning of your mBlock code. I believe you could put this in the Common Code section (found under the Advanced Configuration tab using the default Arduino template) and then you wouldn’t need the separate command block. Because I’m trying to teach my students to always explicitly initialize their code, I elected not to do this.
The best place to put commands is in the Setup section. This is because in most cases, you only want the command to be sent once, and Setup is where that happens. If you do need the command to be sent continuously, then you’d put it in _Loop section. In this case, you can see that in the Setup section I have a call to the MeAccelGyro library that I wrote (see my other post for the code).
Also notice that this is how you access the parameters in your dropdown box. Place the parameter name (AXIS in this case) inside/*{ }*/. In this case, that was /*{AXIS}*/ .(Yes, I know, AXIS isn’t that great a choice for variable names since it’s actually the rating in g’s – I duplicated blocks to make sure I didn’t forget to set everything.) When the ArduinoC code is generated, this variable will be replaced with the user’s runtime selection from the dropdown box.
- For completeness, the OnRun section is where you would put any code that you want executed in Live Mode. Unfortunately, according to tech_support (in 2020, at least), Makeblock has removed are ability to access the value of the block in Live Mode. This means that ALL of our extensions that need this capability must be run in Upload Mode. Sucks, but there it is. Hopefully they will change their minds.
Notice that since I only want the command to execute once, there is nothing in the _Loop section.
- In Extension Builder, press the Download button in the upper right corner and the builder will pack your extension for use. Open mBlock5, drag the extension onto main window, and it will be added to mBlock. If you are updating your extension, you’ll need to exit mBlock and restart it in order for the updated version to take effect. When you restart, you can add the extension from the “+ Extension” button at the bottom center of the screen as normal.
That’s it! You can now include your Command block in any mBlock program you write. When the block is reached, it will simply execute the function that you have placed in the Setup section.
Good luck!
Dr. Keith “Kilo” Watt
PRofessor of Engineering Physics
Department of Physical Sciences
Glendale College, Arizona