The User Guide and Troubleshooting of XY-Plotter


#1

User Guide


  1. Construct the structure of XY-plotter. You could follow the instruction on Instructables.
  2. Make sure you connect all the cables correctly. The most important thing is the stepper motor, you can follow the instruction of stepper motor.

Until now, we have finished the contruction. Next part is the program.

There are two methods to control XY-plotter. The first one is easier, Android App used with Bluetooth module. And the second is a little complex, but more flexible, Gcode, which is usually applied in CNC.

Android App and Bluetooth


  1. Install the Makeblock Library first, you could follow these steps, http://wiki.makeblock.cc/index.php?title=Library_Download

2, You could download the program of andoird App and bluetooth here
3, Unzip the file. Copy the ā€œAccelStepperā€ folder into the ā€œlibrariesā€ file,

ā€œC:\Users\user name\Documents\Arduino\librariesā€ (Windows 7),
"/Users/username/Documents/Arduino/libraries" on OSX.

4, Upload the Arduino Code onto the kitā€™s Meduino.
5, Copy the ā€œXY-Plotter.apkā€ to you Android phone and install it.
6, Plug in the 12V power cable to the Baseshield. And connect the bluetooth named ā€œMakeblockā€.

It shoud be like this,
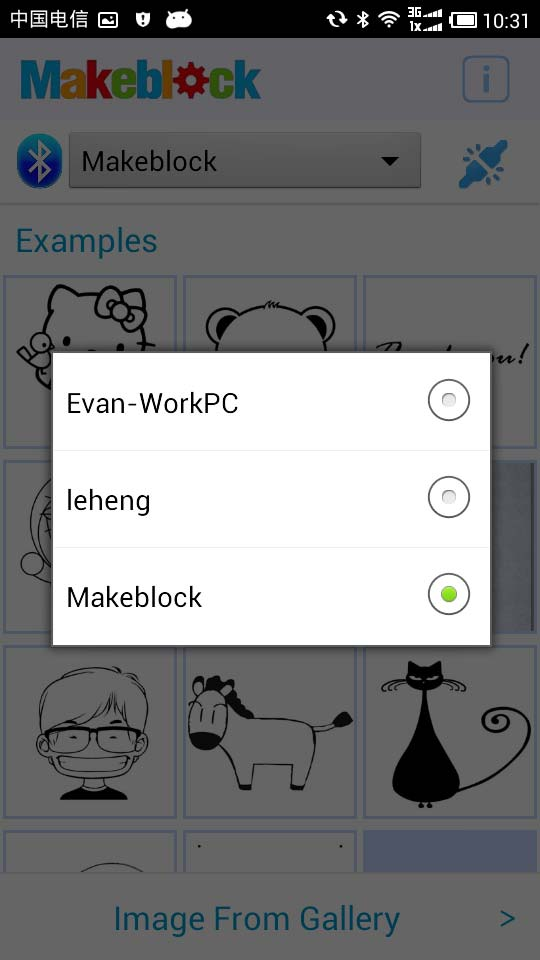
Make sure you get the ā€œconnectedā€ mark on the top-right corner.

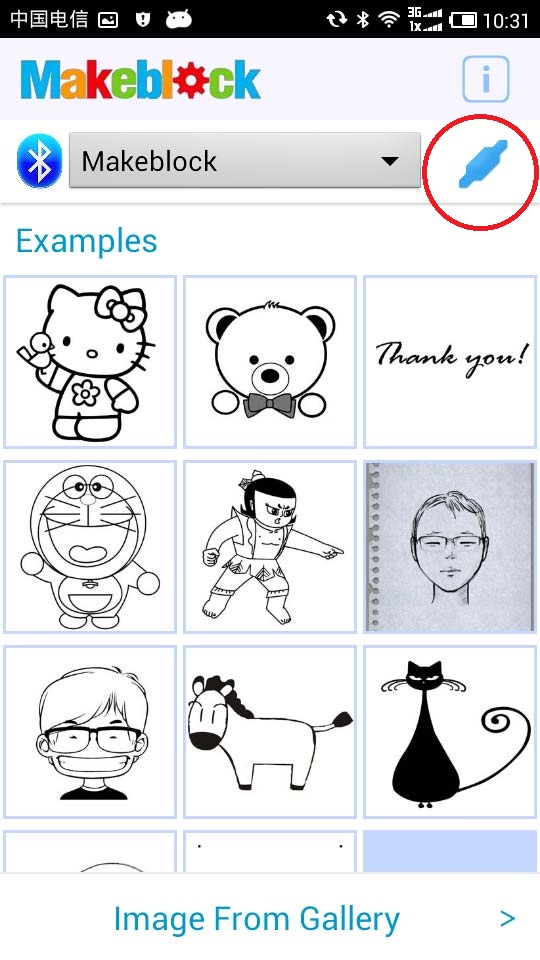
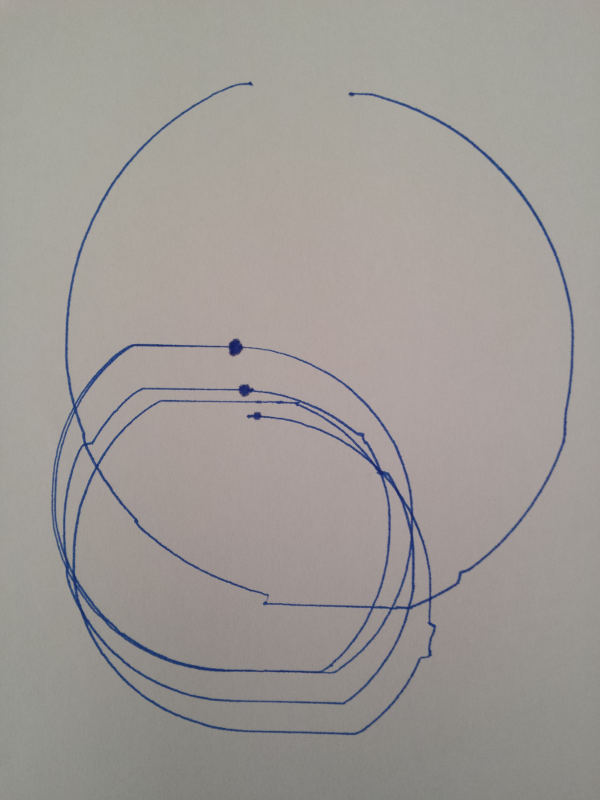
6, At last, check all the cables and steps you have just finished. If all works well, you can choose an image and push ā€œStartā€ button. Then the xy-plotter would start to draw a beautiful picture.
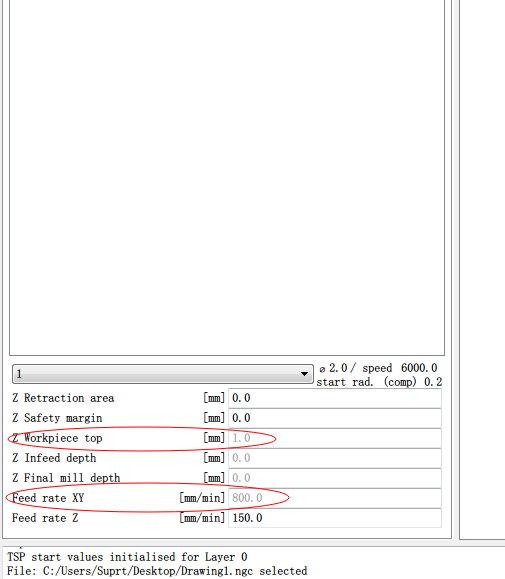
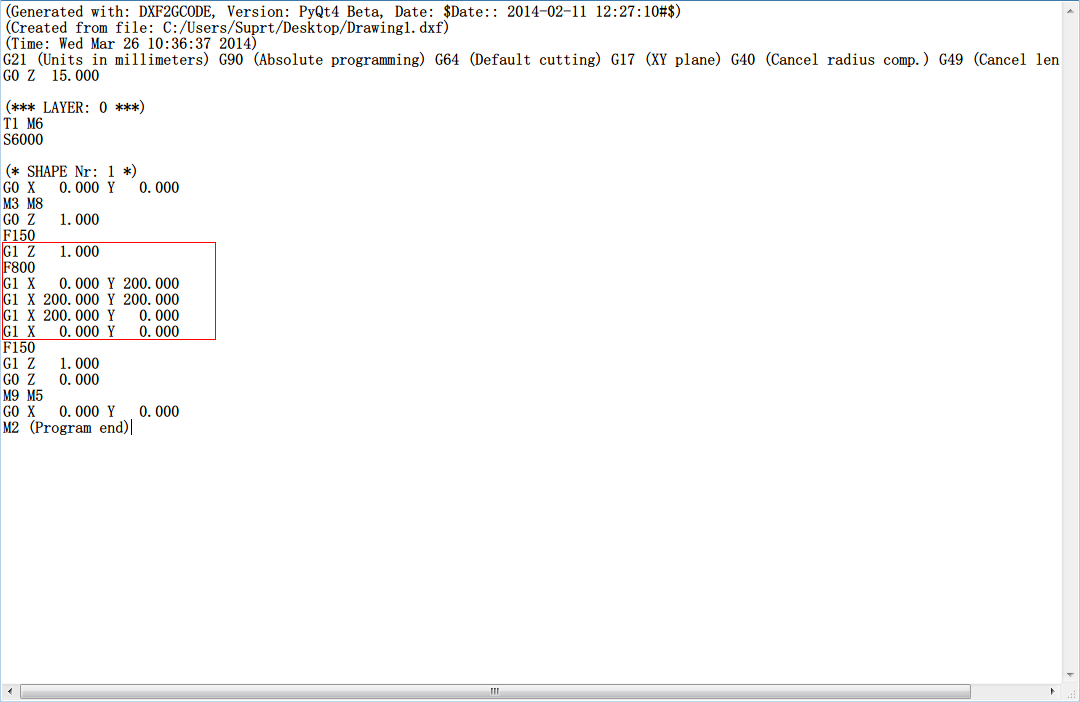
Gcode


You could the follow the steps here to learn how to use Gcode control your XY-plotter.

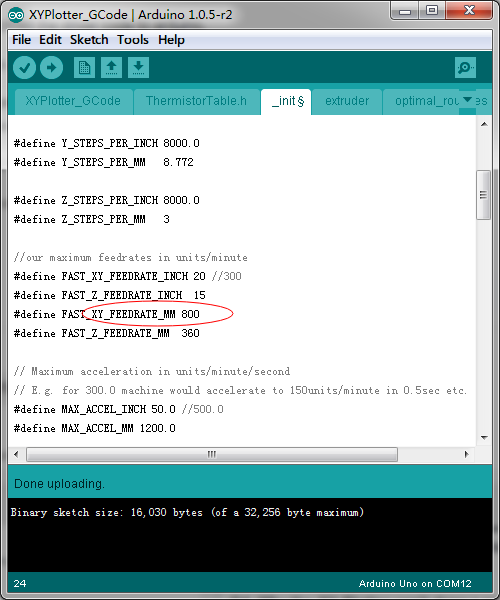
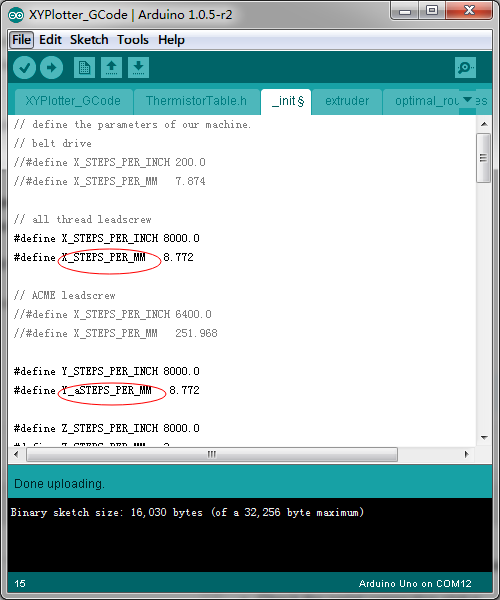
We have update all the Gcode program (2014_03_25).


XY Plotter doesn't start correctly
#2

Troubleshooting


Q1. Why dose my XY-Plotter have no response?
A1: First, check all the cables whether they were connected correctly, you can follow the Step 17 on Instructabls. After that, check the program.

If you used app to control the plotter,

  • Make sure you have upload the code arduino
  • Check you have installed Android app
  • Check the bluetooth connection.

If you used Gcode, you also need to upload the driver code to arduino,

  • Check the serial connection status.

Q2, Whatā€™s the precision level of XY-plotter?
A2, It depends on the micro of stepper motor and the assembling process. Ideally, if you choose 8 micro of stepper motor, the diameter of 90T wheel is 58.21mm. The timing belt would move 58.213.14=182.78mm a round. The step angle of the motor is 1.8Ā°, 360/1.8=200. So the time belt would move 182.78/(2008)=0.114mm pre step.

As a result, the precision of XY-Plotter is 0.1mm ideally.


Q3, Why the speed of the two stepper motors are different?
A3: You should check the DIP switches on the Stepper motors. Both of the two motors should be trun to

OFF ON OFF OFF OFF OFF ON (SW1-SW7, micro 8)

You can visit wiki to get the instruction of the DIP switches.


Q4, How to generate Gcode by software?
A4, You could try this one, dxf2gcode. This could help you converts a 2D dxf drawing to CNC machine compatible G-Code. For the settings of Z, you can visit here to know how to set up.


Q5, Why the XY-Plotter canā€™t draw a square?,
A5, Try to set the same speed in each Gcode step. You can write " F xxx " (which meant the pen would move as xxx mm/min ideally, you would get more detail in Q7) at the end of each line.


Q6, How to regulate the default speed (G00) of XY-plotter?
A6, Open the XYPlotter_GCode.ino, click the _init tag.

You can change the value of FAST_XY_FEEDRATE_MM to change the default speed of XY-plotter.


Q7, When I want to draw a line whose length is 150mm, why the actuall size is not correct?
A7, Open the XYPlotter_GCode.ino, click the _init tag.

Make sure the value of X_STEPS_PER_MM and Y_STEPS_PER_MM is 1mm/0.114mm=8.772. (Micro 8)


Q8, How to set up the value of Z in the XY-plotter Gcode program?
A8, There is only 0 and 1 of Z in the XY-plotter Gcode program (Z 1 is pen down and Z 0 is pen up)

To be continuedā€¦


#3

Great set of answers to common issues, thanks! :slight_smile:


#4

Iā€™m not sure whether it figure out your questions?

For the Q4, I got a software dxf2gcode which is used to generate GCode from dxf.


#5

Johnny, it helps answers the question of how to generate GCODE, Iā€™m trying to find the different ways people use this device and your answer is a very useful one. :slight_smile:


#6

Question @Johnny. What settings are best for the Z when using dxf2gcode in your experience? It seems like the software assumes we want to control the depth of ā€˜Zā€™ when all we want to do is have it use up or down.


#7

There is only 0 and 1 of Z in the XY-plotter program (Z 1 is pen down and Z 0 is pen up). I think you can set up the value like the pictures below.

After that, the gcode looks like this,

In this case, I want to draw a square.

As a result, there are some repeated code. You can delete them directly.
:smile:


#8

@Johnny again great answer on some creative ways to use XY Plotter. Thanks for everything that you have done to provide information for us to use and enjoy your product.


#9

@Johnny I downloaded the latest version of the Arduino software which is ver 1.5.6 r2 and am trying to find the right Board that is available to properly download the arduino code to and Arduino supplied on the XY Plotter. Here is a list of the options available. Which board do we select based on the meduino included in the XY Plotter electronics kit?

Link to selection in Arduino software: http://www.wildfirelabs.info/media/meduinoQuestion.png


#10

@todd You should choose ā€œArduino UNOā€ :smile:


#11

Hey @Johnny. Could you give us some information about the Bluetooth module used? I have been looking at your code for the Arduino and am curious about how the communication works with this piece of hardware. I would like to begin writing some of my own code to work with it, but would love to get some information about the manufacturer. Thanks for your help!


#12

Hi, @todd

It sounds good that you move forward. I am not sure which kind of information you need. Maybe you can find them on the wiki. http://wiki.makeblock.cc/index.php?title=Me-Bluetooth

p.s: We plan to launch bluetooth 4.0 module in April.


#13

Hi, I purchased the xy plotter and already assembled but I have a problem
I followed all the instructions on the page instructables, and i did the procedures to install the apk and make a drawing but the plotter does not respond, only one engine is locked and does not move, I Use the gcode by another method and if it works so i do not think that the problem are the motors or controllers , i checked the cables and the code that loads to the arduino and runs well, someone who can help me?

excuse my English, is not my native language :smile:


#14

Hi @Marco_Carrillo,

Itā€™s a little confusing about your problem. Could you check the status of the limit switch? It seems that the switch is touched.


#15

@Johnny I am trying to compile the code for the XY Plotter and I get a message telling me it canā€™t find the SoftwareSerial.h library file. How am I able to get a copy of this library file or run this code without referencing the SoftwareSerial library?


#16

Hi @todd,

Sorry for lately reply, I was on a long holiday last two weeks.

SoftwareSerial.zip (9.0 KB)

You can download the file, unzip it and copy it to your Arduino -> libraries folder.


#17

hello , could someone help me to modify the XYPlotter_GCode for arduino for assigning the zero machine with the states of limit switch, like the code Plotter_for_Arduino, the code that i use for the tablet? thank you


#18

I followed all instructions and it worksā€¦ sort of :wink:

This is what the XY-plotter draws when I send it the gcode ā€˜G2 I40 Z1ā€™ (four times) followed by moving the paper and then adding ā€˜G2 I60 Z1ā€™ once.
Can you tell me what is wrong ? I checked cabling twice and downloaded the latest programs.
Is the timing belt too tight ? Or not tight enough ?

disclaimer: I have no engineering experience and know nothing about electronics.


#19

A video of the plotter drawing this page:

I did some more tests and it works ā€˜betterā€™ when drawing a small circle in the middle of the plotter area. It gets far worse when drawing larger circles (G2 I90 Z1 fails horribly, stepper motors sometimes make noise but donā€™t move the belt).

I will do some troubleshooting on Sunday.

paul


#20

This is a great project! There is one part I am confused about: how do you install the timing belt? The instructions could include a bit more detail. Do you poke a hole through the timing belt with the screws? Or is it somehow held in place with tension?

Thanks in advance!