mBot2- servo command does not work in upload mode


#1

Hello,
The following code works just fine in “Live” mode (mBlock 5.4.0):
The screen gets updated, the servo moves.

Once I switch to upload mode, uplaod the program succesfully, the screen gets updated, however the servo does not move at all.

Any explanation, or just a (bad!) bug?


#2

Is your servo plugged into port S1? Sometimes live mode glitches, try the other ports.


#3

Hi Neko,

I don’t have mBot2 but with the CyberPi I use the following extension and it works fine. However, I am aware that there is only S1 and S2 unlike the other extension S1 to S4.

Try with the other extension and maybe with the application install locally ???

Crackel
2022-11-21%2016_41_22-Window


#4

Crackel, Best_codes,

Thank you for youre replies.

I am using mBlock 5.4.0 on a windows PC, I guess this is the Application installed locally that Crackel mentions.

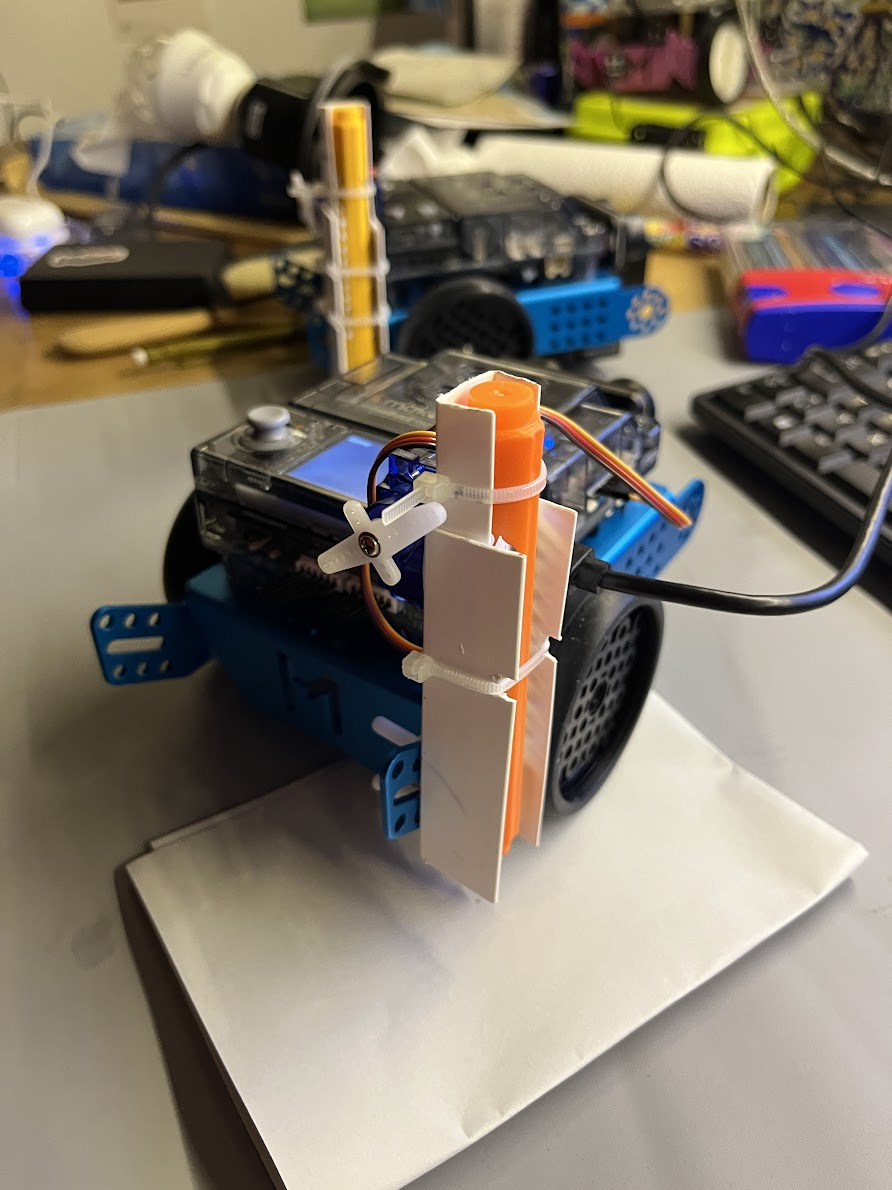
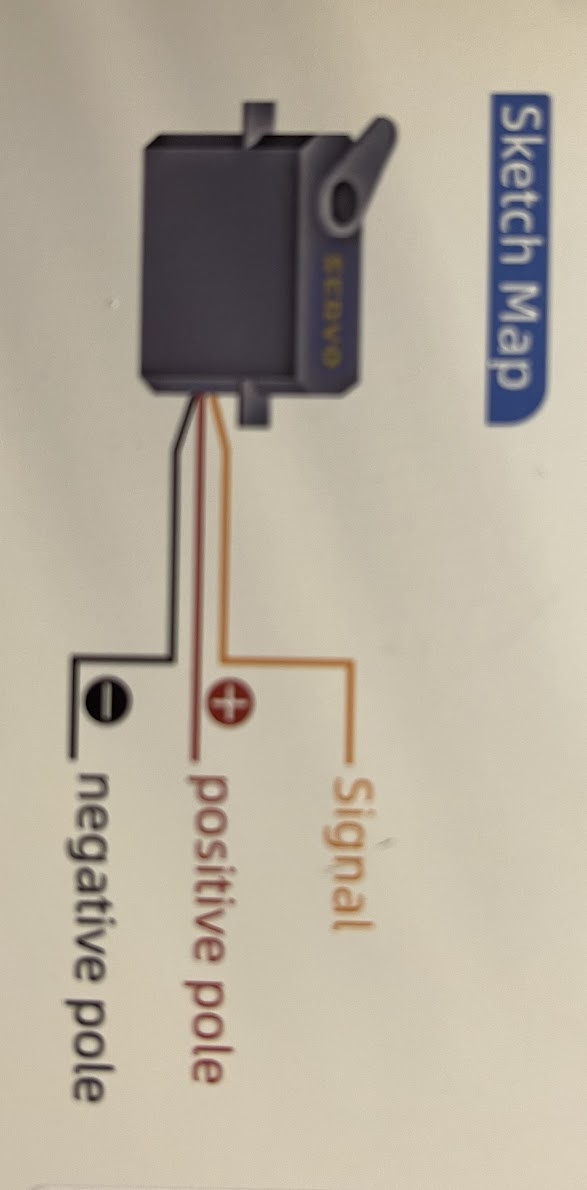
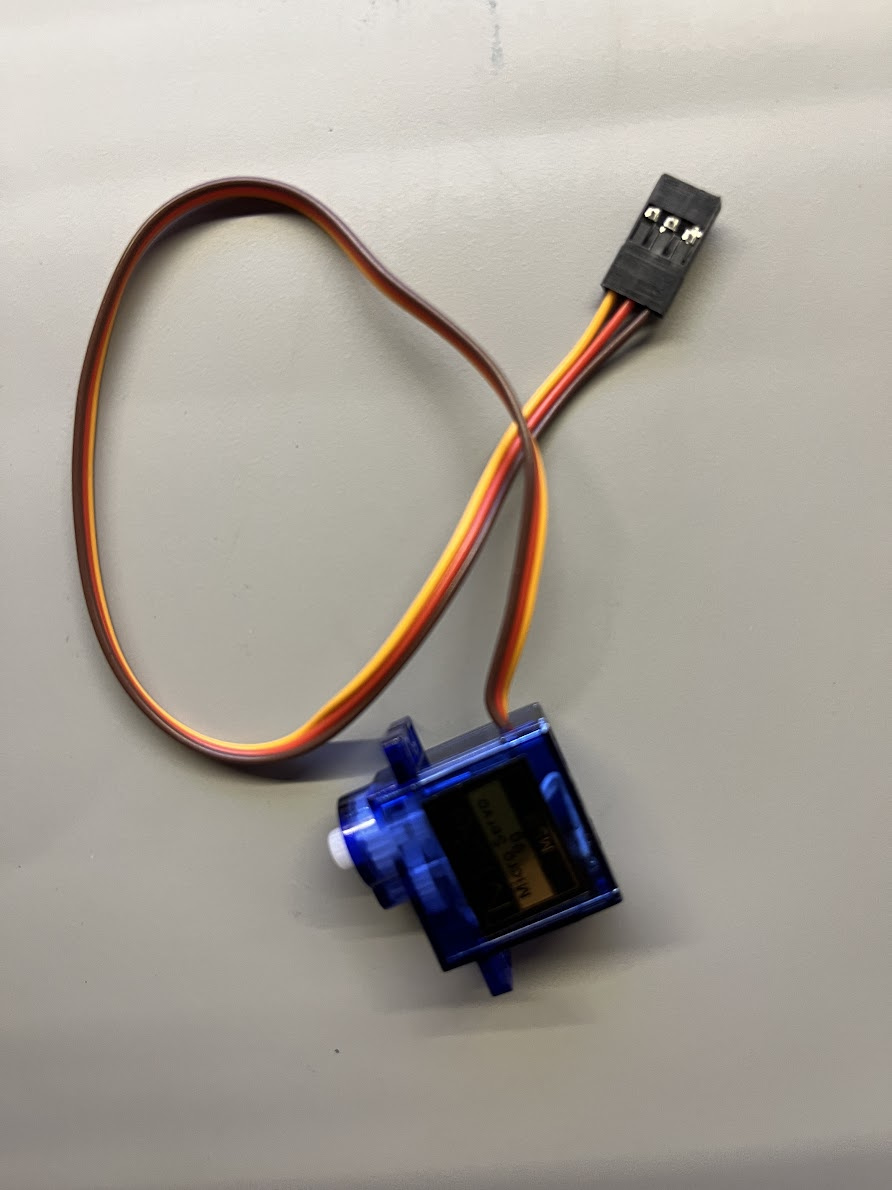
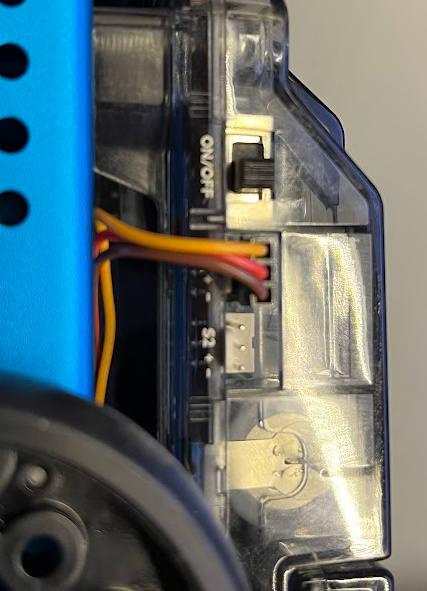
I have tested on 2 PCs already, 2 different mBot Neos, S1 and S3 servo ports.
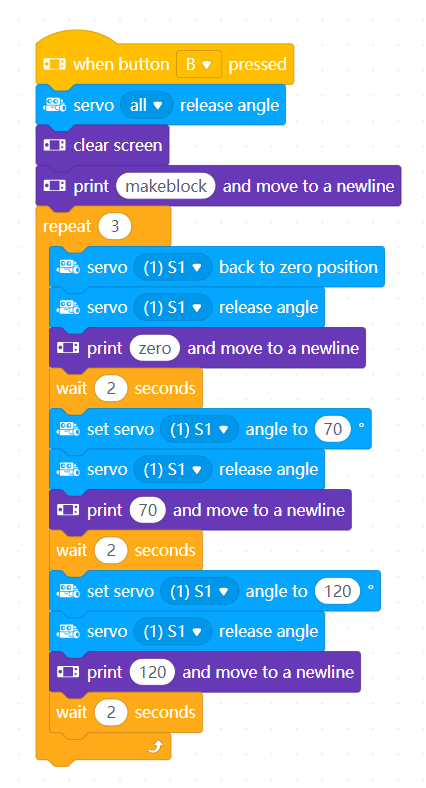
The behaviour is always the same: In live mode (USB cable connected), program works perfectly. The servo moves, this means it is correctly connected, and the port is correctly addressed by the program.

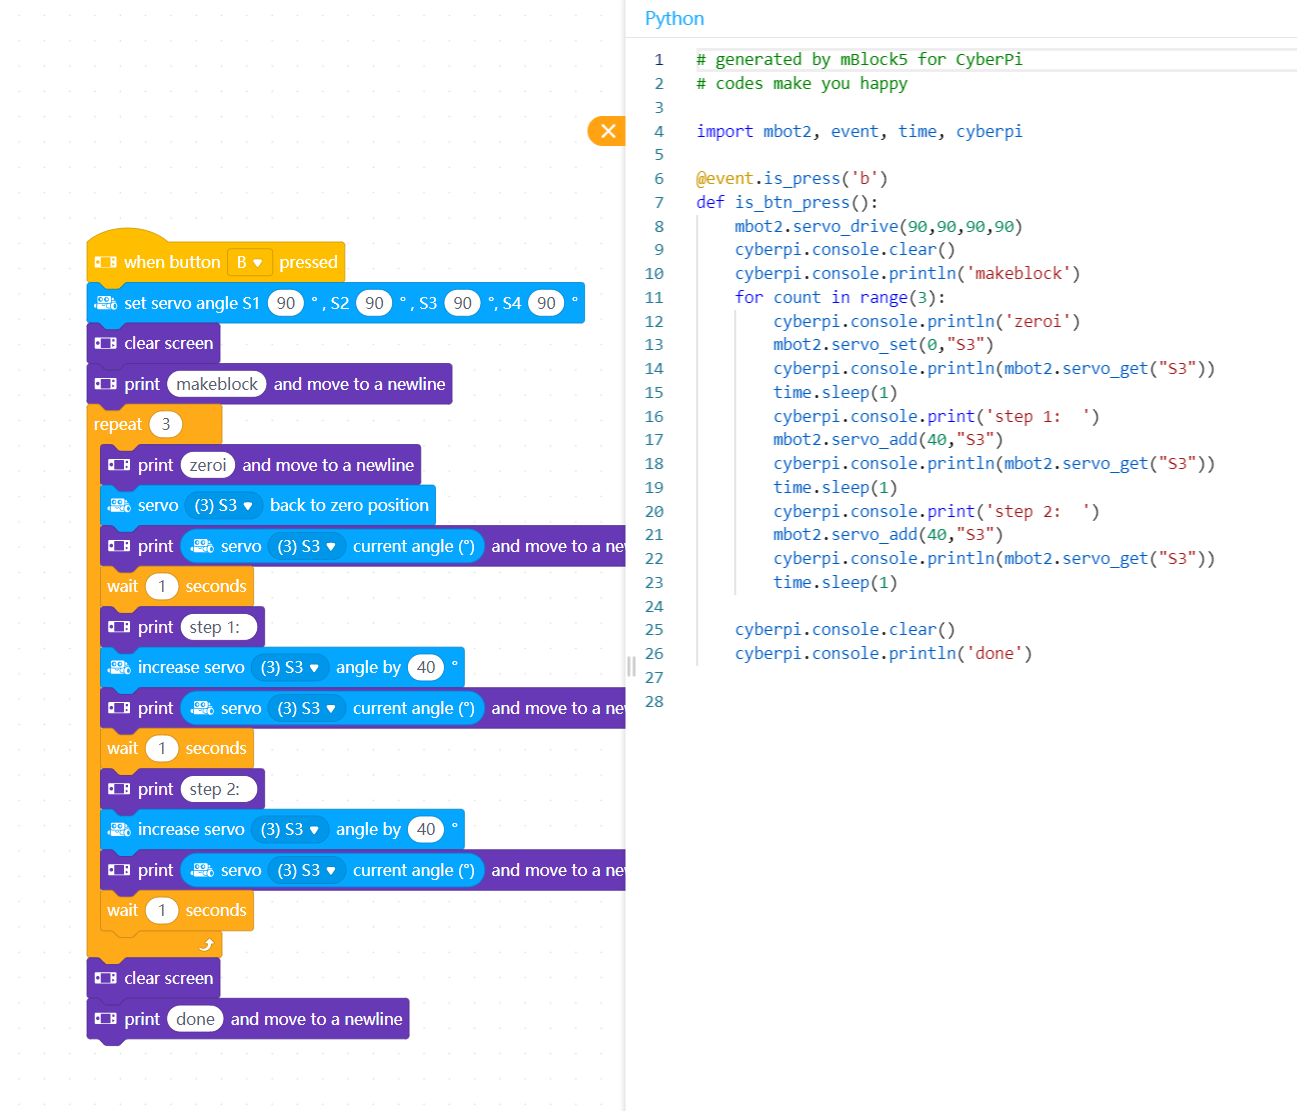
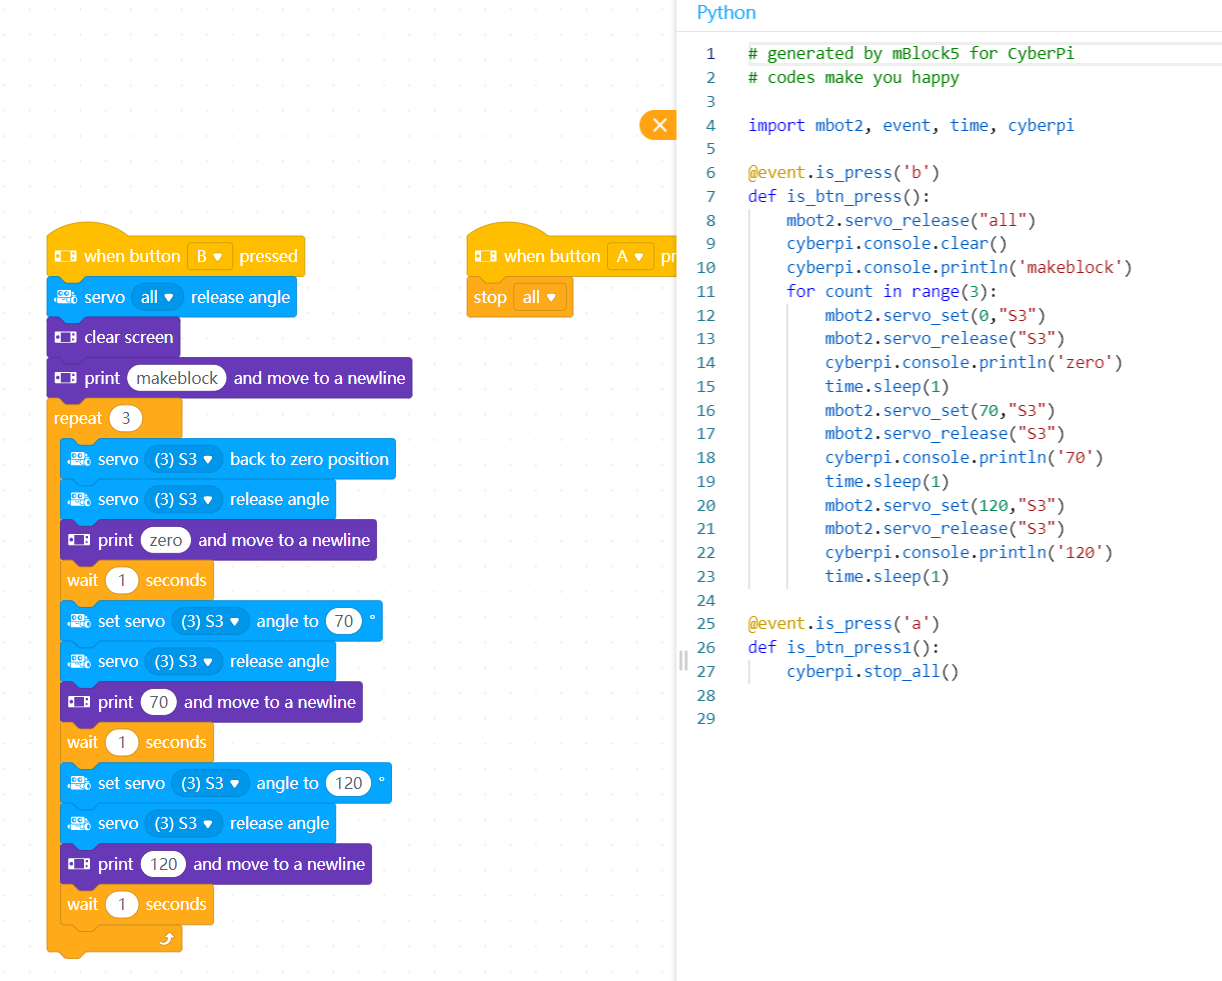
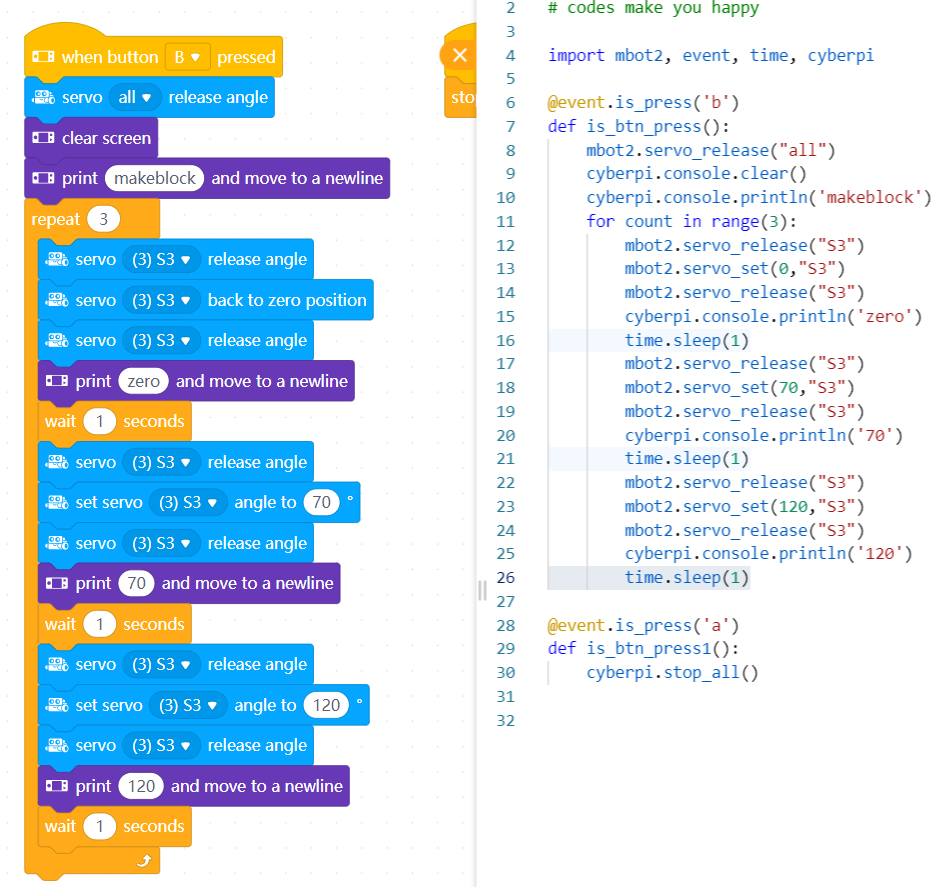
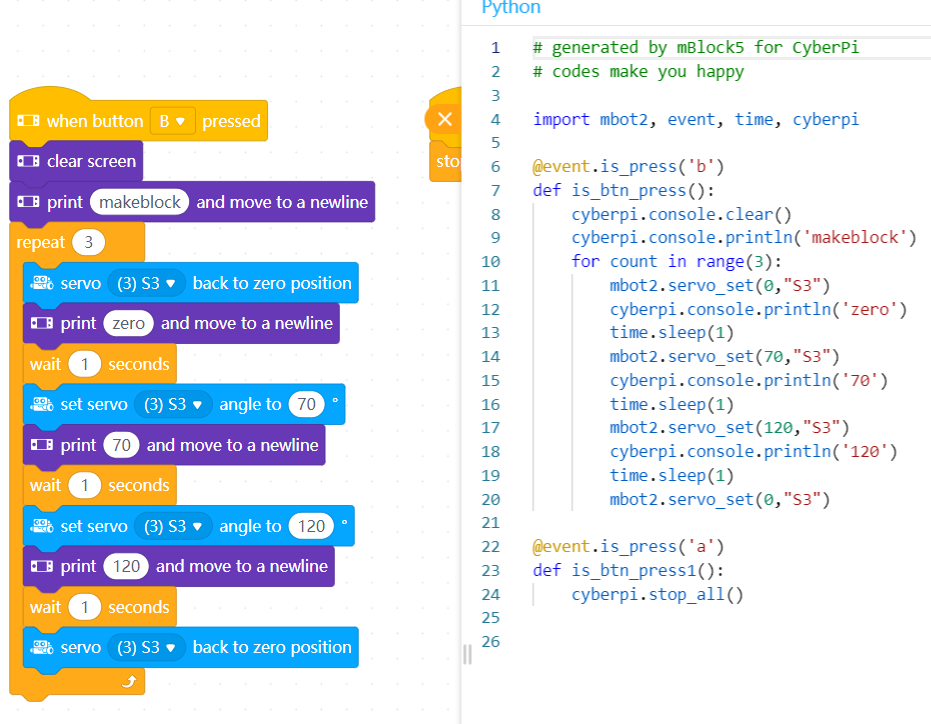
When I upload the program, remove the USB cable, and press the B button, the screen is updated according to my program (Showing “zero”, then “70”, then “120”): this tells me the program has been correctly uploaded and is executing correctly.
However, the servo does not move. it seems that the Servo command are simply ignored.

I did not yet try the “Pocket Shield” extension, but I tried the "servo module " extension and including the servo commands of that extension into my program. They were simply ignored, both in live and in upload mode. My interpretation is that CyberPi ignores commends which are directed at a module (Servo extension in this case) that is not physically present. or, in other words, the mBot2 shield is not accepting commands designed for the servo extension.

Any idea on possible other causes?

Regards,
Neko


#5

hmmm you did the tests i would have done. Unfortunately I don’t have mBot 2. Maybe write to @makeblock123. However, I am never sure who to write to.

Sorry… and good luck


#6

Thank you Crackel,

I messaged makeblock123, ,hope he will answer and be able to help.

I tried the servo commands from "Pocket Shield " extension and including the servo commands of that extension into my program. They do not work using the mBot2 chassis, they were simply ignored, both in live and in upload mode.

I designed a robot drawing workshop for high school students, with 10 mBot Neo, using the servo to lift/lower the pen. Did the development in live mode, to find out 2 days ago that it does not work when uploading. Event is on Thursday, hundreds of students, very bad for my reputation :frowning:


#7

Hey, @Neko, which cyberpi device are you using?
image
Try different devices.

Also, I see by your picture that you are using a non-makeblock servo? mBlock servo wiring, for which the servo ports are designed, may be different from yours. Try plugging the servo in the other direction (backwards).
makeblock servo:

Thanks for your time,
Best_codes


#8

Hello Best-codes,

And thank your for your support!

I am suing the device CyberPi, mBot Neo and mBot2 do not appear in my device library. Do I have to change some setting to access different devices in the library? I have then added the extension mBot shield.


image

Regarding the servo, I am using a standard blue 9g servo similar to your picture. connections should be OK, (I have been using servos for 35 yrs), and , most importantly, it works perfectly in “live " mode, the problem is only in “upload” mode”


Regards,
Neko


#9

Hey, @Neko, I see there are updates for both the mBot Neo device and the shield extension. No, you don’t have to change settings to make the devices appear, you use mBlock online:
https://ide.mblock.cc/
(Please note that the above link will require mLink.)
Also put some more blocks, for instance the ones for the encoder motors, to see if only the servo ports are the issue. I’ve had problems with my motor ports before.

Hope that helps!


#10

@Neko Wait! I just thought of something I need you to try! Take out the “servo [(1) S1] release angle” blocks. See what that does. Also, what is the python code? (Click the orange </> symbol to copy and paste/ screenshot it):
image


#11

Sorry it’s taking so long to figure this out, by the way. It’s just so much harder online than in person, like it used to be.


#12

Hello Best-codes,

Many things to try!
Updates done, no chnage.

deleted Servo-release, now it works?! However, servo remains noisy and jittery.

I copied the corresponding python codes.

I also noticed in the Python editor that it uses Python in Live mode, micro-python for uplaods. So the code os dfferent for upload and live, which explains different behaviour?

I did not have time for testing the web IDE, installing mLink takes a long time, and I have to get to sleep now.

Hope my info helps!

Neko


with servo release:


#13

Doesn’t the “release angle” block make the servo just not hold its position? I don’t know much about servos, but that’s what I’d think. Try putting the “release servo” block before the “set angle” block, too.

Hope that helps!


#14

When not “released”, a servo tries to maintain its position/angle actively, i.e. the motor actively counteracts any force (up to its maximum torque/power of course). As the position control of the cheap sensors is not very precise, the servo is continually slightly adjusting its position, which leads to the noise and jittering. try pushing the servo arm with your finger and you will feel it counteracting.

When released, the motor and the position control are no longer active, no power is applied. Therefore, no noise, no jittering. If the load is small, like with my pen setup, the servo arm remains where it is due to the friction of the gears and the motor. If you push the arm with your finger, you will be able to move it.


#15

That’s what I thought…
Did you try this?


#16

this one does not work:


#17

No I mean like this:

Before:

image

After

image


#18

Does not work either:


#19

That’s the code you already had… I meant switch the release and servo block’s order/


#20

OK, sorry.

In the meantime, this one works: