Arduino read analog pin (A) works in v3 but not in v5


#1

Hi,

I am new to both mBlock and Arduino. My knowlegge in both areas is extremely limited so maybe I am asking something obvious, but my problem is really making me crazy. I have done tons of testings, and both Googled and looked up my issue in the forum; but it seems I am the only one with this particular problem.

I am trying to learn how to use a board called “Echidna” based on Arduino (http://echidna.es/hardware/echidnablack/). When using mBlock 3 I can get the readings of the analog inputs. However, the same code does not work in mBlock 5. The board also shows the analog readings when using snap4aurdino. Here you have some screen captures:

Any help will be greatly appreciated.

Thank you,


#2

Hi I never heard of Echidna but if its based on an arduino there should always be a way to make it work. But can I ask you, is there a specific reason you want to use the mblock software? Maybe for a non mblock native piece of hardware its easier to directly program it using for instant Arduino IDE.


#3

Hello Atonbom,

Thank you for your interest in my question. I am a teacher and our school is engaged in a computer science programme. The administration bought some Echidna boards for us, so that is what we have and, therefore, what we have to use.

Regarding why use mBlock in particular, because of the pandemic situation we cannot longer use the computer room (we cannot meet the minimum legal separation between students) so the only device they can use now to code are tablets. And while mBlock 5 allows to code using a simple web browser there is no “online” version for mBlock 3.

I have been able to use the analog sensors using Snap4Arduino, but I find mBlock much easier and appealing for my 10-11 year-old students.

Again, thank you for your interest.

Kind regads,


#4

Hello again,

Switching the leds of the board on or off depending of an analog value I have been able to verify that the analog reading DOES WORK. My problem now is that those readings seem to be “stuck” into the “Device” tab of mBlock, but I need to pass on those values to the “Sprites” section. Using variables as a way to exchange those values DOES NOT seem to work.

Any ideas?

Thank you!


#5

Hi

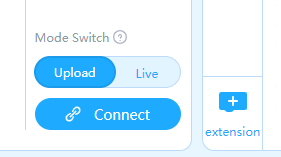
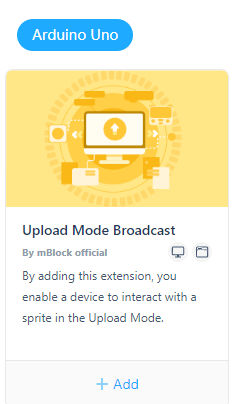
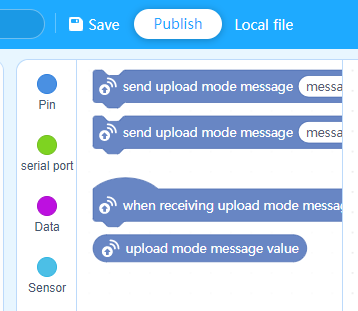
When a device is programmed in ‘Upload’ mode using Arduino C code, it is possible to get ‘Upload Mode Messages’ to transfer data back to the mBlock 5 stage. To do this you need to declare suitably named variables to be used on the ‘Devices’ Tab and a similar set of variables declared to be used with any sprite on the ‘Sprites’ Tab. It makes sense if these sets of variables are similarly named (almost matching names, but not quite matching).

As a general principle, to get sensor feedback from an ‘Offline’ board to the mBlock 5 ‘Stage’ it needs a variable thgat can be used at each end of the of transmit and receive cycle. A sprite (any sprite) needs a blocks script creating to receive a NAMED broadcast message containing the value of a ‘Devices’ Tab variable and then set the value contained in that message into the matching ‘Sprites’ Tab variable so that it can be used as graphical output on the ‘Stage’.

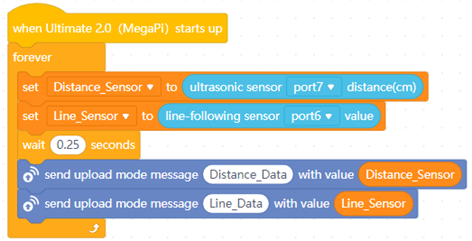
A ‘forever’ loop (in the Arduino Code) reads a sensor and updates a declared variable called xxxSensor with that value . It then sends an ‘upload mode message’ called xxxData with the value stored in xxxSensor attached to the message.

On any Stage sprite (any sprite) a hat block ‘when receiving upload mode message (xxxData)’ is added to the sprite and immediately under the hat block, is added any actions that need to be carried out. In this case, a similarly named variable xxxxxx is set to equal the value of the data (xxxSensor) sent from the Arduino code polling the sensor.

This SENT VALUE can be displayed on the stage where the ‘when receiving upload mode message’ sprite routine will be constantly updated by the feedback from the Ultrasonic Sensor with the transmitted values. Such receiving scripts will ‘pulse’ gently as long as the Arduino code continues to send values (as it has been instructed to do) unless stopped.

Devices (Broadcasting) Script Example:
image

Sprite (Receiving) Script Example:
image

Hope this helps.

My book ‘mBot&Me - vol I’ explains and demonstrates how you can turn sensor data on the 'Stage into high-quality graphics that will update as required in real-time: You can find this at:


#6

Dear CommandeR,

Thank you so much for your interest in my problem and your detailed answer. it is truly appreciated. However, when choosing “Arduino UNO/Nano” as my device I am unable to find any available “Send message” option. It is my believe that I should use the “broadcast” option, but it is greyed out.

Next you will find all the tools I have for my device.

Thank you once again.

Kind regards


#7

OK, I think that I see your problem now…

…you need to use the extension button at the bottom of the blocks panel:
image

and then open the ‘Upload Mode Broadcast’ extension by clicking on the ‘+Add’ button:

image

You should now find that you have the Upload Mode blocks added to your blocks panel:

image

By the way, this is what I meant by real-time high-quality graphics (screen-grabbed from a project about 5 minutes ago (note the time on the clock):


#8

Thank you so much CommandeR!!!

The “Upload Mode Broadcast extension” was exactly what I needed. I have made some tests and they all seem to work as expected now. THANK YOU!

Following your lead I have found this useful document:

https://www.mblock.cc/doc/en/hardware-basic/interact-with-sprite.html

As I said in my first post, I have just started using mBlock and Arduino and absolutely everything is new to me. Now that I know how to communicate my device with the Sprites I will make my first simple projects and after that, little by little, I will try to improve them. Thank you for your resources. Surely, I will use some of them later on.

All the best,