MLaser fuzzy edges on engraved designs


#1

Hi all,

Any ideas what could cause these fuzzy edges all of a sudden? I didn’t change any settings and the laser head is firmly in its place. Yesterday it was working fine, today I started engraving the same design I did yesterday and it was completely messed up.

Help please? Thank you!


#2

Hi orshika,

How about try upgrade firmware again for the Laserbot with mLaser software.
Besides, there is possibility that the Laserbot mechanical structure loose or deformed. Please also check it structure refer to some steps in Q3 of this link.

Once still the same issue after checking above, please also try engrave the M test file and see what’s the result.


#3

Thank you,

I’ve tried all of the above, didn’t help and the hardware is fine. Problem only exists in engraving, no issues in cutting. Very strange. Especially after it was working just fine with the very same design it now has this issue with. Tried text too, it also has this fuzzy edge issue.


#4

Hi orshika,

Usually, engrave takes longer time than cut.
If the structure is okay, the problem may due to that the data is not completely sent down but it automatically disconnect the communication.Could you please check if the Laserbot serial port is disconnected from the host computer when the progress bar is not finished.


#5

Yes I know it takes WAY longer haha, I use both functions :slight_smile: OK, let me repeat my initial problem. The issue came up with the EXACT SAME design that I just engraved PERFECTLY the day before. As in it worked Wednesday evening, sat idle all night (turned off) and then the next morning the issue started.

When the USB is not connected it won’t even start so yes, it is always connected and my problem is that this is INCONSISTENT. If it was always bad I wouldn’t be that worried but SOMETIMES it’s good, sometimes it’s bad. I’m just really anxious because this little machine is what I work with and I LOVE it so I sure hope there’s some logical explanation… :frowning:


#6

Ok I have isolated the problem. It’s only on LEATHER material. Problem is that I’ve used the same leather ALWAYS - without any problems, now it won’t come out right. I’ve tried the following materials with the SAME design:

  • Paper: GOOD
  • Birch wood: GOOD
  • Oak: GOOD
  • Walnut: GOOD
  • Unfinished cow hide: BAD
  • Unfinished buffalo hide: BAD

Here’s my issue: so far it worked on unfinished leathers just fine (attaching pics), crisp, beautiful edges and now it has problems on material cut from the VERY SAME hide! PLEASE PLEASE PLEASE help, I’m losing my mind! :frowning:


#7

Some further investigation shows that the issue arises when I try to resize JPG-s (I can see the fuzzy edges on the monitor if I zoom in on the interface) - again, I had no issues with this before - so I tried the same file in SVG format, no fuzzy edges BUT it won’t start - with the following error code: “SVG format won’t engrave in grayscale”. Problem is the software is set to black&white (see image) and the original SVG itself is as black and white, there’s no grayscale ANYWHERE.


#9

Correction: it IS fuzzy on paper as well. Harder to see but the edges ARE fuzzy :frowning:


#10

Hi orshika,

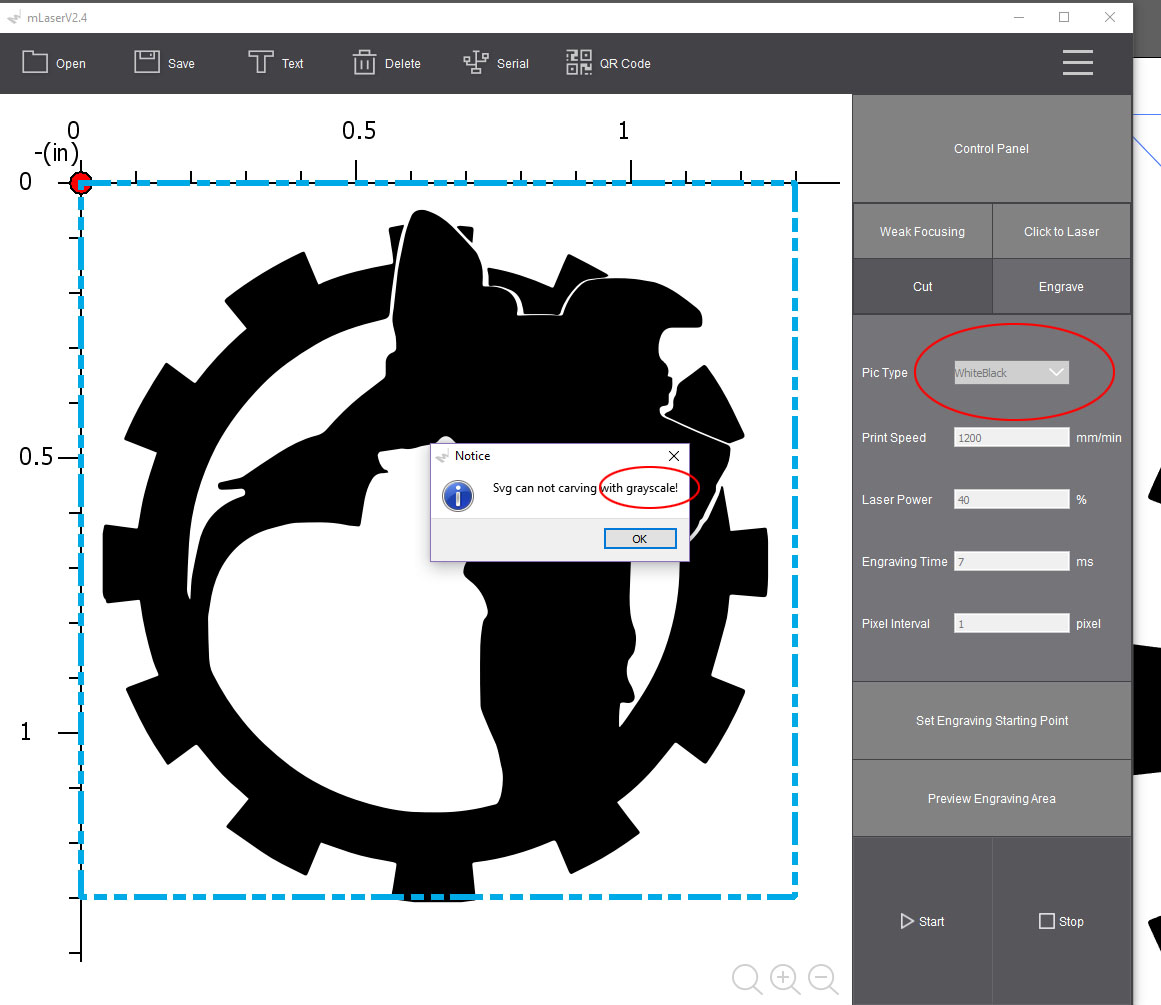
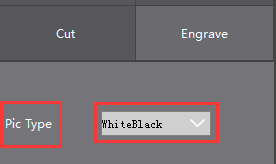
The SVG format image doesn’t support engrave, it only support cut, that’s why there is error “SVG format won’t engrave in grayscale”.

According to your description, everything was working properly the first day. Have you ever made any changes (like software, computer, the height between the Laser and the material) the next day?

Besides, let me confirm that currently there are two problems, right?

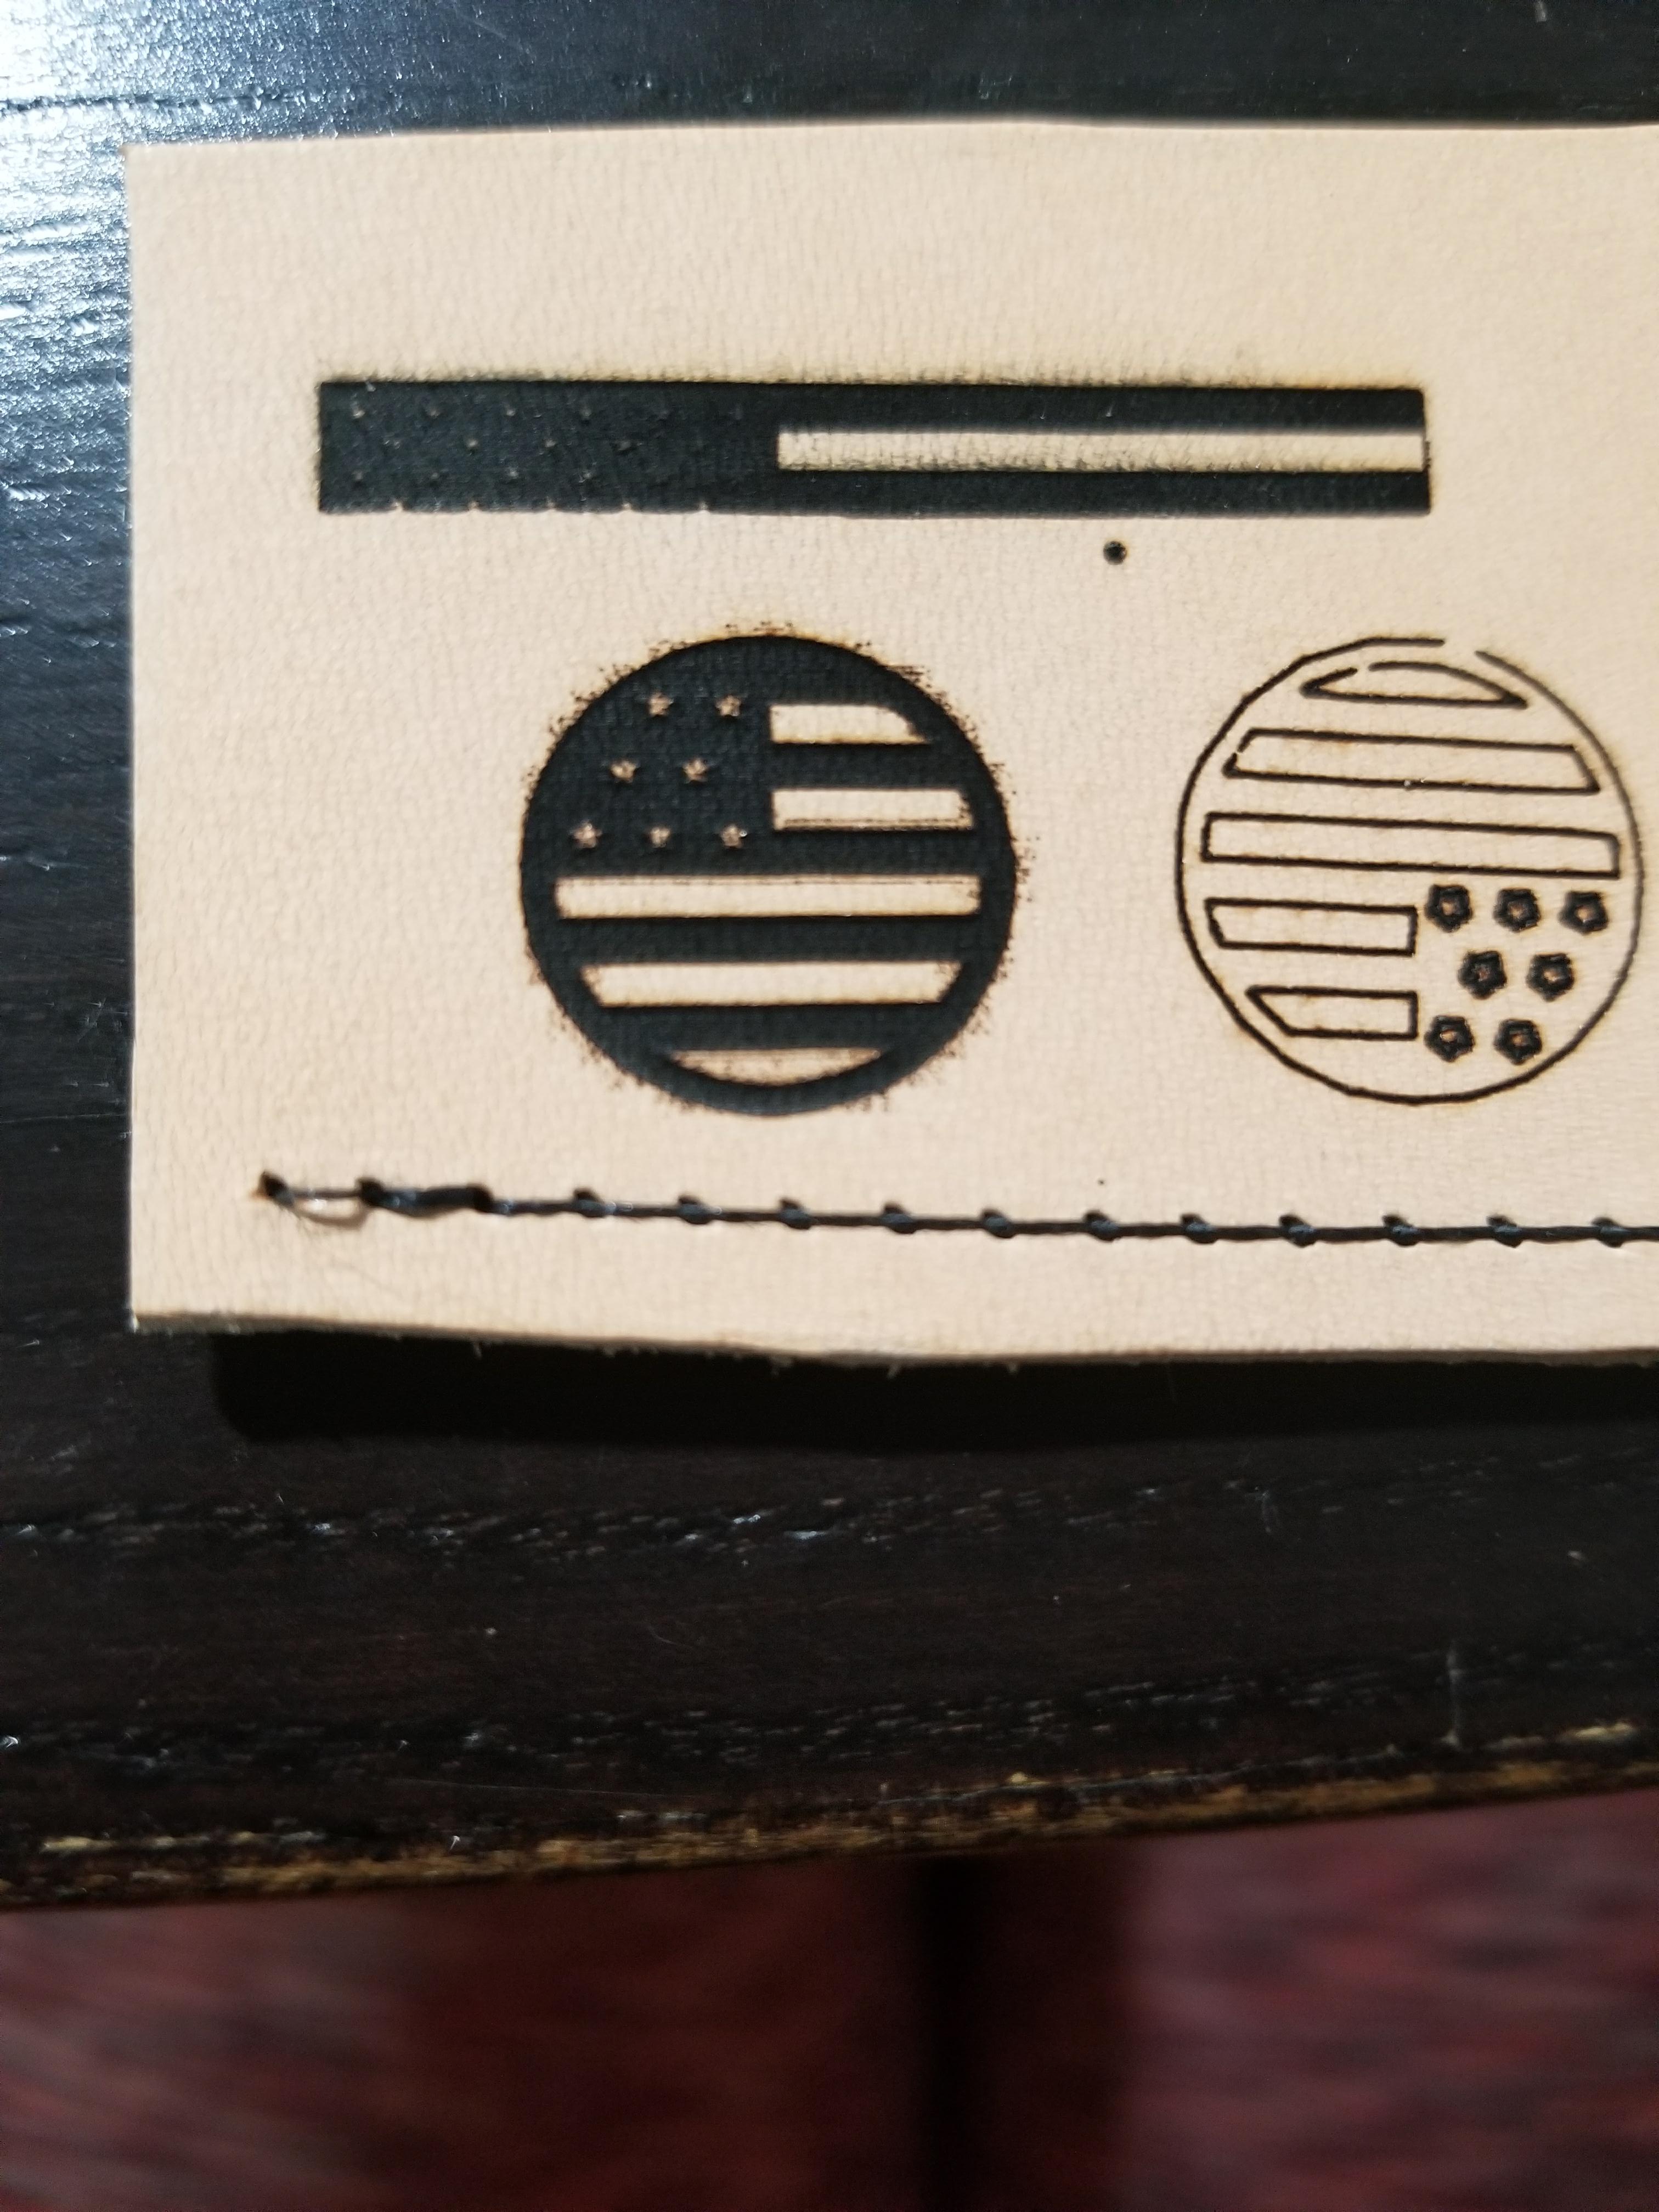
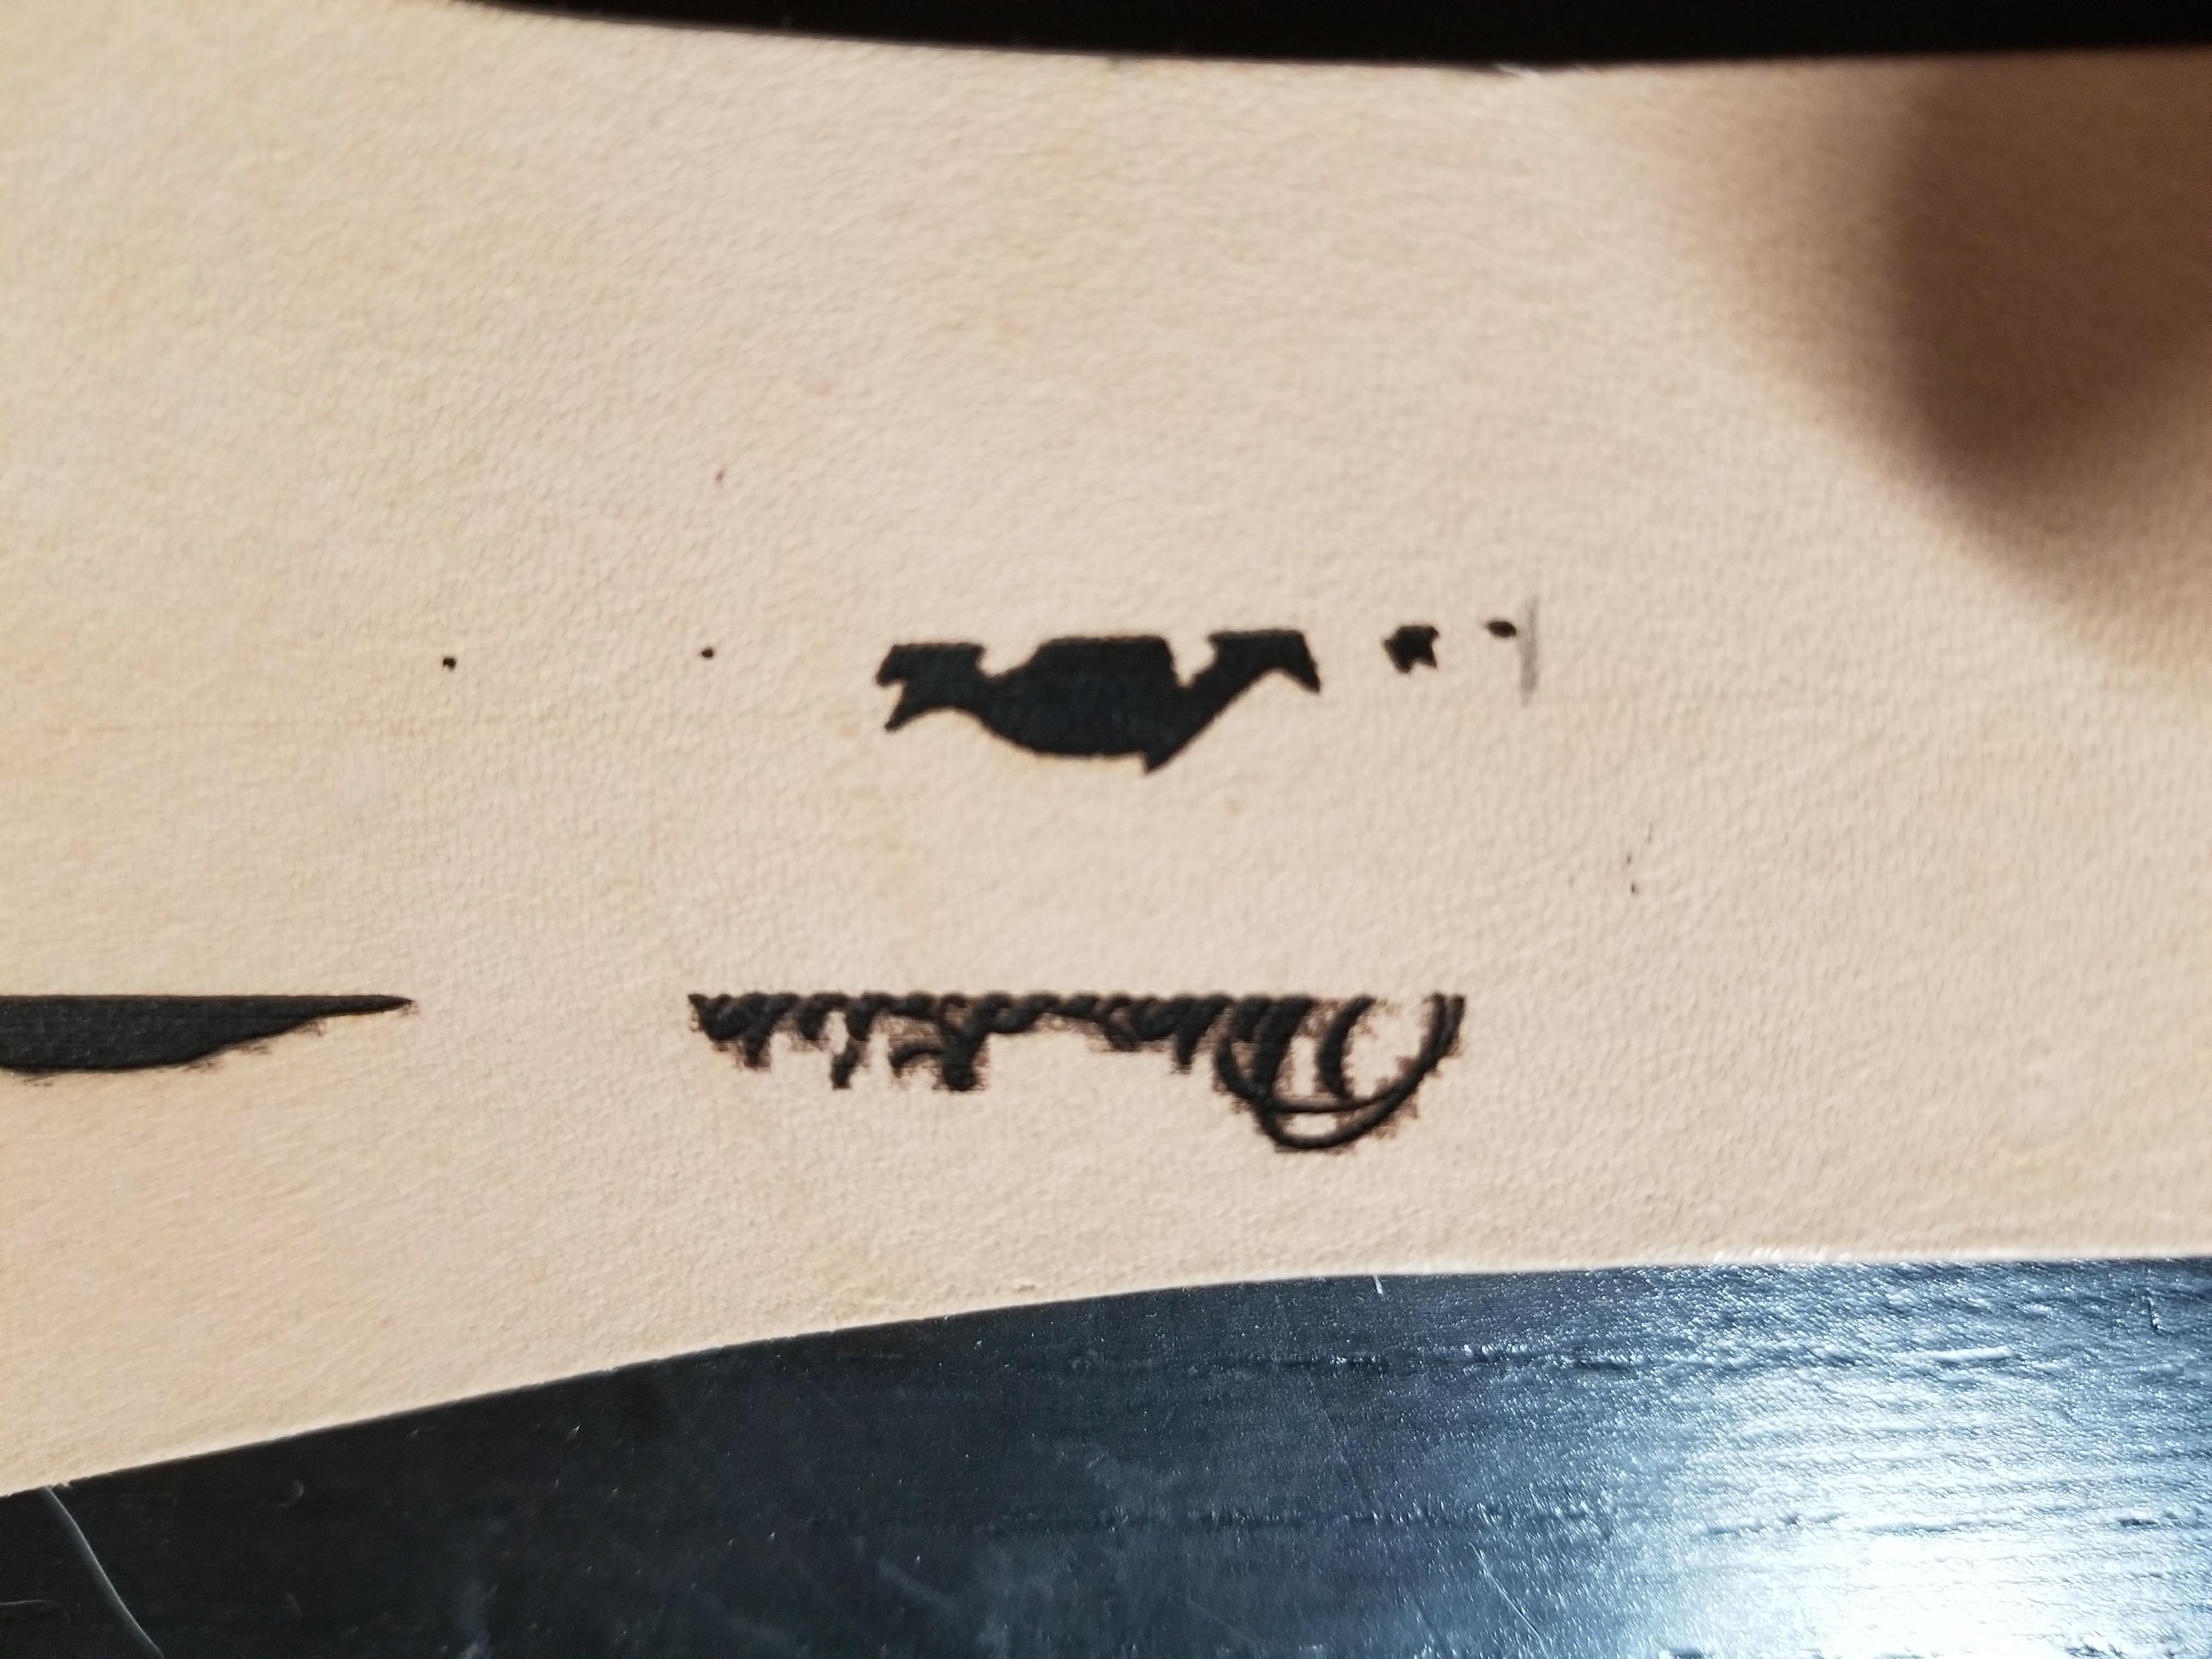
  1. Has fuzzy edge on no matter material when engrave a jpg image.
  2. Can’t engrave the image (which can be engraved completely before) completely.

For the first problem, here we tested a picture, when resize it much larger on the mLaser software, the edge will be a little fuzzy which is not avoidable. But when you resize it to a smaller size, there is no fuzzy on the edge. May I know how large you resize your jpg image? Do you resize it to the same size at the first day and the second day?
Also, could you please provide me the following info:

  1. The original jpg format image.
  2. What is the size you tried to resize it.
  3. Please take a picture for engrave result with the resized image.
    Anyway, please also try focus the beam for the Laser on Laserbot have a check.

For the second problem, do you mean it only happens when using the unfinished cow hide and unfinished buffalo hide?
Actually, we don’t mean that the serial port disconnected at beginning.
We suspect if the serial connection was unstable during engrave process? For example, the serial port was connected properly when you started engrave, during the engraving process the serial port might disconnect automatically. In this case, the Engraving progress bar on mLaser won’t go to 100%. Have you ever noticed this phenomenon?
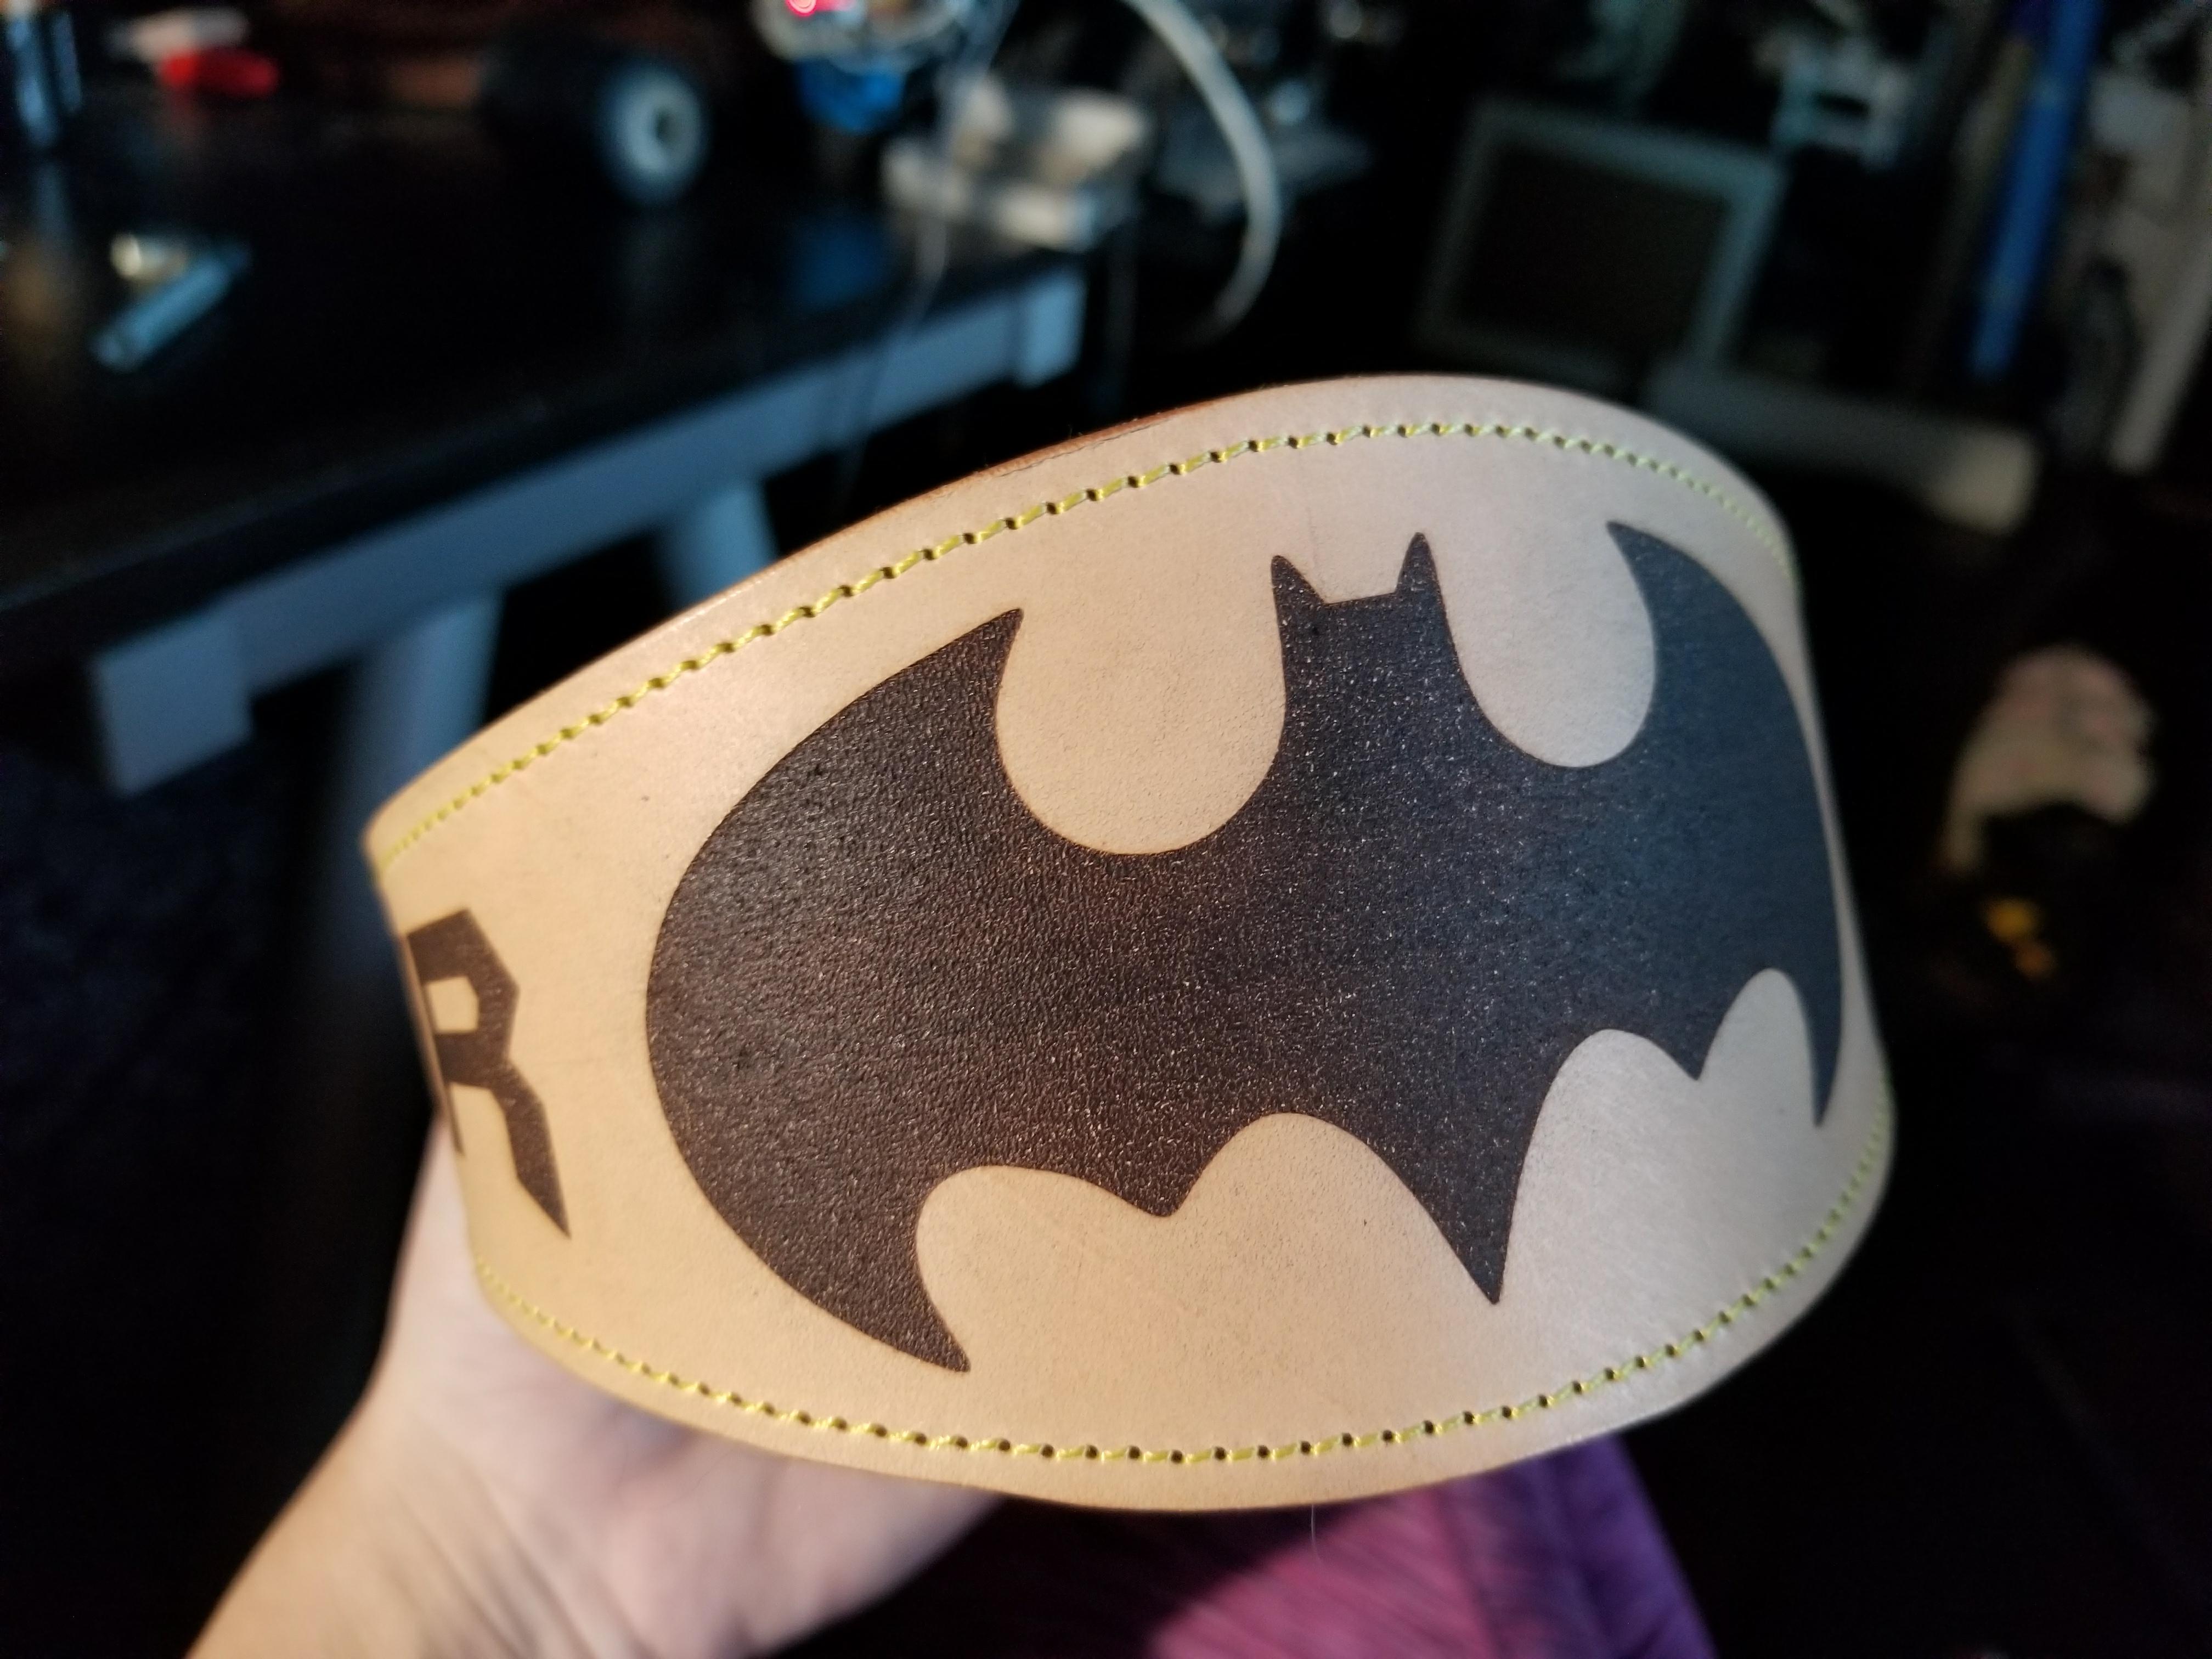

#11

Hello and thank you for your reply, I really appreciate your help!

For the first problem sure I would expect it to go fuzzy if I resize it larger but I have resized it SMALLER actually and if you zoom in on the interface you can even see the extra pixels appearing while you resize (regardless whether you go smaller or larger)…

Talking about resizing. When I design something in a certain size (in Photoshop or Illustrator) why is it displaying another size in the MLaser when I load it? What is the resolution I should use so the finished design will load into MLaser as is, 1:1?

Second problem: checking again the problem occurs on every material, only it’s less visible on some.

I don’t recall seeing the progress bar stalling but I’ll pay attention to it from now on.


#12

Paper (cardboard) vs Leather - image was NOT resized at all. Engraved as it was loaded.


#13

Hi orshika,

The mLaser software was written like this changing the size of the imported image to a standard size to make sure we can see its edge when it is very large. The engineer had made some unit conversion, so a pixel means 0.1mm in a display area. There is no way to show the image in 1:1 automatically. Only can resize the image manually by double click on the image and input the size you designed for it.

For the fuzzy edge issue, did you always choose the “WhiteBlack” in the Pic Type option? Please don’t choose Gray for such kind image.
image

Besides, when you engrave on Leather, please decrease the Laser power a little have a try.


#14

It is ALWAYS in black and white, I ALWAYS make sure ever since I had to throw away a material because it was in gray when I engraved text :frowning: Plus I barely even use the gray as I don’t really engrave grayscale stuff. By the way - may be coincidence but - in 200 dpi the loaded image was exactly the size I designed it in photoshop.

But you can see the difference between paper and leather - why could that be? Same image, same focal length, same “black and white”, same everything except for the material… Especially when it was PERFECT before on the very same leather? I’m kinda devastated…


#15

Hi orshika,

In 200 dpi, the image imported in the same size should be coincidence, normally, a pixel means 0.1mm in a display area. For the detailed unit conversion between varies units, it is hard to explain. But according to the engineer, the fuzzy edge won’t be caused by the resized image on mLaser software.

When you engrave on the leather, could you try decrease the Laser power a little bit and check if the fuzzy edge become less obvious?


#16

I did try that and it is less obvious but still clearly there - then again before I have had no problems at much higher (60%) power :frowning: I’m truly devastated, my business suffers because of this.


#17

Hi orshika,

Do you use the same leather material as the one you used before which works okay?
If not, is it possible for you to test again with the previous leather material?


#18