Working on a Maze Solving mBot - The Maze


#1

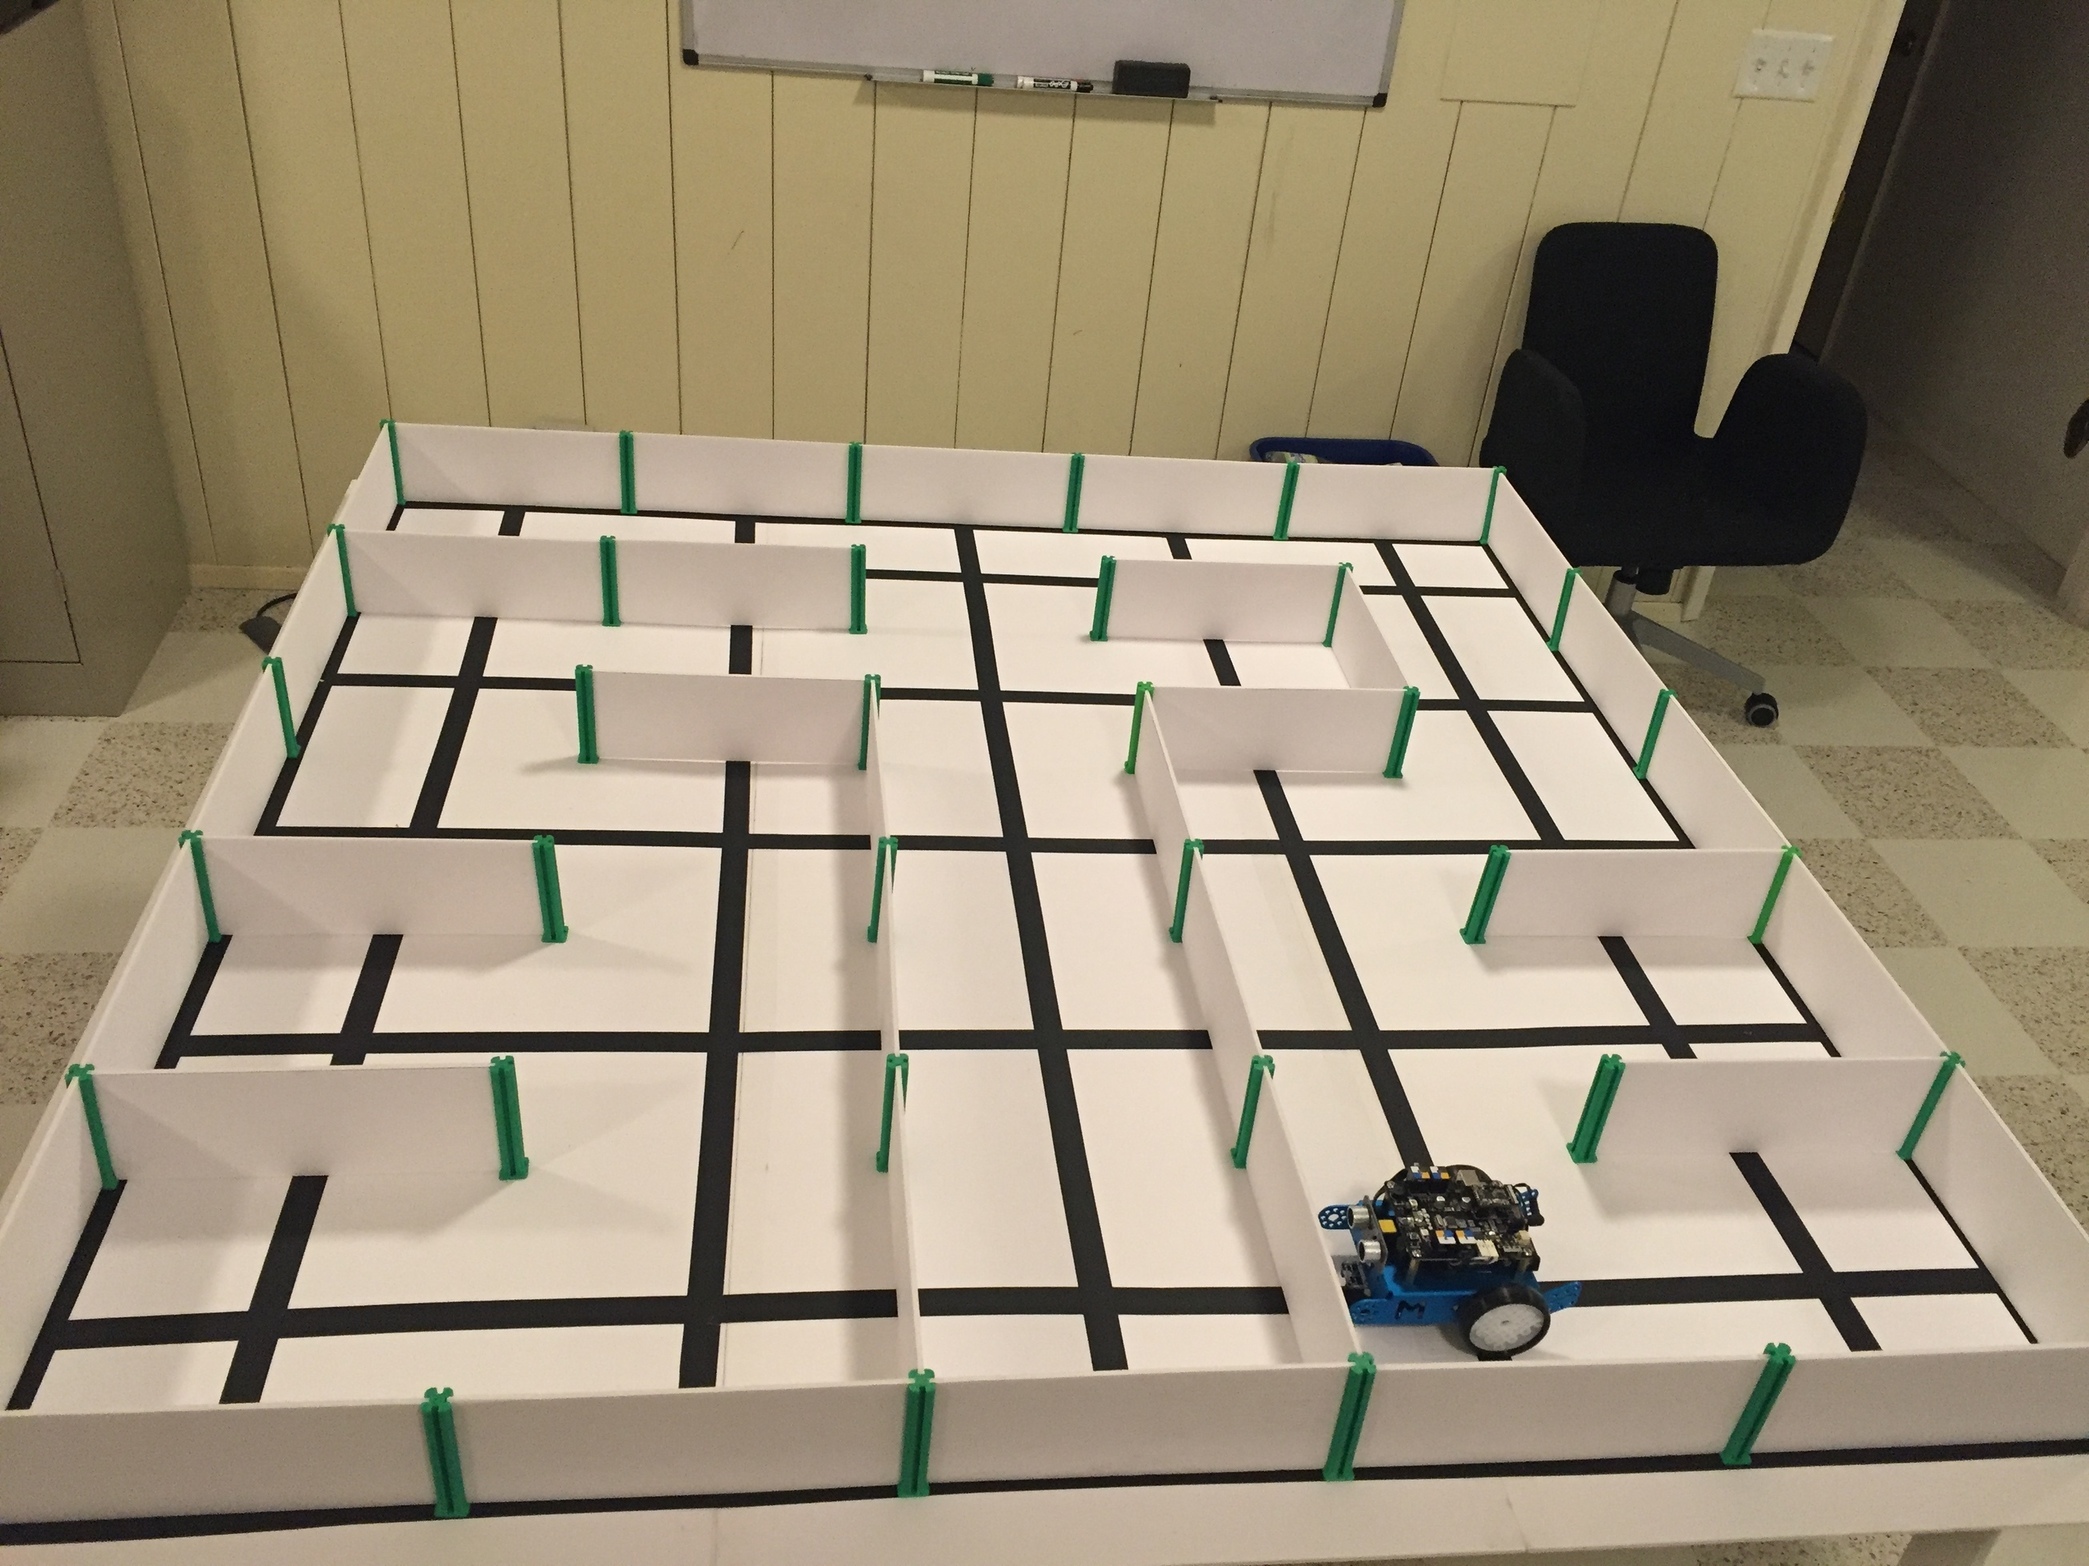
Here’s a picture of the maze I’m using to develop a maze solving program for the mBot for the class I’m teaching in February. The black lines are for ensuring that turns are fairly accurate using the line following sensor. The ultrasonic sensor will be used to determine distances to walls. The program will be creating a map of the maze as it goes, and when it solves the maze, it will turn around and go back to the start (hopefully) without any errors. :smile:

Unfortunately, this has to be built in the Arduino IDE because the extensions in mBlock don’t fully support all Scratch blocks (lists are the primary missing item for this exercise) and the over-the-air lag times associated with serial communications make accurate movements/turns overly difficult when running the program from the mBlock IDE.

In any case, it’s being a great exercise that tests what clever programming can do in a tightly constrained memory environment. Fun for all? :confused:


#2

This is a great showcase item! How are you constructing the maze box?
Great work.
I’d like to try this idea out with my courses.


#3

I designed some posts and pegs, 3D printed them, and used 4mm foam core board for the construction. You can get the 3D models here. The black lines are 1" fabric tape I found at the local electronics shop. My initial thought for the class I’m teaching is to use Tremaux’s algorithm or the Azkaban algorithm. Due to the over-the-air serial lag (and the lack of support for code generating lists from Scratch), this will be an Arduino IDE capstone exercise. As I mentioned in a different thread, I’m using the line-following sensor to ensure that the robot tracks (more or less) in a straight line and makes turning a bit more accurate. The Ultrasonic sensor will be used to map walls (and to back up if necessary).


#4

I am really impressed with your effort to work with the “constraints” of the standard mBot and using the line follower to accomplish what an add on like the gyro or compass would do. Pretty clever.


#5

Yeah, I guess I have too much time on my hands (or I’m too stubborn to give up easily!). :wink:

When I was a wee lad, we had to make do with what we had and it forced us to think out of the box. I guess I’ve just never been one to walk away from a challenge, so working within tight constraints is actually fun for me (yes, I should really get one of those things they call a life). :smiley:


#6

I love this project. I am trying to set something up similar for younger kids. The robot can follow the black line on the sample paper. I am testing different mediums for it to follow, blue tape, black crayon, thin black marker etc. Can you tell me what makes the robot follow certain lines, colors or mediums? You chose 1in fabric tape from an electronics store. Why?
Thanks


#7

The line follower sensor uses an infrared detector that can distinguish between light and dark. I chose black on white to ensure the highest contrast. The line follower sensor is not a color sensor, so the color of the line is likely not as pertinent as the the degree of contrast.

The choice of black fabric tape over standard electrical tape was to eliminate any stray readings that might be caused by the shininess of the tape surface. I chose the 1" width to ensure that the tape was wide enough that the line following sensor could have both of the infrared detectors over the tape.

A maze solving sensor array for lines would need to have a downward-facing IR sensor arrangement of:

                E        E     E        E
                R        R     R        R

                      E = Emitter
                      R = Receiver

so that the two outside sensors could detect intersections.

@Pioneer, the above would be a nice add-on for all of the robots. :slight_smile:


#8

Thanks for taking the time to post back. Very excited to keep playing and trying new functions.


#9

And now I have the Mighty mBot solving mazes!


#10

Hi @chuckmcknight

Do you mind sharing the codes with us?

Regards,
Indra


#11

Hi @md_indra,

I’ll be posting all of the source code for the little ebook I’m writing towards the end of February/early March in a Github repo. I’m trying to make sure things are well-documented before I throw it out there and I’m in the process of writing the ebook which is taking more time than I anticipated. Proceeds from the sale of the ebook are intended to fund the robotics team my son is in, so I’m pretty focused on getting that done first. Your patience is appreciated.


#12

Hi

Did you finish your ebook?

Regards
Michael


#13

Hi @RoboteShop,

Yes, you can get it a Amazon (.mobi) or at Leanpub (.pdf, .epub, .mobi). The links are:

Amazon (link)

Leanpub (link)

The PDF is the best quality from a typesetting perspective. ePub / .mobi are still something of a pain to get right for all screens sizes. The Amazon version is $20 USD, the Leanpub version is suggested at $20 USD but can be purchased for $17.50 if you are really cramped for cash. All of the proceeds go to a pool to fund school robotics programs for middle and high school students.

Best regards,

Chuck


#14

hi chuckmcknight, i want to learn about maze solving mBot so i need source file

Please send the source file to the address ibrahimpulat1@gmail.com

Thank you in advance


#15

@ibrahimpulat,

The code is in a Github repo. It is a companion to the book “A Gentle Introduction to Robotics” that is available at Leanpub (link). The proceeds from the book go to fund school robotic programs, so I’d like to ask that you consider buying a copy of the book to support the kids.

Thanks!

@chuckmcknight


#16

Hey Chuck,
Just bought the wi-fi mbot online. I really want to do this maze for my 4th graders soon. Is there a way I can purchase a maze similar to yours thats already been built??? I am tech savy but not too good with building actual mazes. Thanks.
P.S. You are awesome man!


#17

Hi,

Not really. The 3D printer files for the posts are on Thingiverse (link), but the rest of the maze was 4mm foam core that you can buy at any office supplies house, 1" wide non-reflective black tape, and some clear packing tape at the seams. The overall maze is about 5’ x 5’ and the posts are on 11" centers.

You could probably build it out of posterboard and just tape (my son prefers white duct tape from Home Depot) the posts to the board, then tape the walls to the posts. For the posts you could use almost anything (dowels, etc.) so long as you can firmly attach them so that a collision with the mBot won’t tear the whole thing down. In fact, unless you want a reconfigurable maze you might find that having the students design and build the maze is a great learning activity as well. :slight_smile:

I should also mention that Makeblock now has a line follower sensor array that would not require the walls but I haven’t written the program for that yet. :slight_smile:

Regards,

Chuck


#18

This is awesome!

By the way, in similar maze-solving-robot experiments, the winning(est) solution turned out to be “always turn left” unless there is no “left”, in which case a “right” turn or turnaround is executed. Of course, always turning right works too.

Looking forward to seeing your code.


#19

However, there are mazes which can not be solved using the “always turn left” approach :slight_smile:


#20

@Andreas,

Exactly so. A left-hand wall follower will not work on mazes that have a loop. However, I wanted to constrain myself to just the mBot kit and mBlock does not provide any data structures for code generation. Therefore, a stateless program that has the robot living “in the moment” was what I worked out as being a reasonable solution that could be taught to children and non-technical people. :slight_smile:

Chuck