The demo of robot arm kit


#1

Hi everyone, we are working on robot arm kit. This is the 1st version of it. Please post everything you think about it. The BOM list and 3D model are coming soon.

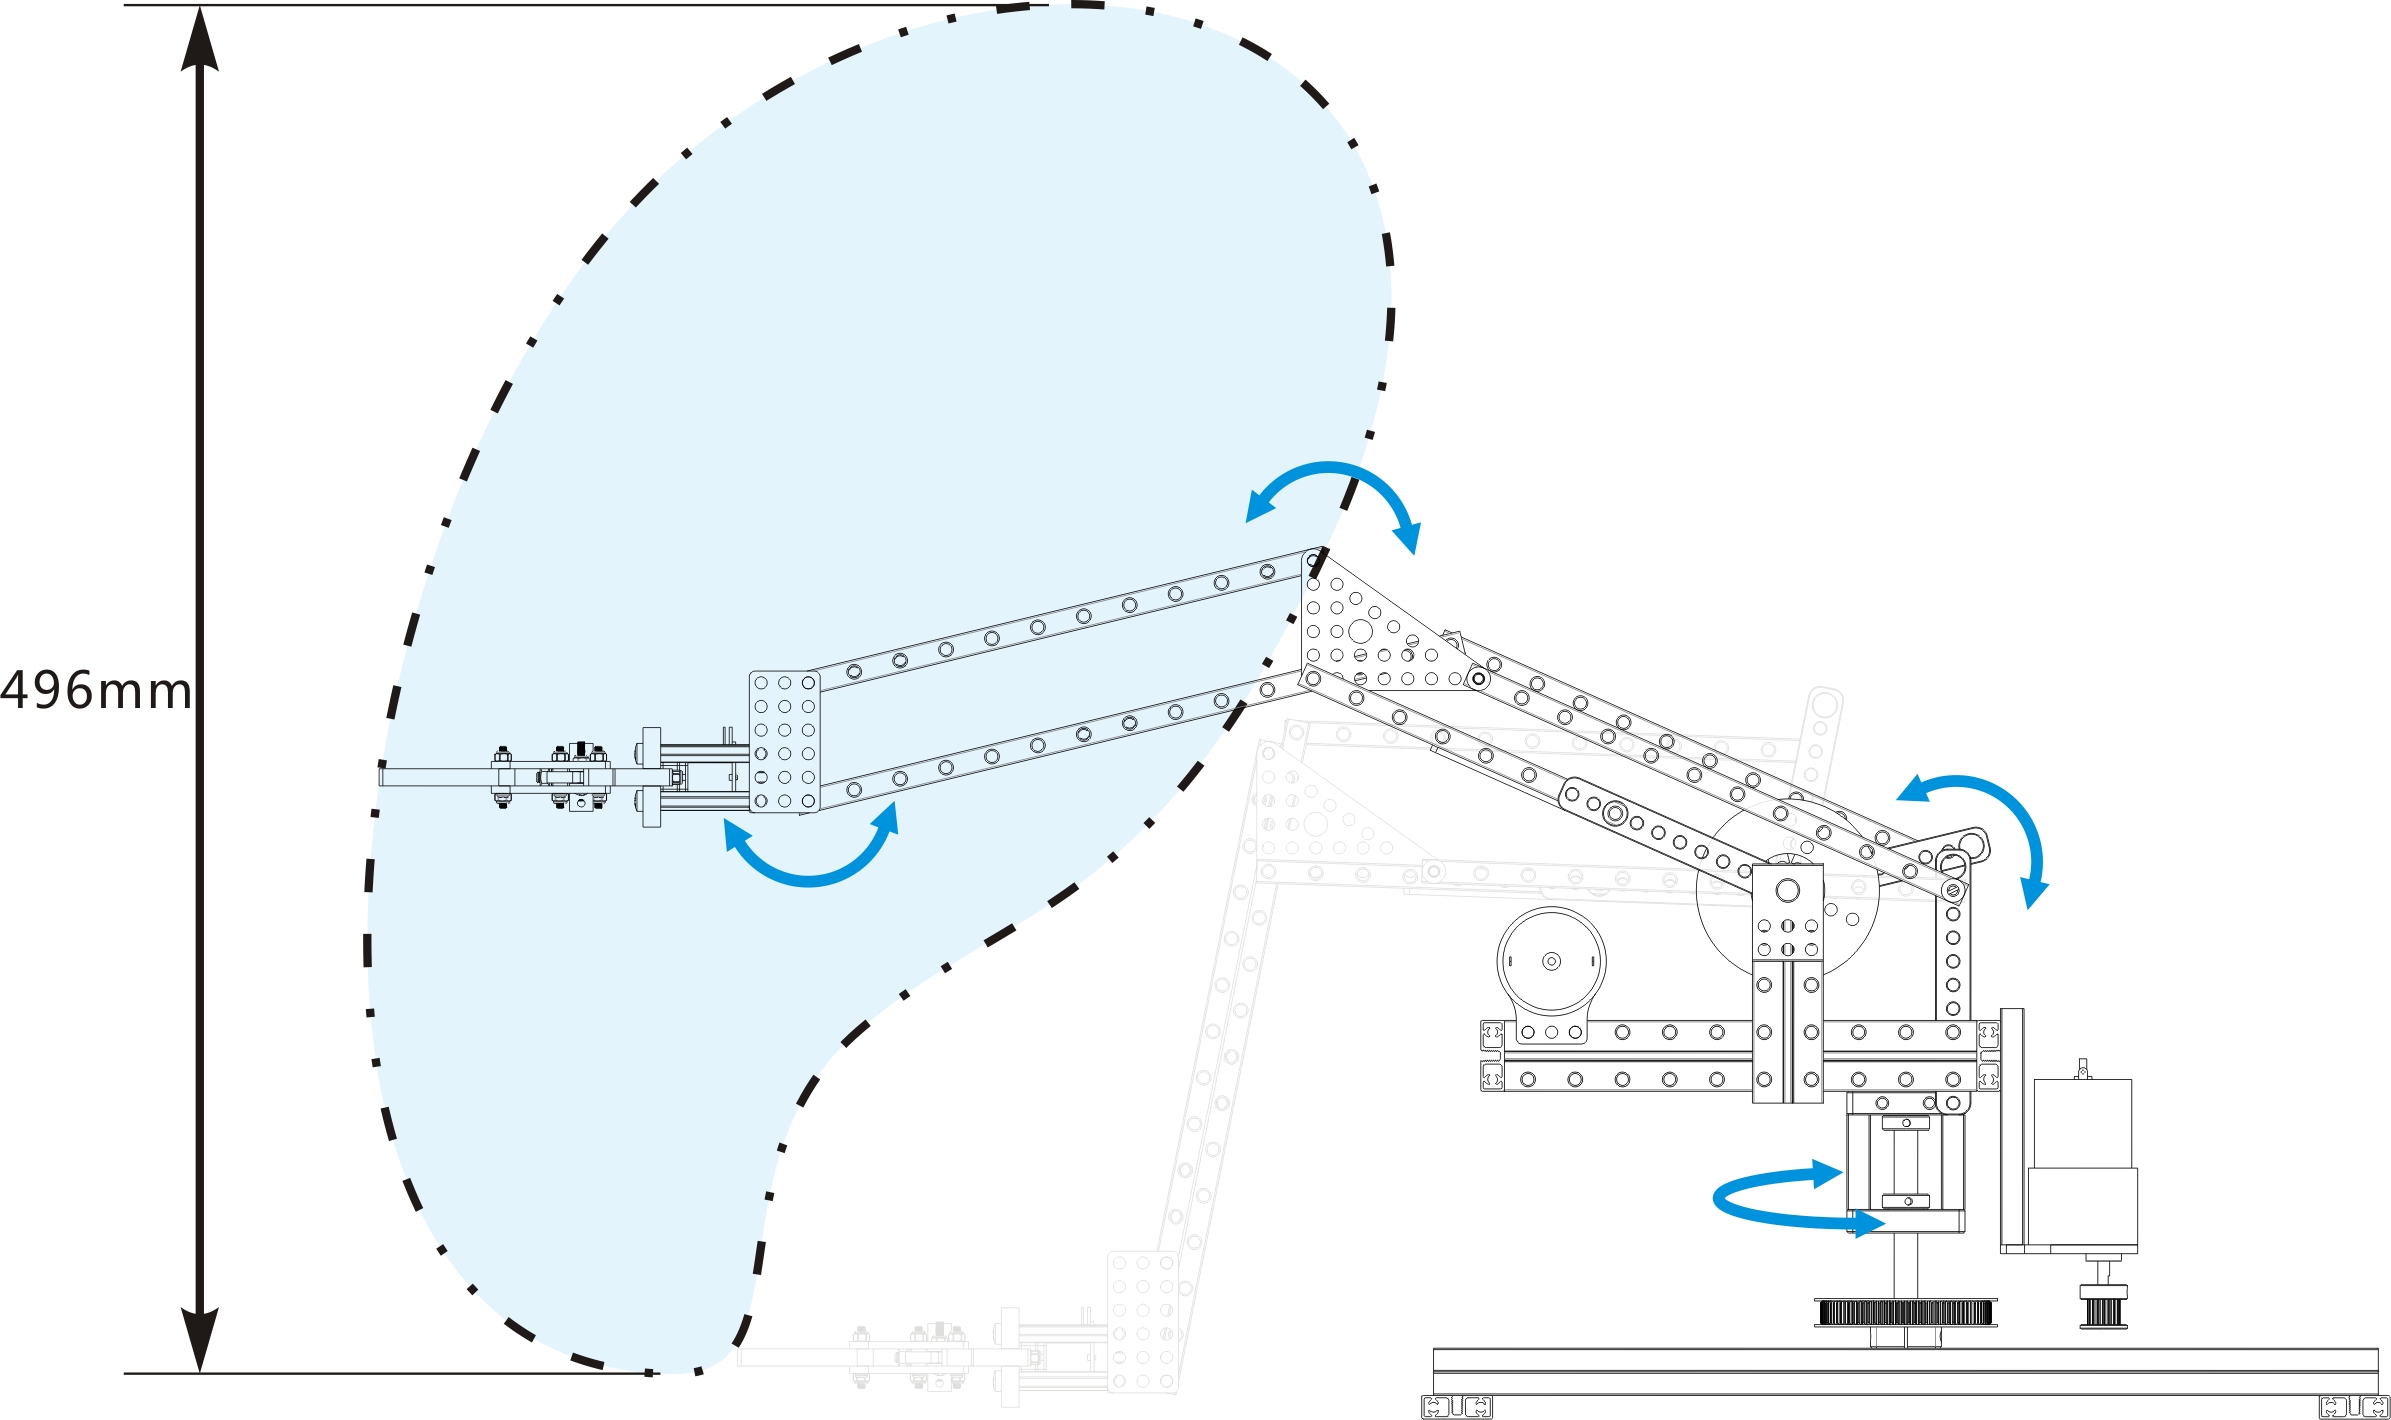
The motion range, XZ Plane
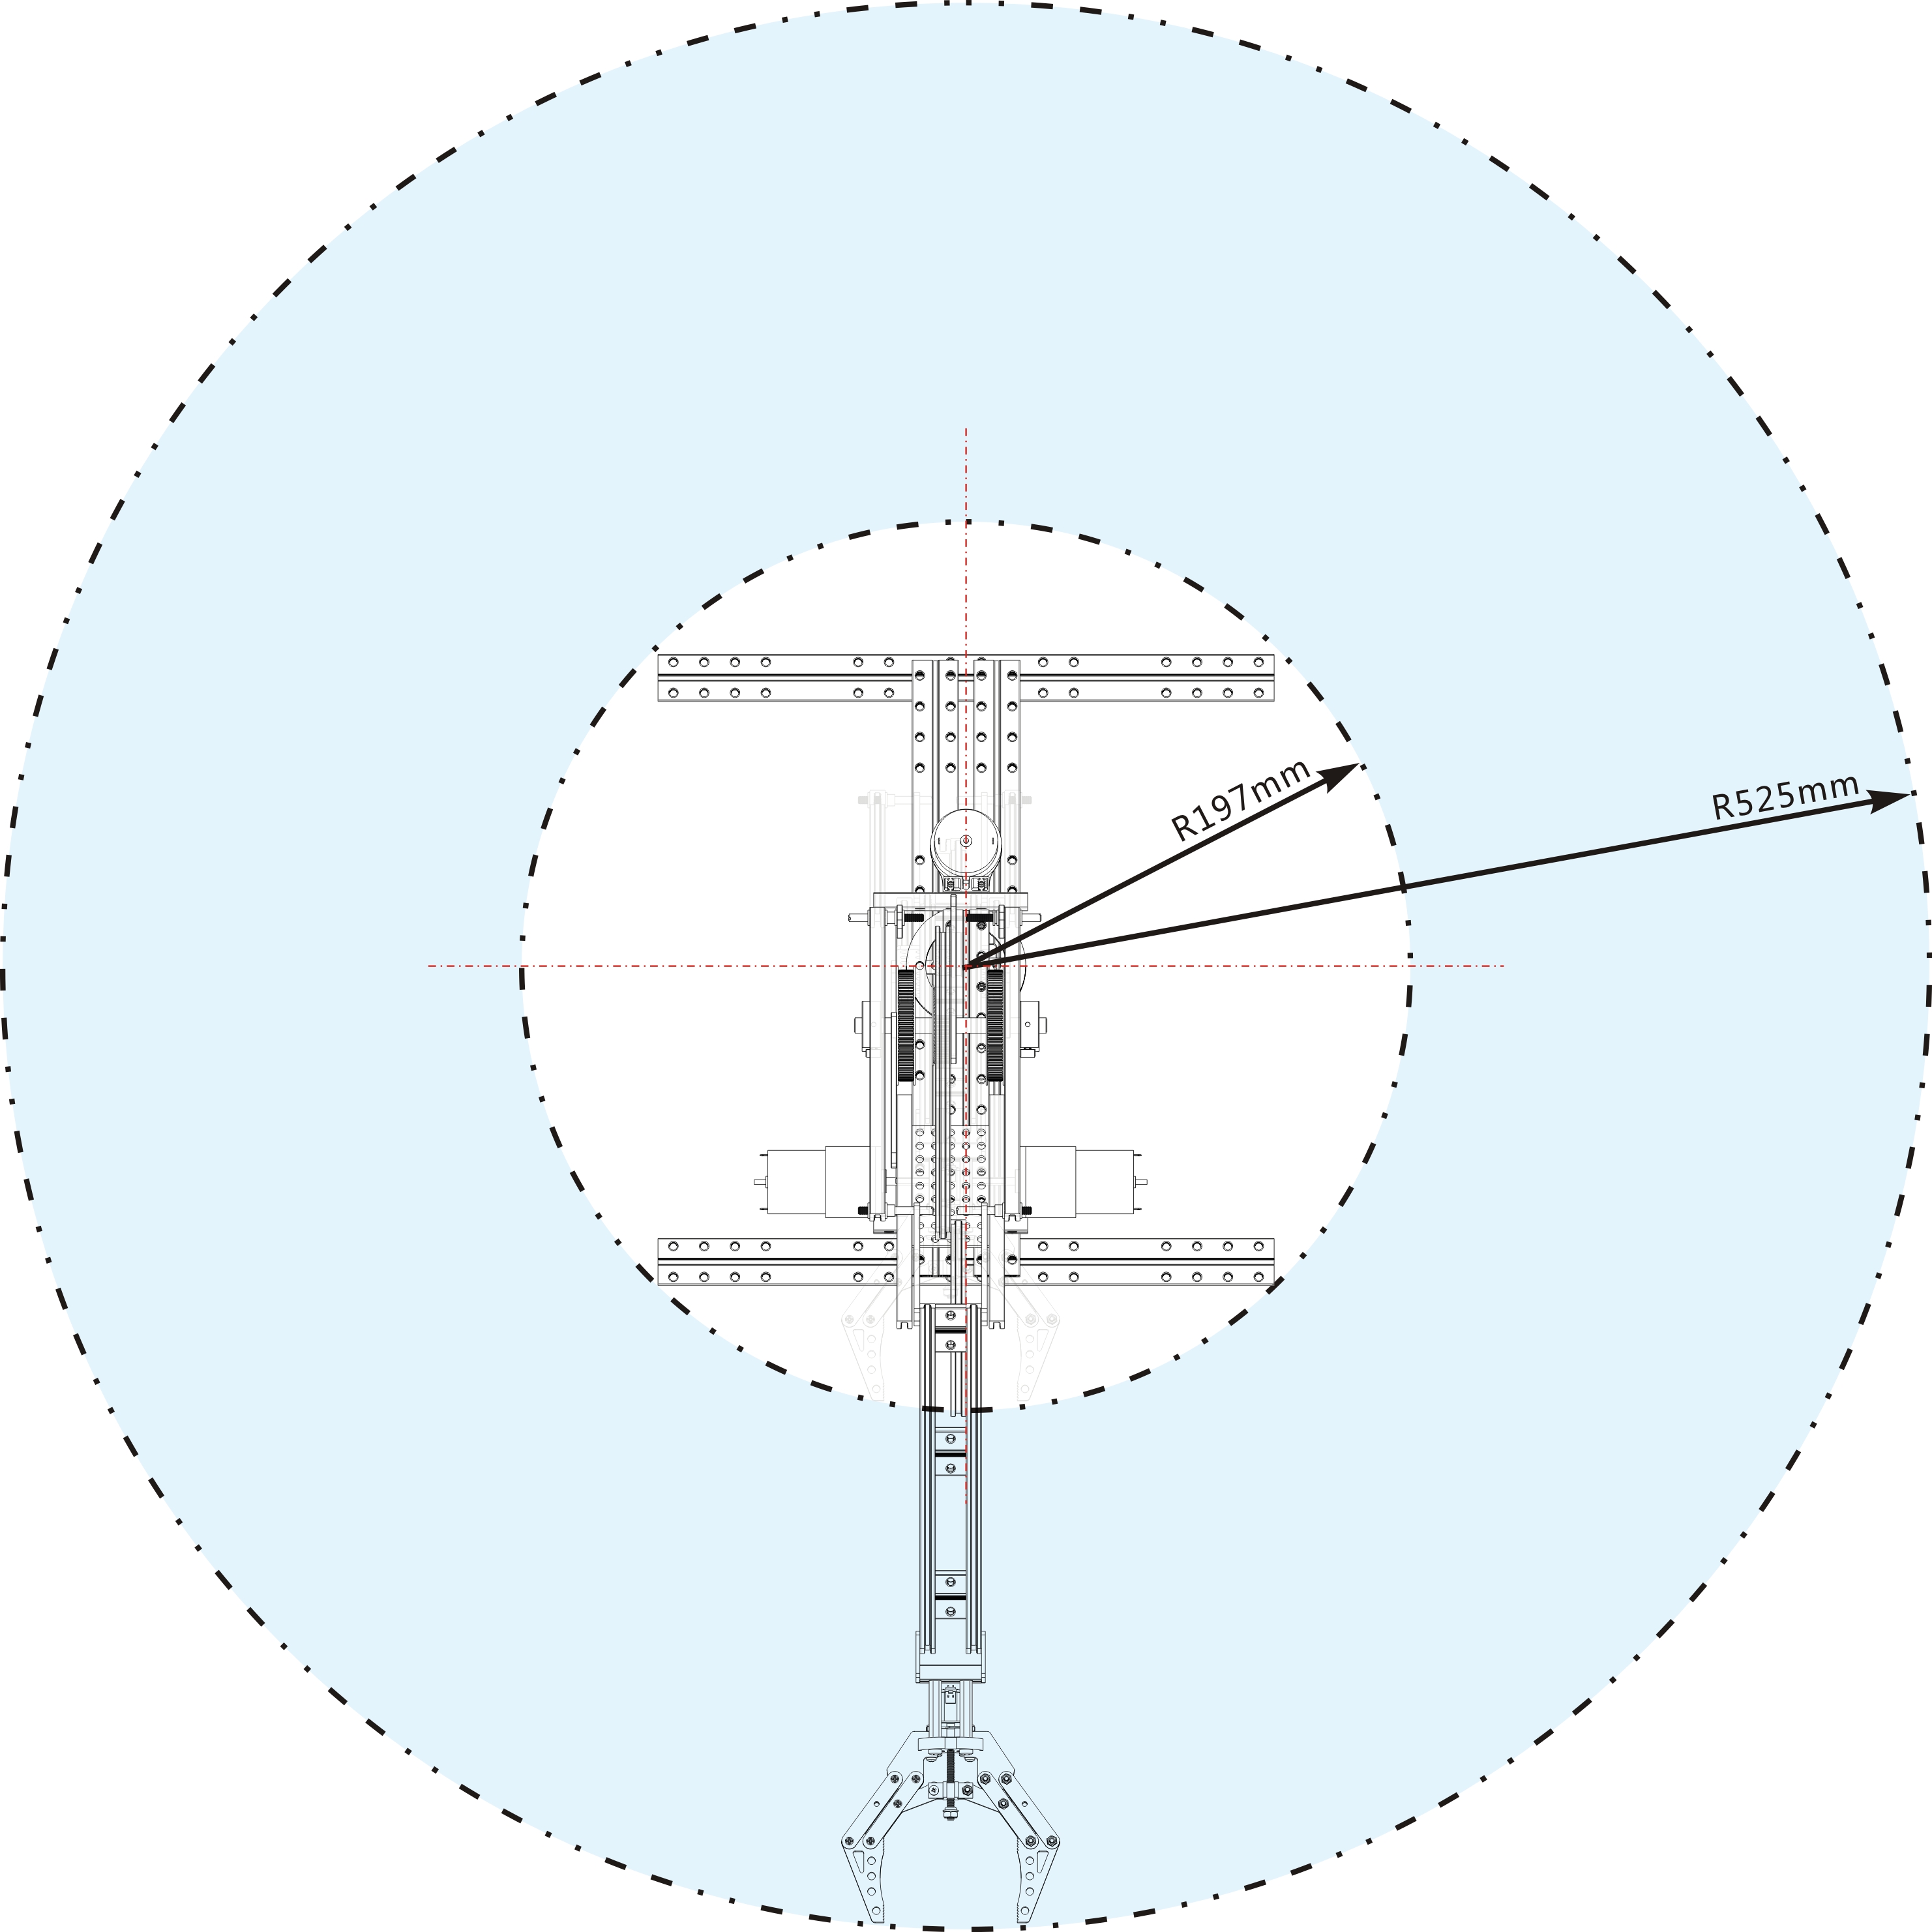
XY Plane

Here is the program (In this case, the MPU6050 is used to correct the angle sensor at the first time, you can ignore that)

#include <Makeblock.h>
#include <SoftwareSerial.h>
#include <Wire.h>

#define A_RATIO 0.14516 // 18:62/2
#define B_RATIO 0.1125  // 18/80/2

#define DOCK_X 762
#define DOCK_Y 253
#define V_A 769
#define V_B 646


MeEncoderMotor a(0x2, 0x0); //Motor at Slot1
MeEncoderMotor b(0x2, 0x1); //Motor at Slot1
MeEncoderMotor c(0x3, 0x0); //Motor at Slot1

MeDCMotor grab(M2);
MePort crane(PORT_3);
// the control
MePort p0(PORT_6);
MePort p1(PORT_7);

MePort btn(PORT_8);
// the poly matrix of murata's potential meter
#define A_0 607.47
#define A_1 3.063

int follow = 0;
int init_c, init_x, init_y;
float arm_x,arm_y,last_x,last_y;
float ctrl_a, ctrl_b, ctrl_c, last_a, last_b, last_c;
float tmp;

void setup() {
  a.begin();
  b.begin();
  c.begin();
  Serial.begin(9600);
  MPU6050_init();
  delay(300);
  backToDock();
  a.begin();
  b.begin();
  c.begin();
  init_c = p1.Aread2();
  // x y use potential value instead
  init_x = DOCK_X;//crane.Aread2();
  init_y = DOCK_Y;//crane.Aread1();  
}

void backToDock()
{
  int x = crane.Aread2();
  float angx = (DOCK_X-x)/A_1;
  moveA(angx);
  int y = crane.Aread1();
  float angy = (DOCK_Y-y)/A_1;
  moveB(angy);
  delay(1000);
}

char buff[64];
char buffIndex = 0;

void loop() {
  while (Serial.available()) {
    char c = Serial.read();
    Serial.print(c);
    if (c == '\n') {
      parseCommand(buff);
      memset(buff, 0, 64);
      buffIndex = 0;
    } else {
      buff[buffIndex++] = c;
    }
  }

  arm_x = (crane.Aread2() - init_x) / A_1;
  arm_y = (crane.Aread1() - init_y) / A_1;
  ctrl_a = -(p0.Aread2()-V_A) / 2.1682f; // different??
  ctrl_b = (p0.Aread1()-V_B) / 2.1682f;
  ctrl_b = ctrl_b-ctrl_a; // change to absolute angle
  ctrl_c = (p1.Aread2() - init_c) / 3.5700f; // poly fit for potential base
  //Serial.print(crane.Aread1());Serial.print(",");Serial.println(init_y); 
  //Serial.print(crane.Aread2());Serial.print(",");Serial.println(init_x); 
  //Serial.print(p1.Aread2());Serial.print(",");Serial.println(init_c);
  delay(100);

  int btna = btn.Aread2();
  //Serial.println(btna);
  if (btna < 50) {

  } else if (btna > 450 && btna < 500) {
    grab.run(254);
  } else if (btna > 640 && btna < 680) { // follow crane
    if (abs(ctrl_a - last_a) > 3) {
      moveA(ctrl_a);
      last_a = ctrl_a;
    }
    if (abs(ctrl_b - last_b) > 3) {
      moveB(ctrl_b);
      last_b = ctrl_b;
    }
    if (abs(ctrl_c - last_c) > 3) {
      //moveC(ctrl_c/2); // ratio to 1:2
      moveC(ctrl_c);
      last_c = ctrl_c;
    }
  } else if (btna > 710 && btna < 735) {
    grab.run(-254);
  }  else {
    follow = 0;
    grab.stop();
  }

}

#define M_PI 3.14159265359
void parseCommand(char * cmd)
{
  if (cmd[0] == 'r') {
    float posa = a.getCurrentPosition();
    float posb = b.getCurrentPosition();
    float posc = c.getCurrentPosition();
    Serial.print(posa);    Serial.print(",");    Serial.print(posb); Serial.print(",");    Serial.println(posc);
  }else if (cmd[0] == 'a') {
    Serial.print(getA());Serial.print(",");Serial.println(ctrl_a);
  }else if (cmd[0] == 'b') {
    Serial.print(getB());Serial.print(",");Serial.println(ctrl_b);
  }else if(cmd[0]=='c'){
    Serial.print(ctrl_c);Serial.print(",");Serial.println(init_c);
  }else if(cmd[0]=='i'){
    Serial.printf("x=%d,y=%d\n",init_x,init_y);
  }else {
    int posa, posb, posc;
    sscanf(cmd, "%d %d %d", &posa, &posb, &posc);
    Serial.printf("move %d,%d,%d\n", posa, posb, posc);
    if (posa > 90 || posa < -90 || posb > 90 || posb < -90 || posc > 180 || posc< -180) {
      Serial.printf("error value\n");
    } else {
      moveA(posa);
      moveB(posb);
      moveC(posc);
    }
  }
}

void moveA(int ang)
{
  float targetAng = ((float)ang);
  float value = targetAng / A_RATIO;
  Serial.print("move a="); Serial.print(targetAng); Serial.print(" value="); Serial.println(value);
  a.moveTo(value, 0.3f);
  while(abs(a.getCurrentPosition()-value)>10){
    Serial.println(a.getCurrentPosition()-value);
  }
  Serial.println("done a");
  
}

void moveB(int ang)
{
  float targetAng = ((float)ang );
  float value = targetAng / A_RATIO;
  Serial.print("move b="); Serial.print(targetAng); Serial.print(" value="); Serial.println(value);
  b.moveTo(value, 0.3f);
  while(abs(b.getCurrentPosition()-value)>10){
    Serial.println(b.getCurrentPosition()-value);
  }
  Serial.println("done b");
}

void moveC(int ang)
{
  float targetAng = (float)ang;
  float value = targetAng / B_RATIO;
  Serial.print("move c="); Serial.print(targetAng); Serial.print(" value="); Serial.println(value);
  c.moveTo(value, 0.3f);
  while(abs(c.getCurrentPosition()-value)>10){
    Serial.println(c.getCurrentPosition()-value);
  }
  Serial.println("done c");
}

float getA()
{
  int ax = acc_x();
  int ay = acc_y();
  float ang = atan2(ay, ax) / M_PI * 180;
  return ang;
}

float getB()
{
  int ax = acc_x();
  int ay = acc_y();
  float ang = atan2(ax, ay) / M_PI * 180;
  return ang;
}

void systemReset(){
    a.begin();
    b.begin();
    MPU6050_init();
    delay(1000);
    buzzerOn();delay(300);buzzerOff();delay(100);
    buzzerOn();delay(100);buzzerOff();
    buzzerOn();delay(300);buzzerOff();delay(100);
}

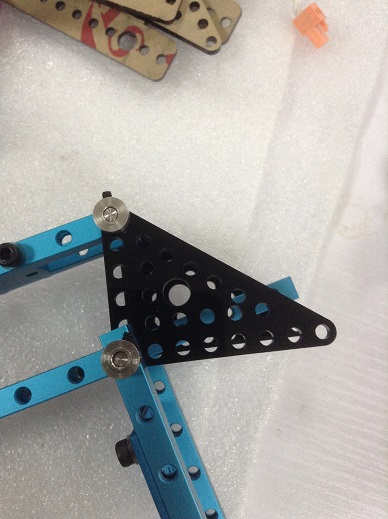
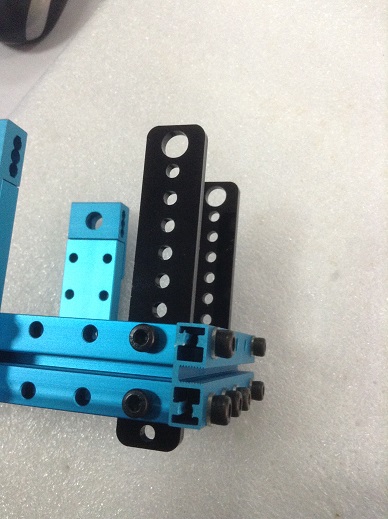
New parts, we have made some improvement after I finished the video. More holes on the plates.


#2

Looks really cool, but yeah - you need to resolve the choppyness. It sort of looks like the sensor isn’t properly grounded in some way? I’d try to get a more steady sensor reading at least.

There’s ways around of course. It sort of looks like it lost it’s rotation-reference at the end of the video, but have you tried adding a smoothing function? Just an array of the last 15-30 position that is then averaged. If you have a problematic sensor that varies a lot, that usually does the trick.


#3

Thanks for your suggestion about the smoothing function. @waldschip is our engineer, he will try this later. It seems that the PID feedbcak of the encoder motor is not stable under the influence of gravity.


#4

You could add a counterweight to each of the arms, that should help. I think just the 4 button and joystick may be a better control system.


#5

Thanks, @whitepass. we are trying it. And for the control system, this version is just a prototype. There is no doubt that the buttons and joystick are much more familiar to people. It looks like the Sony 2.4 GHz remote control.


#6

I love the robot arm control you show in the video. When can we buy the encoder?


#7

Thanks! The encoder will come soon. We are developing the software which is used to get the status of the motor.


#8

Update!! Here is the demo of V0.2


#9

It’s fantastic!!! Great job :smiley:


#10

How do you connect to a game controller?


#11

Hi @BridgerWild, here is the code,

#include <Makeblock.h>
#include <Arduino.h>
#include <SoftwareSerial.h>
#include <Wire.h>

MeDCMotor arm0(M1);
MeDCMotor arm1(M2);
MeDCMotor base(PORT_1);
MeDCMotor grab(PORT_2);

#define UP 0x01
#define DOWN 0x02
#define LEFT 0x04
#define RIGHT 0x08

#define ONE 0x01
#define TWO 0x02
#define THR 0x04
#define FOU 0x08

#define L2 0x40
#define L1 0x10
#define R2 0x80
#define R1 0x20

#define SELECT 0x10
#define START 0x20

void setup()
{
  Serial.begin(9600);
  Serial1.begin(115200);//2.4G接收串口硬串口
}

uint8_t lastchar;
uint8_t cmd[16];
uint8_t cmdindex;
void loop()
{
  if(Serial1.available()){
    uint8_t c = Serial1.read();
    //Serial.print(c,HEX);
    if(c!=0xff){
      if(c==0x55 && lastchar==0xAA){ // the begin of cmd
        cmdindex = 0;
      }
      cmd[cmdindex++] = c;
      if(cmdindex>5){
        parseCmd();
        cmdindex = 0;
      }
      lastchar = c;
    }
  }
}

void parseCmd()
{
  int i;
  uint8_t btnR, btnL, btnC, btnS;
  btnR = cmd[4] & 0x0f;
  btnL = cmd[5] & 0x0f;
  btnC = cmd[4] & 0xf0;
  btnS = cmd[5] & 0xf0;
  
  if(btnR & ONE){
    Serial.println(F("R 1"));
    grab.run(250);
  }else
  if(btnR & THR){
    grab.run(-250);
    Serial.println(F("R 3"));
  }else{
    grab.stop();
  }
  
  if(btnR & TWO){
    Serial.println(F("R 2"));
  }  

  if(btnR & FOU){
    Serial.println(F("R 4"));
  }
  
  if(btnL & UP){
    arm0.run(210);
    Serial.println(F("L up"));
  }else
  if(btnL & DOWN){
    arm0.run(-250);
    Serial.println(F("L down"));
  }else{
    arm0.stop();
  }
  
  if(btnL & LEFT){
    base.run(250);
    Serial.println(F("L left"));
  }else
  if(btnL & RIGHT){
    base.run(-250);
    Serial.println(F("L right"));
  }else{
    base.stop();
  }
  
  if(btnC & L2){
    arm1.run(-180);
    Serial.println(F("L2"));
  }else
  if(btnC & L1){
    arm1.run(255);
    Serial.println(F("L1"));
  }else{
    arm1.stop();
  }
  
  if(btnC & R2){
    Serial.println(F("R2"));
  }
  if(btnC & R1){
    Serial.println(F("R1"));
  }  
  
  if(btnS & SELECT){
    Serial.println(F("Select"));
  }
  if(btnS & START){
    Serial.println(F("Start"));
  }

}

#12

Is this code compatible with the Meduino? In the void setup section, “Serial1.begin” only applies to the Mega and Leonardo. I thought the Meduino was based on the Uno. Also what Bluetooth module do I need?


#13

Sorry, we just finsih the test on Baseboard(Leonardo) until now. As for the this game controller, it is based on 2.4ghz rather than Bluetooth. I will provide more information later, since we want to launch it as a new controller kit.


#14

Interesting project! When I saw the video you provided, it got me to think about a few other interesting robot projects I have seen recently: the uArm, which uses the design of the ABB IRB 460. These might seem a bit similar in design? :wink:

I am mentioning these projects as I believe you might find them interesting too, in particular the favourable operation range of these robots, and also how the creators of the uArm intend to control the robot. I have to say, though, that using a mini-arm to control the main arm seems like a fun concept!

Keep up the good work!


#15

Yeah, I think uArm now just have finished the Kickstarter project and start to develop the next generation robot arm. We have a good relationship with uArm team:)

The Mini arm-> Main arm and Human arm -> Mini arm are both a very good use case. Actually, we are very curious about how people use the DIY level robot arm.

How would you use it if you have a DIY robot arm?


#16

How nice! I think that Makeblock can be well suited for making this type of robotics because of the quality of the material and the usability of each part. :wink:

How to use it? Well that certainly is a good question. I think a really cool way of using it would be to programatically (or manually) save a set of end effector coordinates, and let some path planning algorithm do the actual movement. Maybe this would require external computing, but I am not sure.


#17

Thanks @tormodhau. We are going to provide the upper program which is used to control the robot by coordinates. And you can also control it by leap motion.

The program need to run on PC.


#18

Very nice project. May i know the RObot is it able to run Gcode for writing some word just like makeblock
XY plotter?


#19

Sorry, until now, it can’t run with Gcode. But you could try it by yourself. The kit would come in 1 mounth. I think all the motors would be encoder motor-- so we could control its rotate angel.


#20

forget the arduino with its sensors.
first do this properly with servomotors and servomotors test-potentiometers.

add servos to the other robot arm that will do the job, then add servos without motor to the other robot arm, that will be the joystick, connect the joystick servo potetiometers via the servo tester to the working robot arm servos. so you can do the robot arm as you should, and it will no longer rattle or be crazy, it will obay your movements like a slave!

i have been thinking of doing it for a several years, but i have not money enough to buy things to even test it i have 1 plastic yellow robot arm kit, but it is too slow to work like i want it to.
. i believe the next generation excavators vill be no longer working with joystick-sticks but with a little model excavator joyarm that you move with your hand, while the real excavator does the digging in real life.