I have followed the video mGiraffe Debugging Instruction, tried both automatic leveling and manual leveling, but still can’t adjust the center properly, What I did wrong?
Some customers may have some misinterpretation while watching this video instruction.
“I have adjusted the X,Y,Z tower properly according to the video, but can get the proper value for leveling the center. I have modified the center value to 140 or even larger, but the nozzle still can’t touch the paper at Center point (the height between Nozzle and Center is higher)”
From above, we can know they did it wrong while adjusting the nozzle at center. Customers may think that they should keep increasing the Radius value when the height is higher at Center (the Nozzle doesn’t touch the paper). Actually, it is wrong.
The correct approach should be: after adjusted the X, Y, Z value and find the height at Center is higher, when you start adjust the center, increased the Radius to a larger value, please don’t keep increasing the Radius value since the heights for X, Y ,Z tower are also changed once changed the Radius, so you need to modify the X,Y,Z value again to make the heights for X,Y,Z tower is proper first. Then test the center and modify the Radius if still need, so alternately repeated until 4 points have the appropriate friction with paper which mentioned in the video.
In conclusion, each time you modify Radius value to a different value (suggested 0.5mm every time), the heights at X,Y,Z will be changed, so you need to test the X,Y,Z tower again and modify X,Y,Z value.
Please refer to the example steps below:
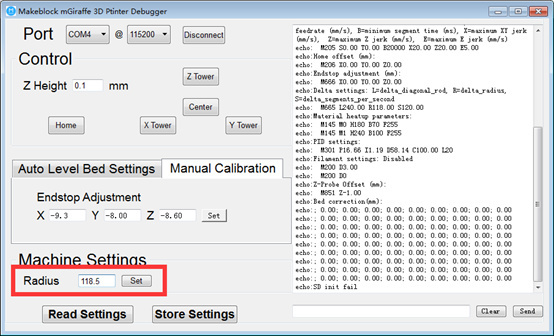
- As shown below, first tune the value of X, Y, Z. For example, my machine is now -9.3, -8, -8.6, X,Y,Z tower have been able to touch A4 paper.

- Click on the Center and check. If you can pull the paper easily without any resistance (the nozzle is too high from the paper), increase the Radius value as I adjust from 118.0 to 118.5
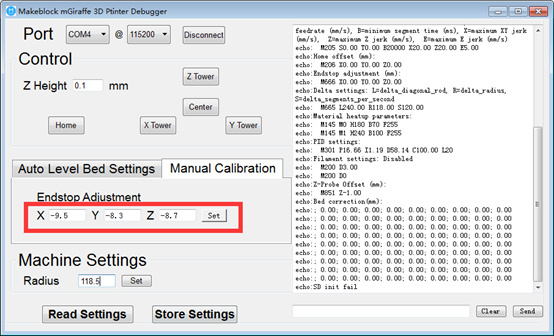
- Now go back and test the height at X,Y,Z tower, you should find that the heights at X,Y,Z tower are increased either, please adjust the X,Y,Z values again (increase). On my machine, I have increased the X,Y,Z values to the proper one again (-9.5,-8.3,-8.7):
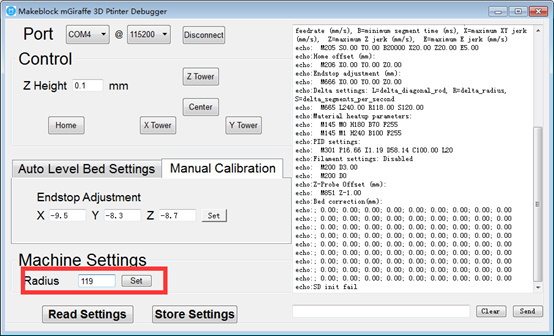
- Test the height at Center and check. If you still can pull the paper easily without any resistance (the nozzle is still too high from the paper). Continue increasing the Radius value, for example: 118.5->119.
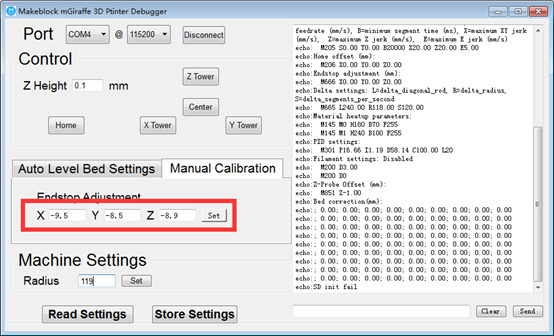
- Now, go back again to test the height at X,Y,Z tower, you will also find that the height at X,Y,Z are increased, then adjust the X,Y,Z values again (increase). On my machine, I have increased the X,Y,Z values to the proper one again (-9.5,-8.5,-8.9):
Keep repeating above steps until 4 points have the appropriate friction with paper which mentioned in the video.


