How to Make a Wheel Speed Detector by Using a Light Sensor


#1

We post this instruction first on the Instructables, you can visit there to watch the completely instruction.

How this work?

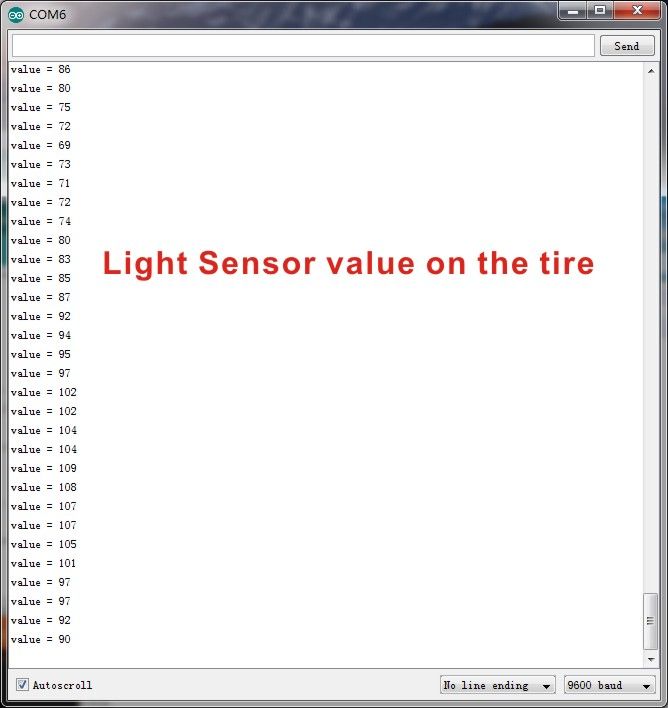
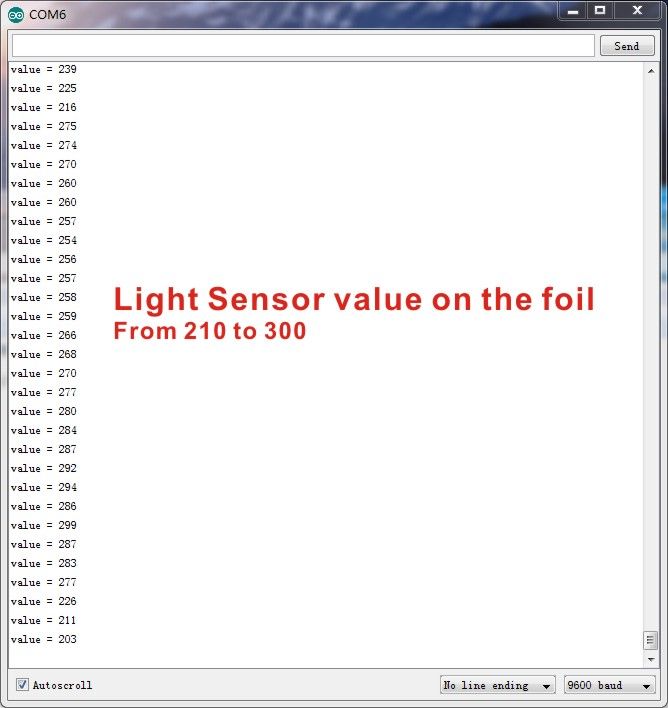
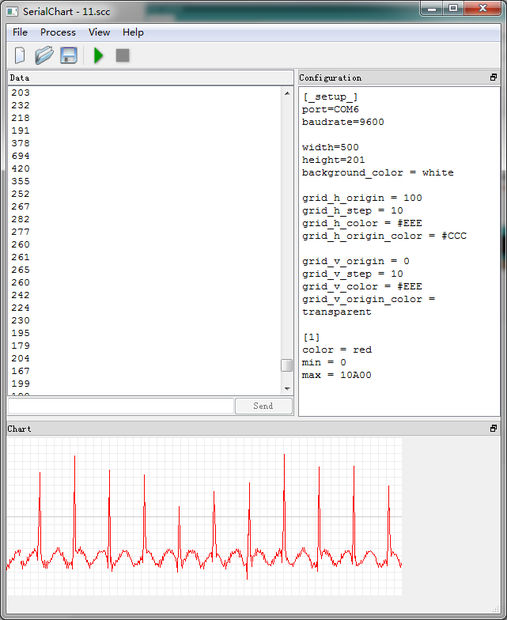
As we know the light reflection effects are different in objects. Some bright stuff (white paper, foil, and aluminum stuff) have much better reflection rate than a dark black rubber tire. Therefore, in same condition, if we use a light sensor to test the light reflection value on a foil and a rubber tire, the output value should be obviously different.

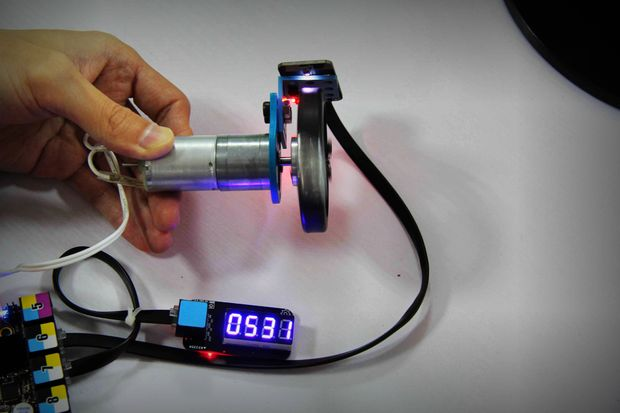
So, if we put a piece of foil on a running rubber tier and put the light sensor on top of it, whenever the foil pass the light sensor the light value should be higher than the value was on the rubber tier. We can tell the speed of the running wheel if we know the time between the foil passing through the light sensor.

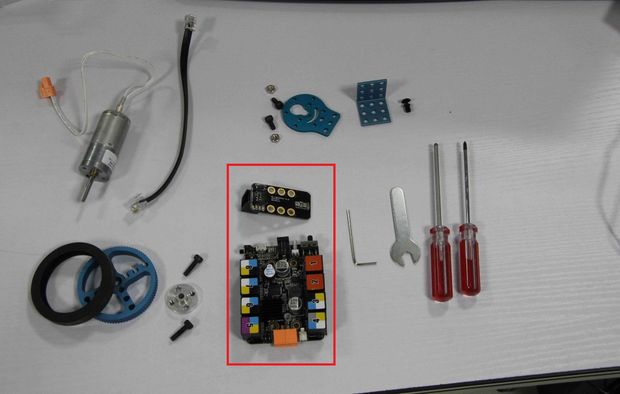
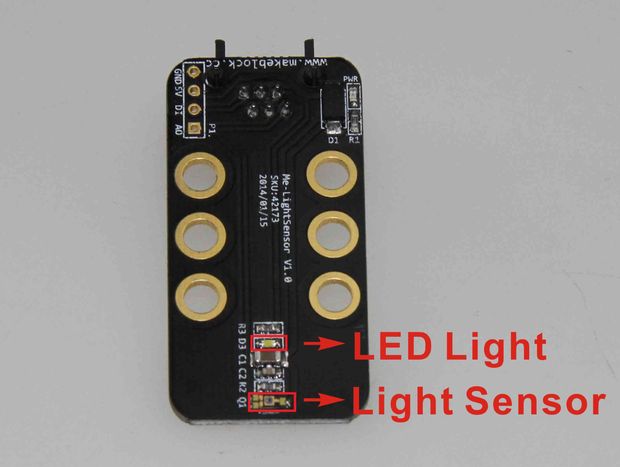
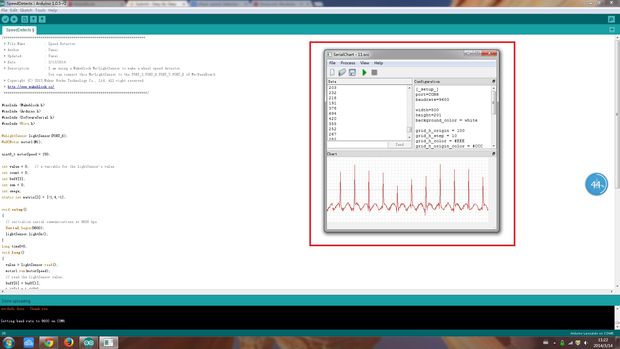
Sincere there are a lot of light distraction in a public environment, we might need an LED light to increase the light reflection difference and use algorithm to filter out the distraction. The Makeblock Me-LightSensor is a perfect electronic module for this project. It has both LED light and light sensor on board. The following video shows you my final result which is very great!

The video demo,

Me Light and Grayscale Sensor V1.0


#2

Step 1

All you need are a light sensor and LED, an arduino, a motor, a wheel and some cables.

In this case, we use baseboard (http://www.makeblock.cc/me-baseboard-v1-0/)and light sensor from Makeblock.


#3

Step 2 LightSensor testing.

First I used the Makeblock Me-LightSensor example code to test the difference between tire and the foil.
The light value on a tire is shown on the first picture. I found that the value is varying from 70 to 160.
The light value on the foil is shown on the second picture and I found the value is varying from 210 to 300.

This is hard to tell the different by just looking at the number on the serial monitor.

Next step we will get a graphic report when reading these light value.


#4

Step 3, Graphic result of these light values.


As you can see in the pictures, this window is “Serial Charts”.The link to Serial Charts is:
https://code.google.com/p/serialchart/downloads/detail?name=SerialChartInstall.exe

Upload your code first before start reading the data in Serial Charts.

Processes:
First, I uploaded my code to the Me-Baseboard and I used the software “Serial Charts” to read the light sensor value. Since there are a lot of noise and the raw data is not very stable, I used Laplace of Gaussian array [-1,4,-1] to do the second derivative of the light data. As you can see on the second picture the spike is much better than the raw light data. It is very sharp and big value. The light value on foil is easy to distinguish from the light value on the tire. Then, I used a filter to get rid of the unstable value below certain reference. All these algorithms are shown in my code.


#5

Step 4, Uploading the code and get it work!


General Idea of Speed detection:
The spike on the second picture illustrated the reflection on the shiny paper in each rotation period. I counted the time between these spikes and get the rotation speed of the wheel.

The code is based on the baseboard and the [library][1] of Makblock. If you use arduino, please write your own code. It would be great if you share the code here.

/*************************************************************************
* File Name          : Speed Detector.
* Author                : Yuwei
* Updated            : Yuwei
* Date               : 3/13/2014
* Description        : I am using a Makeblock Me-LightSensor to make a wheel speed detector.
                        You can connect this Me-LightSensor to the PORT_3,PORT_6,PORT_7,PORT_8 of Me-BaseBoard.
* Copyright (C) 2013 Maker Works Technology Co., Ltd. All right reserved.
* http://www.makeblock.cc/
**************************************************************************/

#include <Makeblock.h>
#include <Arduino.h>
#include <SoftwareSerial.h>
#include <Wire.h>

MeLightSensor lightSensor(PORT_6);
MeDCMotor motor1(M1);

uint8_t motorSpeed = 100;

int value = 0;   // a variable for the lightSensor's value
int count = 0;
int buff[3];
int sum = 0;
int omega;
static int matrix[3] = {-1,4,-1};

void setup()
{
  // initialize serial communications at 9600 bps
  Serial.begin(9600);
  lightSensor.lightOn();
}
long time0=0;
void loop()
{
  value = lightSensor.read();
  motor1.run(motorSpeed);
  // read the lightSensor value:
  buff[0] = buff[1];
  buff[1] = buff[2];
  buff[2] = value;
  sum = matrix[0]*buff[0] +matrix[1]*buff[1]+matrix[2]*buff[2];
//  Serial.println(sum);    //uncomment this line and comment the next 15 lines if you want to see the data in Serial Charts
  if(sum >750)
  {
   //count++;
   long t=millis();
   long deltaT=t-time0;
   if(deltaT>100)
   {
   omega = 360000/deltaT;
   //You can use Printf fuction if you add the "printf" library to Print Class.
   //more details on http://playground.arduino.cc/Main/Printf#.UyE3NxSSz9F
   Serial.print(omega);
   Serial.println("rad/s");
   }
   time0=t;
  }
delay(2);

}


  [1]: http://wiki.makeblock.cc/index.php/Library_Download

#6

I have also post this instruction on Arduino.cc, http://forum.arduino.cc/index.php?topic=226695.0

and Instructables, http://www.instructables.com/id/How-to-make-a-wheel-speed-detector/