How to add an extension for mBlock?


#1

mBlock v2.2.0 provides a new feature of extension management. Users are able to add or remove extensions from now on.

I’ll show you how to add an extension in the following steps(Download Demo.zip (3.3 KB) to see demo extension).
The feature of demo extension:
(1) Output HIGH and LOW level from digital pin on Arduino board
(2) LED blink

  1. Files in demo extension
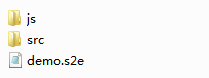
    Unzip the demo.zip file, you’ll get following files:

    js file: called JavaScript codes for online communication(Scratch online programming)
    src file: .h and .cpp files for Arduino compiling(Arduino offline programming)
    s2e file: description file of this extension

  2. Defining extension
    Open demo.s2e, you’ll get following codes:

{   "extensionName": "Demo",
    "sort":0,  
    "javascriptURL":"js/demo.js", // define the path of JavaScript file
    "firmware":"1.0",  // firmware version 
    "extensionPort":0, // network port of extension, 0 for serial port
    "blockSpecs": [ // module defining array
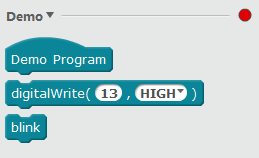
        ["h","Demo Program","runArduino"],
        [
            "w", // "h" for event module, "w" for write module, "r" for read module
            "digitalWrite( %n , %d.digital )", // module display name, %n is number type, %d.digital is menu value with menu name "digital"
            "digitalWrite", // called javascript function
            "13", // default value of the first parameter
            "HIGH", // default value of the second parameter
            {   // define Arduino programming
                "setup":"pinMode({0},OUTPUT); \n", // codes inserted into void setup{}
                "inc":"", // included header file, such as #include <Arduino.h>
                "def":"", // define variables, such as double _num = 0;
                "work":"digitalWrite({0},{1});\n", // output implementing codes
                "loop":"" // codes inserted into loop{}
            }
        ],
        [
            "w",
            "blink",
            "blink",
            {
                "setup":"",
                "inc":"#include \"demo.h\"",
                "def":"DemoClass demo; \n",
                "work":"demo.blink(); \n",
                "loop":""
            }
        ]
    ],
    "menus": {
        "digital":["HIGH","LOW"] // menu
    },
    "values":{ // corresponding values for "HIGH" and "LOW"
        "HIGH":1, 
        "LOW":0
    },
    "translators":{
        "zh_CN":{ // Chinese version
            "Demo Program":"演示程序",
            "HIGH":"高电平",
            "LOW":"低电平",
            "digitalWrite( %n , %d.digital )":"数字口输出( %n ,%d.digital )",
            "blink":"闪烁"
        }
    }
}
  1. Writing JavaScript codes
    Define corresponding functions.
ext.digitalWrite = function(pin,level) {
  // digitalWrite function 
  runPackage(30,pin,typeof level=="number"?level:levels[level]);
};

var _level = 0;
ext.blink = function(){
  // blink function 
  _level = 1 - _level;
  runPackage(30,13,_level);
};
  1. Writing source codes for Arduino programming
    (1) Create demo.h and demo.cpp files in src folder.
    (2) Define blink function in demo.cpp file.
#include "demo.h"
DemoClass::DemoClass(){
  pinMode(13,OUTPUT);
  level = 0;
}

void DemoClass::blink(){
  level= 1- level;
  digitalWrite(13,level);
}
  1. Zip the files
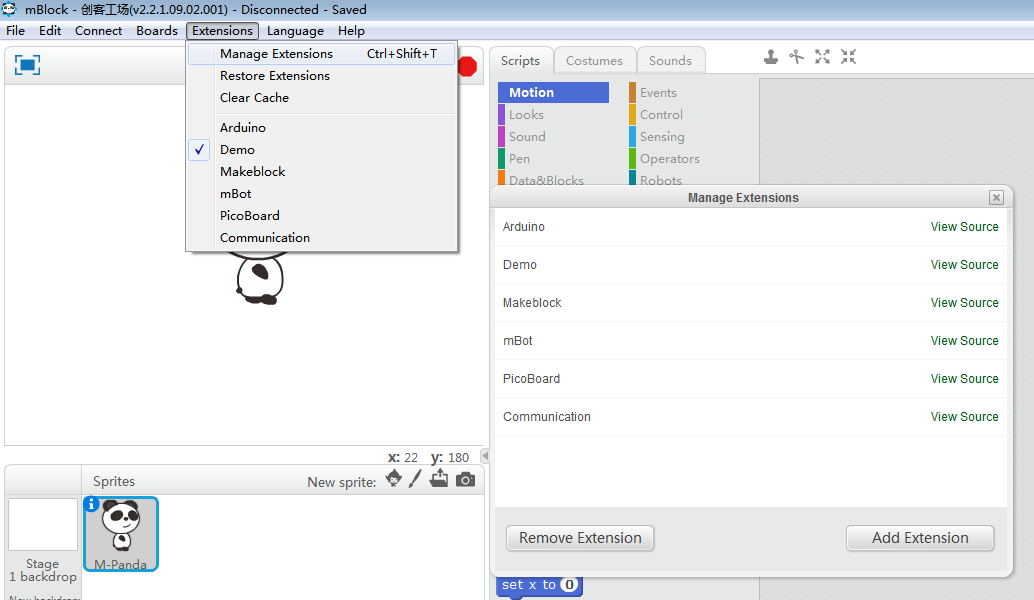
    Zip the files and add them to mBlock with extension management. It should look like this:

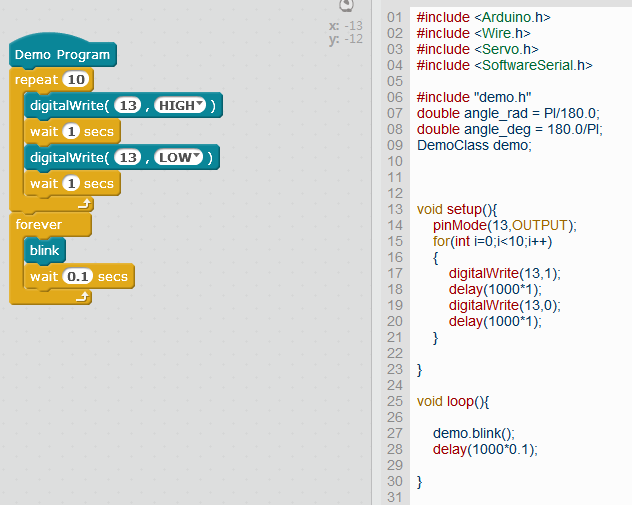
    Let’s run a test. Create a program with drag-and-drop in mBlock and output its Arduino codes.

How can I develop mBot Extention?
#2

Hello!

Is it possible to use this method to add a couple of ADAFruit libraries to mBlock? I would like to use mBlock to have students work with the 2.8" Resistive TFT arduino screen.

Thanks!


#3

Could you please explain how to add mBlock to Extension list. Is it so that mBlock is not working with mac os? My arduino prog has no opportunity to select any device.


#4

I mean mBlock-software


#5

Using a mac with OS X El Capitan, extensions->mbot is not an option, therefore scripts for mbot are not available. Please clarify missing links between mbot and mblock.


#6

Hi. Does anyone know if the WeDo extension for Scratch 2.0 can be applied to mblock? The location of the info on that extension is here. I downloaded the extension and it is a .msi file. If not, does anyone know of any WeDo extensions for mblock?

http://wiki.scratch.mit.edu/wiki/LEGO_WeDo_Blocks


#7

Did you get any response on this or make any progress? I’d like to know how to add libraries as well. Thanks.


#8

I would like to know as well.

Please can someone help


#9

Dear JS01: I am trying to use your example to make a new extension for MakeBlock for my mbot. But in my current version of Makeblock (3.2.2 or 3.2.3) there are no files using the Java Script codes that I can see. Was your example written for an earlier version of MakeBlock? Is this the file that is now included as firmware for the mbot? Also can one name the commands in the new extension? Can you please update this example so it will work with the current version of MakeBlock? Thanks so much! Eric


#10

Hi i have tried open one a file but it no open. You may be guide to initialization one a extension for mblock ?


#11

Hi everybody,
I am a bit new in this Mblock environment, but I really want to know how to make my own extensions, Do anyone knows if it is really possible to add custom extensions to mblock?
Greetings
Martin


#12

Hi JMOG_94,

Here is a post to you for reference:http://www.mblock.cc/posts/create-extensions-for-mblock


#17

wifi ve firebase mblok yapmak mümkün mü?


#18

Absolutely great post here. it has a lot of key elements that truly makes it work.:relaxed:
stay connected with us: online android course


#22

Thanks for that post, I was also stuck on that problem.


#23

Open the MBLOCK5 client
First, open your mBlock PC and click the “add” button:

  1. Add device
    Among the devices, find the Arduino device we want to add:

  2. Drag the mext file into the mblock application
    After adding the device, we know the mext files (. Mext files you get from the web or export from the extension designer) we want to import is called “2dimArray”.

Drag and drop it into our mBlock app. When you drag and drop, the window will say “drag the file and drop here” :

  1. Extend, add feedback
    We drop the extension to the mBlock, then we will get notification saying the extension is loaded.

  2. Opens an extended add window for the corresponding device
    Next we open the extension center for the currently selected Arduino device and try to add our extension:

  3. Add extensions
    The extension has been added to mBlock. We can click

“add” to add this extension to our block panel:

  1. Use extension blocks
    Now the extension blocks have been successfully loaded in the panel, and we can use them for our amazing projects!

I hope these steps will be helpful!
Mark Wilson


#24

You can use this: ext.mblock.cc.