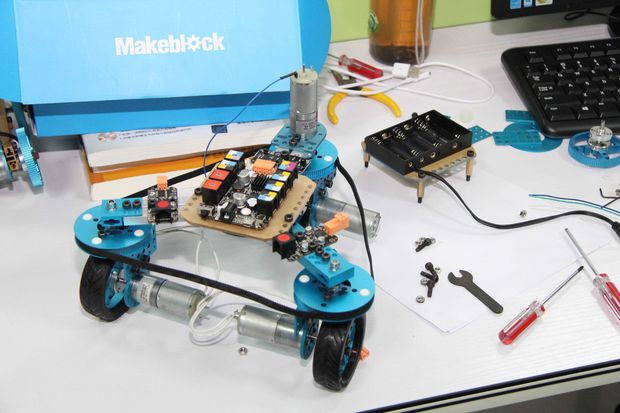
Here is the 3WD vehicle, very flexible.
Here is the demo,
All you need is a arduino, DC motors and drivers, IR remote controller and some beams, plates and wheels,
In this case, we choose Baseboard and Me dc motor drivers . Since the connection type of Makeblock electronic modules is RJ11 rather than normal lines, the cables would not be twined together when the vehicle is rotating.
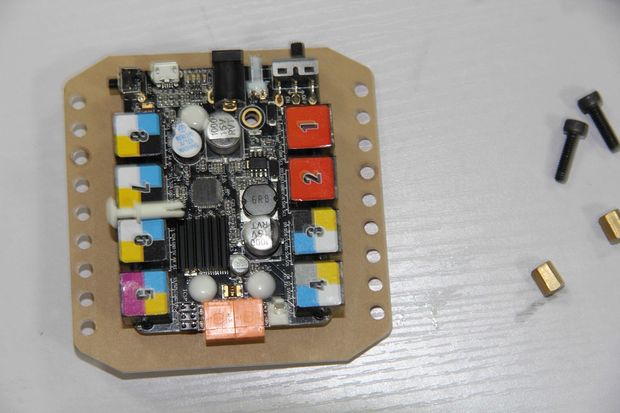
Step 1, get the 3WD vehicle chassis
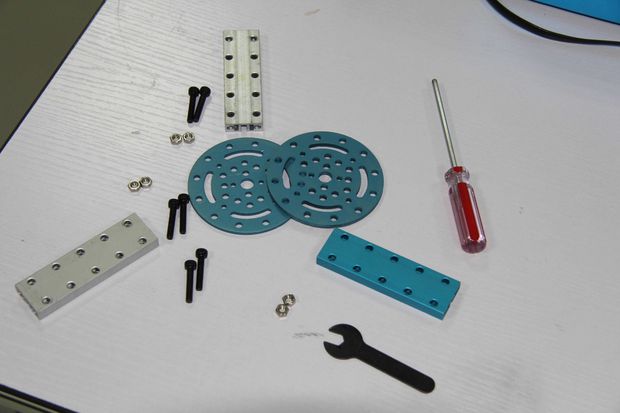
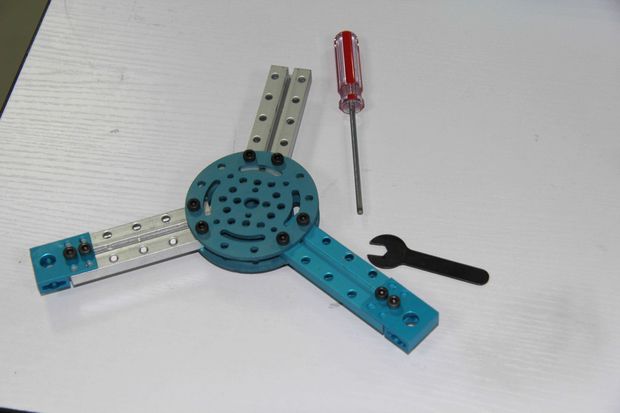
Beams, www.makeblock.cc/beam0824-080-blue-4-pack/
Plates, http://www.makeblock.cc/disc-blue-pair/
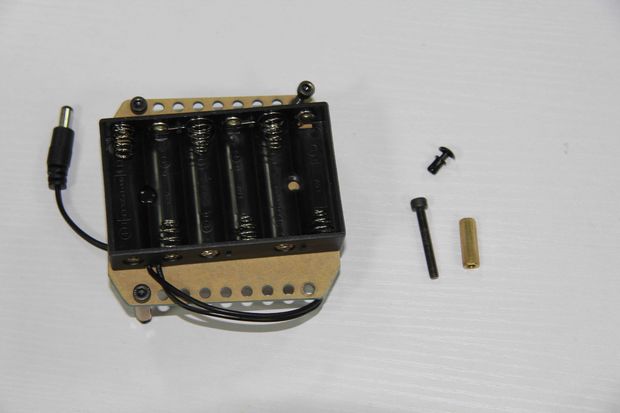
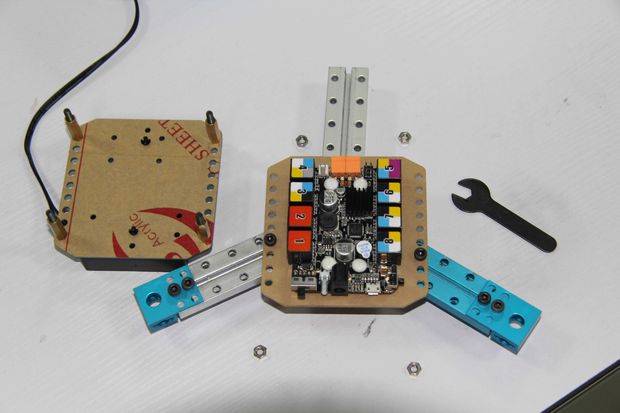
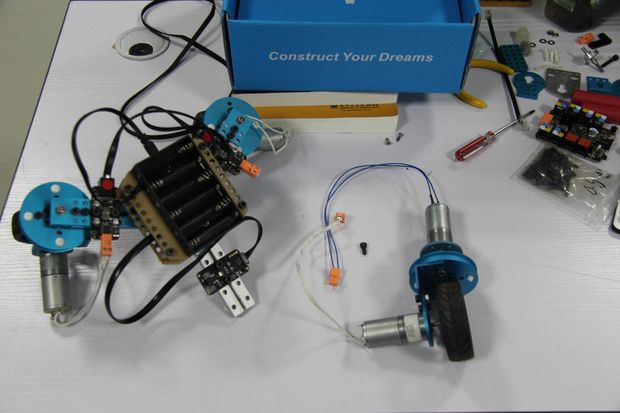
Step 2, Install the baseboard and Battery.
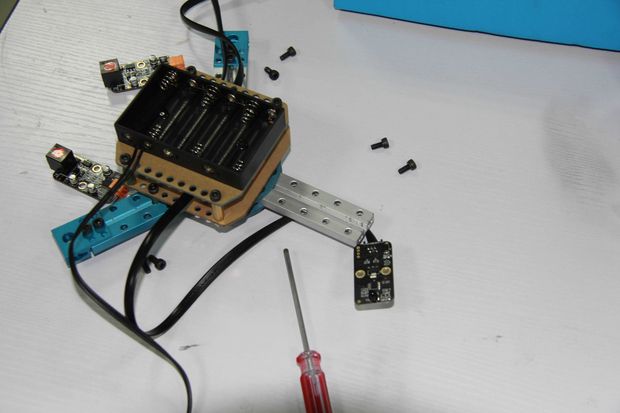
Step 3, install the DC motor drivers and IR decode on the platform
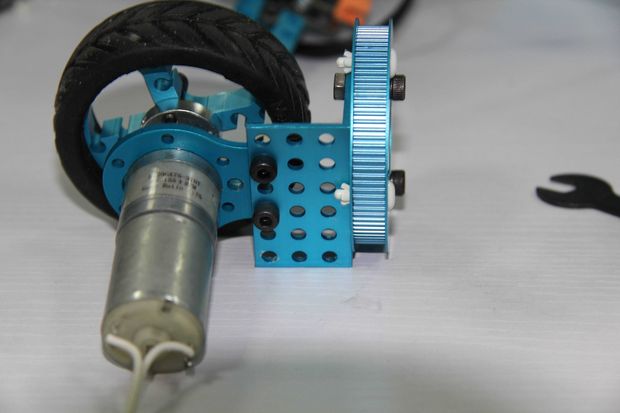
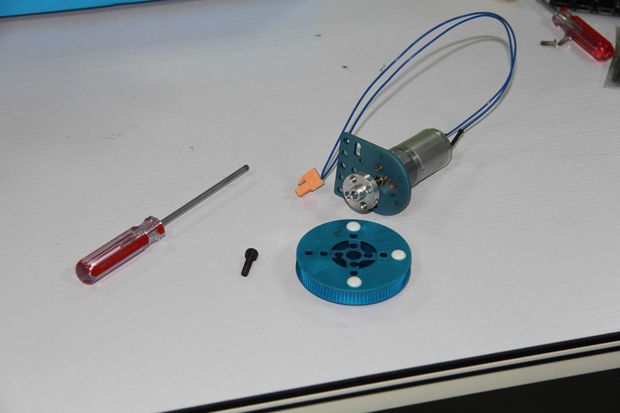
Step4, motor and wheels installations.
Motors and motor connection plates,
http://www.makeblock.cc/25mm-dc-motor-pack-gold/
http://www.makeblock.cc/structure/?sort=featured&page=3
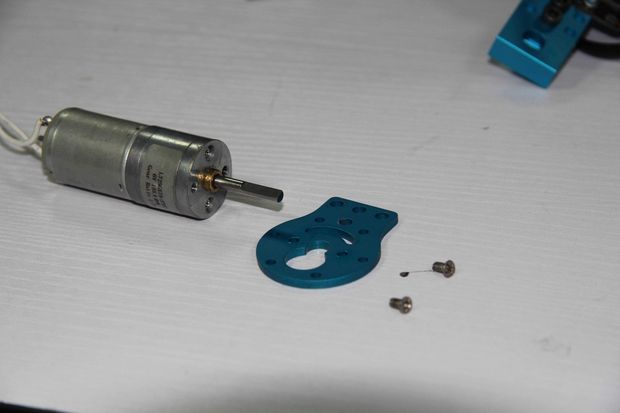
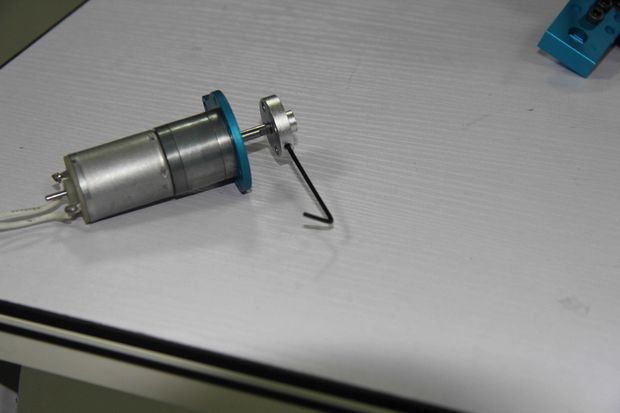
You would like to need some M4 screws and plastic rivets. They would be easily found in local.
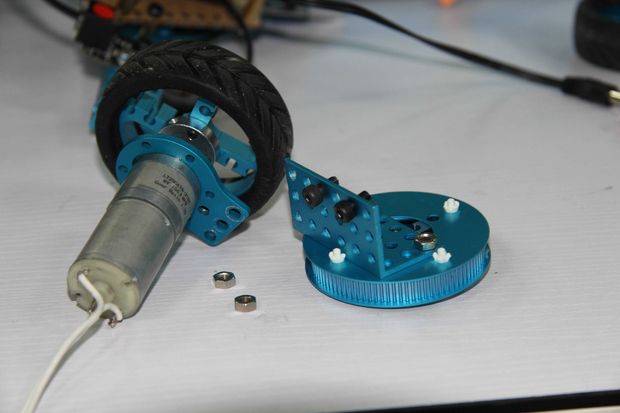
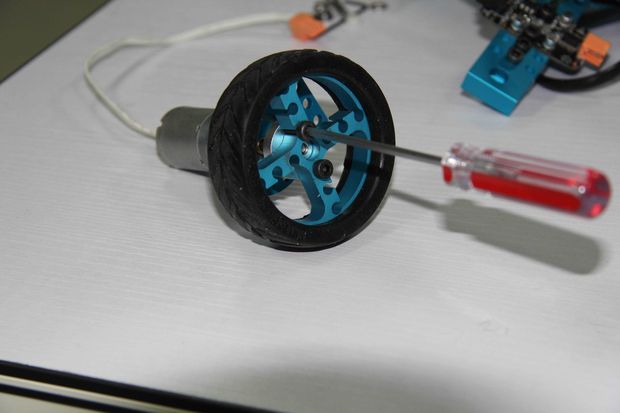
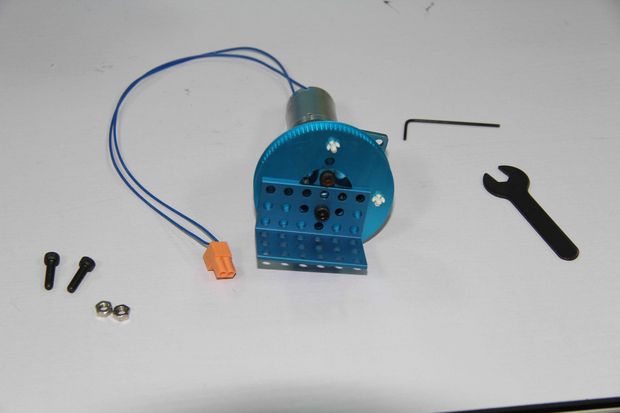
Step 5, follow the picture to install these two wheels to your chassis.
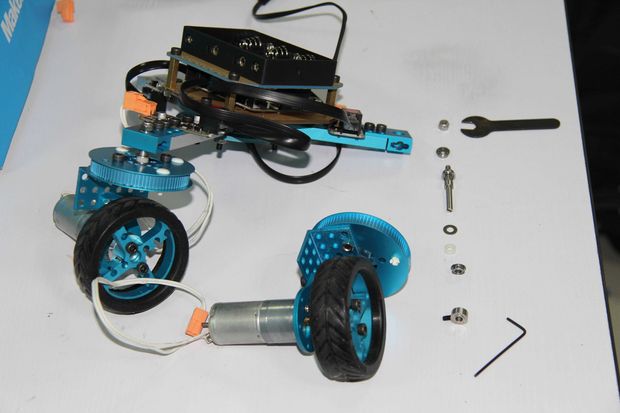
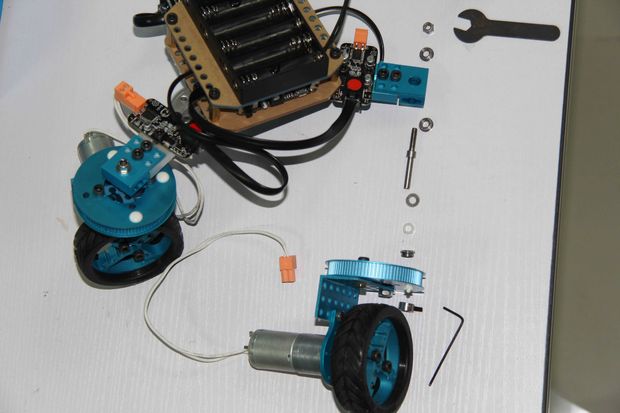
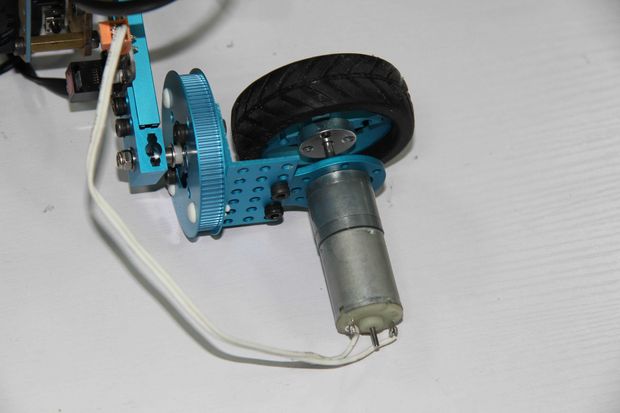
One is already done. The other one is ready for installation. All components are place in their position.
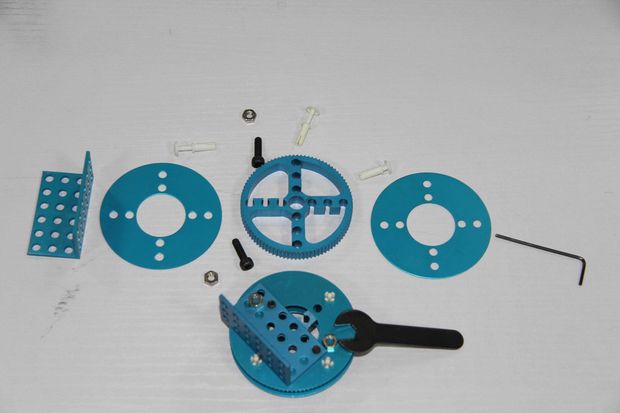
Step 6, Add your direction control wheel.
Step 7, upload the program
Here is the code of the robot. It is based on the Makeblock library, you can download them here.
http://wiki.makeblock.cc/index.php/Library_Download
Pay attention to the PORT, don’ connect them in wrong way. The IR decode should be connected to PORT_6
 /*************************************************************************
    * File Name          : Makeblock 3WD.ino
    * Author             : wyw
    * Updated            : wyw
    * Version            : V1.0.0
    * Date               : 01/03/2014
    * Description        : Demo code for Makeblock Starter Robot kit,two motors
                           connect on the M1 and M2 port of baseshield, The IR receiver module
                           connect on port 6.
                           The four black button on the IR controller is used to control the direction
                           of robot, the number button on the IR controller is for changing the speed of the robot.
                           button 1 is for setting the speed to the slowest,button 9 is for setting the speed to fastest.
    * License            : CC-BY-SA 3.0
    * Copyright (C) 2013 Maker Works Technology Co., Ltd. All right reserved.
    * http://www.makeblock.cc/
    **************************************************************************/
    #include <Makeblock.h>
    #include <Arduino.h>
    #include <SoftwareSerial.h>
    #include <Wire.h>

    MeDCMotor Motor1(M1); //
    MeDCMotor Motor2(PORT_2);
    MeDCMotor Motor3(PORT_1);

    MeDCMotor MotorDirection(M2);//kongzhifangxiang  dianji
    MeInfraredReceiver infraredReceiverDecode(PORT_6);
    int ThreeMoveSpeed = 200;
    int DirectionMoveSpeed = 50;
    int MatchSpeed = 70;
    boolean leftflag,rightflag;
    int minSpeed = 55;
    int factor = 23;

    void setup()
    {
        infraredReceiverDecode.begin();
        Serial.begin(9600);
    }

    void loop()
    {
     if(infraredReceiverDecode.buttonState() == 1)
        {
            switch(infraredReceiverDecode.read())
            {
              case IR_BUTTON_PLUS:
                  Serial.println("move forward");
                   Forward();//control the three motors
                   break;
              case IR_BUTTON_MINUS:
                   Backward();//control the three motors
                   break;
              case IR_BUTTON_NEXT:
                   TurnRight();//control the direction motors
                   break;
              case IR_BUTTON_PREVIOUS:
                   TurnLeft();//control the direction motors
                   break;
              case IR_BUTTON_9:
                   danceOneRound();
                   danceOneRound();
                   danceOneRound();
                   break;
              case IR_BUTTON_8:
                   testMoveRound();
                   break;
              case IR_BUTTON_7:
                   excursionWheel1();
                   break;
              case IR_BUTTON_6:
                   RunMotor3Back();
                   break;
              case IR_BUTTON_5:
                   RunMotor2Back();
                   break;
              case IR_BUTTON_4:
                   RunMotor1Back();
                   break;
             case IR_BUTTON_3:
                   RunMotor3Forward();
                   break;
             case IR_BUTTON_2:
                    RunMotor2Forward();
                   break;
             case IR_BUTTON_1:
                   RunMotor1Forward();
                   break;
               default:
           //    Stop();
               break;
            }
        }
        else
        {
          Stop();
        }
    }
    void danceOneRound()//drive the three Motors and direction motor to make the car dance
    {
      Motor1.run(200);
      Motor2.run(-200);
      Motor3.run(200);
      MotorDirection.run(200);
      delay(700);
      MotorDirection.run(-200);
      delay(700);
    }
    void shake()
    {
       Motor1.run(-250);
       Motor2.run(-180);
       Motor3.run(0);
    }
    void shake1()
    {
       Motor1.run(-40);
       Motor2.run(-250);
       Motor3.run(-40);
    }
    void testMoveRound()
    {
        Motor1.run(-250);
       Motor2.run(-70);
       Motor3.run(0);
    }
    void excursionWheel1()
    {
      Forward();
      delay(2000);
       Motor1.run(-250);
       Motor2.run(-250);
       Motor3.run(0);
      delay(2000);
      Stop();
    }
    void Forward()//control the three motors
    {
      Motor1.run(ThreeMoveSpeed);
      Motor2.run(-ThreeMoveSpeed);
      Motor3.run(-ThreeMoveSpeed);
    }
    void Backward()//control the three motors
    {
      Motor1.run(-ThreeMoveSpeed);
      Motor2.run(ThreeMoveSpeed);
      Motor3.run(ThreeMoveSpeed);
    }
    void TurnLeft()//control the direction motors
    {
      MotorDirection.run(-DirectionMoveSpeed);
    }
    void TurnRight()//control the direction motors
    {
      MotorDirection.run(DirectionMoveSpeed);
    }
    void RunMotor1Forward()
    {
         Motor1.run(0);
        Motor2.run(-ThreeMoveSpeed);
        Motor3.run(-ThreeMoveSpeed);

    }
    void RunMotor2Forward()
    {
        Motor1.run(ThreeMoveSpeed);
        Motor2.run(0);
        Motor3.run(-ThreeMoveSpeed);
    }
    void RunMotor3Forward()
    {
        Motor1.run(ThreeMoveSpeed);
        Motor2.run(-ThreeMoveSpeed);
        Motor3.run(0);
    }
    void RunMotor1Back()
    {
        Motor1.run(0);
        Motor2.run(ThreeMoveSpeed);
        Motor3.run(ThreeMoveSpeed);
    }
    void RunMotor2Back()
    {
        Motor1.run(-ThreeMoveSpeed);
        Motor2.run(0);
        Motor3.run(MatchSpeed);
    }
    void RunMotor3Back()
    {
        Motor1.run(-ThreeMoveSpeed);
        Motor2.run(ThreeMoveSpeed);
        Motor3.run(0);
    }


    void Stop()
    {
      Motor1.run(0);
      Motor2.run(0);
      Motor3.run(0);
      MotorDirection.run(0);
    }
    void ChangeSpeed(int spd)
    {
      ThreeMoveSpeed = spd;
    }
That’s all. Have fun  .
.